
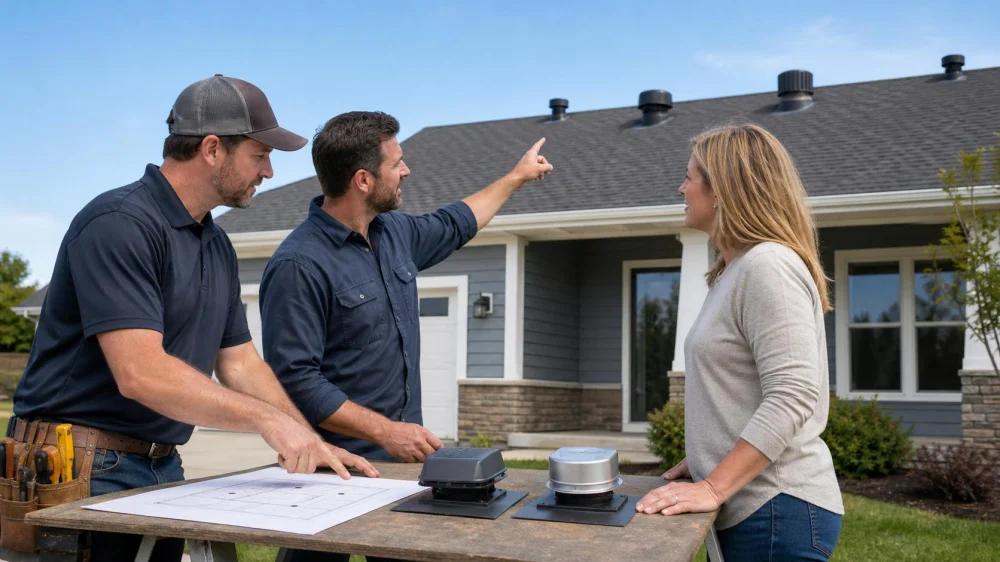
Roof Exhaust Vents: Identify Bathroom, Kitchen, and Dryer Lines
Quick answer: Before roof replacement, map every exhaust duct to its fixture and exterior termination. Bathroom, kitchen, and dryer exhaust must reach outdoors—not end in the attic—and each needs a cap, duct, damper, clearance, and cleaning approach suited to its use. Have the roofer coordinate with an HVAC or dryer-vent professional so the new roof is watertight without restricting airflow.
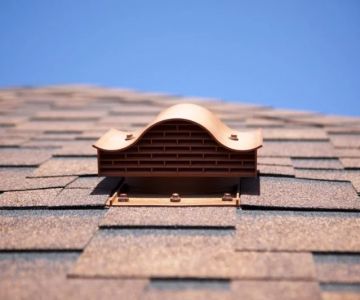
Roof caps can look similar from outside while serving very different equipment. Treating all of them as generic “vents” can leave a bath fan disconnected, a range hood restricted, or a dryer line fitted with a lint-catching screen.
1. Map Each Fan to Its Termination
List every bathroom fan, kitchen range hood, clothes dryer, laundry exhaust, and other powered exhaust. Run one appliance at a time while a qualified person identifies the exterior outlet from a safe location. Label the attic-side duct where accessible without stepping off a safe platform.
Do not assume a roof cap connects to the room directly below it. Ducts can angle across an attic, share a chase, terminate at a wall, or end improperly. Photograph and mark each route on a roof plan before tear-off.

Absolute Roofing / absolute roofing
TimoniumBaltimore CountyMaryland
22 W Padonia Rd # B229, Timonium, MD 21093, USA
2. Confirm Every Exhaust Reaches Outdoors
U.S. Department of Energy guidance says kitchens, bathrooms, and dryers exhaust air from the home and should terminate at the exterior. Venting warm, moist, or contaminated air into the attic can contribute to condensation, mould, wet insulation, odour, and roof-deck damage.
Look for a duct that stops short, has fallen away from the cap, is buried under insulation, or dumps near a soffit intake. Correct the route with a qualified professional rather than asking the roofer to cover evidence of the problem.
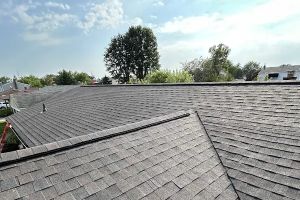
Victors Home Solutions / victors roofing
2722 E Michigan Ave suite 239, Lansing, MI 48912, USA
3. Match the Cap to the Exhaust Type
Bathroom and kitchen exhaust caps typically need a weather hood and backdraft damper sized for the fan and duct. Dryer terminations must follow dryer-manufacturer and code requirements and should not use a screen that traps lint. Range hoods may need metal duct and specific clearances based on the appliance.
Do not reuse a damaged or unidentified cap solely because it fits the old hole. Confirm material, collar size, damper, pressure drop, pest protection, and compatibility with the exhaust and roof system.
4. Review Termination Location and Clearances
Exterior exhaust should be located away from operable windows, doors, mechanical air intakes, property lines, and other openings by distances required by the authority having jurisdiction and equipment instructions. Snow, wind, valleys, walls, and roof geometry also affect performance and service access.
The DOE roof-vent job aid gives general location principles but tells installers to follow local required distances. Ask the designer, code official, or qualified contractor to verify the actual property rather than copying one universal number.
5. Inspect the Duct Path
Check for crushed flex duct, disconnected joints, excessive length, sharp bends, low spots that collect condensation, corrosion, grease, lint, or an undersized transition. The cap can be new while the hidden duct remains the main restriction.
Dryer ducts, kitchen exhaust, and bath ducts have different material and cleaning needs. Do not connect separate exhaust systems together unless a designed and code-approved system specifically allows it. Replace unsuitable or damaged sections using the correct trade.
6. Integrate Flashing With the Roof
A roof termination needs flashing integrated in shingle fashion with underlayment and roof covering so water drains over—not behind—the assembly. Caulk alone is not a durable flashing strategy. The cap base and fasteners must be compatible with the roofing material.
Ask for photos before and after underlayment and covering are installed. Define who warranties the penetration and who repairs surrounding deck damage found during removal.
7. Air-Seal and Insulate Where Appropriate
Seal the ceiling or wall opening around the duct using a compatible material and fire-safety approach. This reduces uncontrolled air leakage between the home and attic. Do not block the fan housing’s required clearances or service access.
In cold or mixed climates, suitable duct insulation and a short, supported path can reduce condensation. The correct insulation, vapour control, and slope depend on climate, duct type, and code; coordinate with an HVAC or building-performance professional.
8. Assign Trade Responsibility
The roofer can handle deck opening, roof flashing, and covering integration. An HVAC contractor may handle bath or kitchen duct design and airflow. A dryer-vent specialist or appliance contractor may address dryer routing and cleaning. An electrician may be needed for fan wiring or controls.
Put the handoff in the contract: who disconnects, supplies the cap, joins and seals the duct, insulates, tests, corrects hidden defects, and warranties each portion. Do not let one trade assume another completed the connection.
9. Test Airflow and Dampers
After installation, operate each fan individually. A qualified person should verify the exterior damper opens and closes, joints do not leak, and airflow meets design or equipment needs. Check for rattling, whistling, backdraft, condensation, or a fan that becomes louder.
For a dryer, confirm drying performance and exhaust flow after the duct is connected and cleaned as needed. For a range hood, test all speeds and make-up-air provisions where required. A tissue-at-grille check cannot certify total airflow or code compliance.
10. Plan Safe Maintenance
Keep a map with cap type, duct size, appliance, photos, installer, warranty, and service date. Ask how each cap can be inspected and cleaned without walking on the roof. Dryer lint and kitchen grease may require more frequent professional service than a bath cap.
Watch indoors for slow drying, persistent bathroom humidity, grease odour, ceiling stains, frost, or dripping near the duct. Report changes promptly. Do not climb onto a wet, icy, steep, or fragile roof to clear a cap.
Coordination checklist: map each line; prove outdoor termination; match cap and duct to use; verify location; repair route defects; integrate flashing; air-seal and insulate appropriately; assign trades; test every fan and damper; keep service records.
Evidence notes: DOE’s roof-vent installation job aid distinguishes attic, bath, kitchen, and dryer vents and says powered exhaust should terminate outdoors. Its durable-attics guide warns that exhausting into an attic adds moisture. The Building America Solution Center explains flashing and air-sealing around roof exhaust penetrations.
This article is general information. Follow current local code, the authority having jurisdiction, appliance and fan instructions, and qualified roofing, HVAC, dryer, and electrical professionals.

 Superior Roofing4.0 (41 reviews)
 Roof’d Up Roofing And Repairs LLC5.0 (6 reviews)
 RBB Roofing & Contracting4.0 (104 reviews)
 Ladders Up Exteriors5.0 (19 reviews)
 Statesman Services LLC5.0 (26 reviews)
 RPW Construction Inc.5.0 (1 reviews)
 Ceiling Stains: How to Determine if It’s a Roof Leak or a Plumbing Issue
 How to Clean Your Gutters to Protect Your Roof and Prevent Water Damage
 The Best Roofing Materials for a High-End Custom Home with a Complex Design
 Roof Installation Mistakes That Lead to Leaks: What Homeowners Must Avoid
 Most Durable Roofing Materials for Long-Term Value
 How to Decide Whether to Repair or Replace Your Roof – Complete Guide