
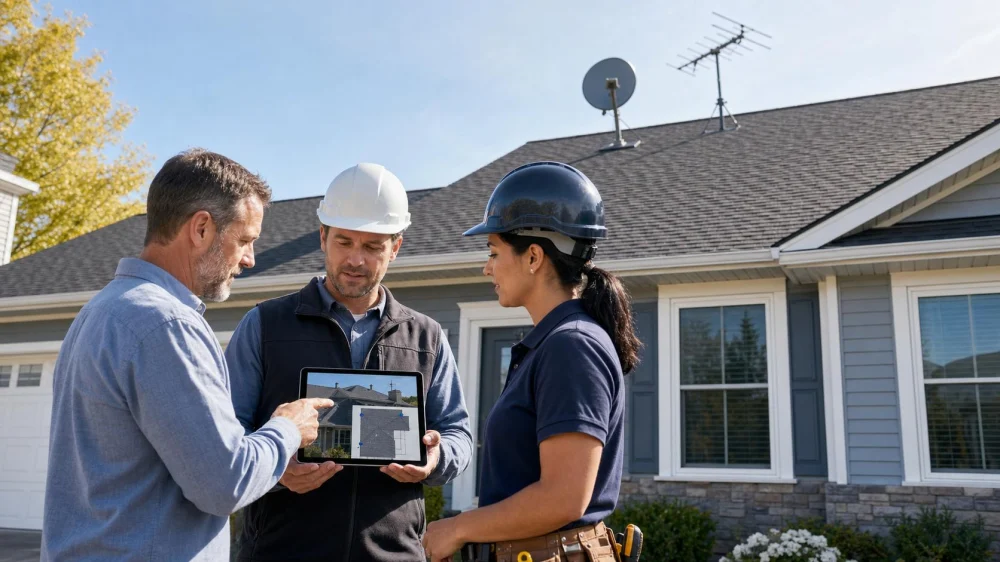
Roof Replacement With a Satellite Dish or Antenna: Coordinate First
Quick answer: Inventory every roof-mounted or roof-adjacent device before the roofing contract is final. Ask the service provider and roofer who may disconnect, remove, store, remount, flash, seal, ground, aim, reconnect, and test it. Put costs, schedule, warranty boundaries, and the new mounting location in writing. Do not let an unknown cable or bracket become a last-minute tear-off decision.
Satellite dishes and TV antennas are only part of the picture. Roofs may also carry internet receivers, weather sensors, cameras, lightning-protection components, solar conduit, heat cable, holiday-light clips, or an old abandoned mount. Each penetration and cable route affects roofing work.
1. Create a Device Inventory
From the ground and attic where safely accessible, photograph each dish, antenna, mast, bracket, wire, conduit, camera, sensor, and junction point. Mark approximate locations on a roof sketch. Note cables that enter siding, soffit, attic, chimney, or wall.
Do not climb the roof or tug unidentified wiring. A device that appears abandoned may still be powered, grounded, leased, or connected to equipment inside the home.
Absolute Roofing / absolute roofing
TimoniumBaltimore CountyMaryland
22 W Padonia Rd # B229, Timonium, MD 21093, USA
2. Confirm Ownership and Service Status
Check account records and contact the provider. Ask whether the hardware is customer-owned, leased, or must be returned; whether removal affects service or contract terms; and whether the provider requires its own technician. Record account and work-order details without posting them publicly.
For an old device, decide whether it should be permanently removed. Do not pay to reinstall hardware that is obsolete, unused, or incompatible with future service. Obtain disposal or return instructions.

SB Pro Roofing / sb pro roofing
Pinellas ParkPinellas CountyFlorida
6358 49th St N, Pinellas Park, FL 33781, USA
3. Assign Qualified Removal and Reconnection
A roofer may remove a simple bracket but may not be authorized or equipped to disconnect communications, electrical, grounding, solar, security, or lightning-protection systems. The service provider may handle aiming and activation but not repair roofing or structural damage.
Assign each task by trade: safe access, disconnection, equipment removal, temporary cable protection, deck repair, flashing, remounting, grounding, aiming, and final test. Verify licensing or qualifications where electrical or regulated work is involved.
4. Choose the Future Mounting Location
Ask whether the device can move to a wall, pole, fascia, or another manufacturer-approved location that avoids new roof penetrations while preserving signal, clearance, structure, and code compliance. The provider should assess line of sight; the roofer should assess roof and warranty effects.
Do not select a location that blocks drainage, crowds a valley, interferes with vents, sits in a snow or ice path, prevents safe service access, or directs fasteners into an unknown structure.
5. Define Flashing and Waterproofing
If an old mount is removed, specify how holes, damaged shingles, underlayment, and deck will be repaired as part of the roof system. Sealant alone is not a durable substitute for a compatible repair detail.
For a new roof mount, require the mounting and flashing method to comply with the roof-covering manufacturer, device manufacturer, local code, and roofing warranty. Ask who supplies the flashing and who accepts responsibility for that penetration.
6. Plan Cables, Grounding, and Penetrations
Identify which cables remain, move, or are removed. Protect active cables from nails, sharp metal, tear-off debris, heat, and crushing. Cap or remove abandoned penetrations properly rather than cutting a cable flush and burying the opening.
Grounding and bonding should be evaluated by the appropriate qualified person. Do not disconnect a grounding conductor or lightning-protection component simply to speed roofing. Keep communications cables separated and supported according to applicable requirements.
7. Coordinate the Schedule
Book the provider before the roof start date and confirm how long service may be unavailable. Ideally, removal occurs close to tear-off and reconnection occurs after the relevant roof section is complete and ready for a mount. Weather delays need a rescheduling plan.
If internet, security, medical communication, remote work, or television access is essential, arrange an approved temporary alternative. Do not reinstall onto incomplete roofing just to restore service quickly.
8. Write Costs and Warranty Boundaries
The roofing contract should list each device and state whether work includes removal only, storage, deck repair, remounting, or none of those. Add service-provider charges, crane or lift needs, new mount, wiring, patching, permits, and return visits to the budget.
Ask the roofer and device provider how their warranties interact. Put responsibility for leaks at the mount, damage to hardware, signal loss, interior wiring, and future service access in writing. A verbal “we put dishes back” does not define performance.
9. Test After Installation
Before crews close the project, inspect from the ground and review close-up photos of repaired and new mounting areas. The qualified technician should verify signal, alignment, connection, grounding, and equipment operation. Test every receiver, camera, sensor, or network function that was affected.
Check the attic or interior area below penetrations after rain when safely accessible. Report dampness, damaged finishes, loose cables, or new service problems promptly. Do not adjust a roof-mounted device yourself.
10. Keep a Roof-Device Record
Save before-and-after photos, roof plan, provider work order, equipment model, mount and flashing details, cable route, permit or inspection record, invoices, warranty statements, and test results. Note which devices were removed permanently.
Give the record to future roofers, service technicians, solar installers, and homeowners. It helps them avoid drilling blindly, duplicating abandoned cable, or assigning a leak to the wrong contractor.
Coordination checklist: inventory devices; confirm ownership; decide remove or reinstall; assign trades; choose a location; specify deck repair and flashing; protect cables and grounding; align schedules; document costs and warranties; test service and watertightness; keep records.
This article provides general coordination information. Follow device, roof-system, service-provider, electrical, grounding, permit, code, and warranty requirements for the property.
 Superior Roofing4.0 (41 reviews)
 Roof’d Up Roofing And Repairs LLC5.0 (6 reviews)
 RBB Roofing & Contracting4.0 (104 reviews)
 Ladders Up Exteriors5.0 (19 reviews)
 Statesman Services LLC5.0 (26 reviews)
 RPW Construction Inc.5.0 (1 reviews)
 Ceiling Stains: How to Determine if It’s a Roof Leak or a Plumbing Issue
 How to Clean Your Gutters to Protect Your Roof and Prevent Water Damage
 The Best Roofing Materials for a High-End Custom Home with a Complex Design
 Roof Installation Mistakes That Lead to Leaks: What Homeowners Must Avoid
 Most Durable Roofing Materials for Long-Term Value
 How to Decide Whether to Repair or Replace Your Roof – Complete Guide