

- 1. Why You Should Clean Your Roof Before Applying a Protective Coating or Sealant
- 2. How to Prepare Your Roof for Cleaning
- 3. Effective Roof Cleaning Methods
- 4. How to Apply the Protective Coating or Sealant After Cleaning
- 5. Real-Life Example: Successful Roof Maintenance with Protective Coating
1. Why You Should Clean Your Roof Before Applying a Protective Coating or Sealant
Cleaning your roof before applying a protective coating or sealant is crucial to ensuring the product adheres properly and lasts longer. If your roof is dirty, covered with debris, or has moss, algae, or mildew, these contaminants can interfere with the bonding process of the coating or sealant. In some cases, the coating may not stick, leading to uneven coverage and a shorter lifespan for the protective layer.
Furthermore, a clean roof ensures that you are applying the protective layer to a smooth, uniform surface, which helps maximize the effectiveness of the coating or sealant. Regular roof cleaning also improves the overall appearance of your home, making it look well-maintained and increasing its curb appeal.
2. How to Prepare Your Roof for Cleaning
Before you start cleaning your roof, it’s important to take a few preparatory steps to ensure the process is safe and effective:
2.1 Inspect Your Roof
Start by inspecting your roof for any visible damage, such as loose shingles, broken tiles, or cracks. If there are significant issues, it’s important to address them before proceeding with cleaning. You don’t want to accidentally cause further damage during the cleaning process.
2.2 Gather the Necessary Tools and Safety Gear
To clean your roof safely and efficiently, you’ll need the right tools. Some essential items include:
- Ladder or scaffolding (to safely reach the roof)
- Soft-bristled brush or roof cleaning brush
- Pressure washer (optional, for stubborn stains)
- Roof cleaner solution or mild detergent
- Protective gloves, goggles, and non-slip shoes
2.3 Choose the Right Time
It’s best to clean your roof on a dry, mild day with no rain or strong winds. Wet roofs can be slippery, and harsh weather can make cleaning more difficult. Plan your cleaning session during a time when you can focus on the task without interruptions.
3. Effective Roof Cleaning Methods
There are several methods you can use to clean your roof, depending on the type of roof material and the degree of dirt and debris. Below are the most common cleaning methods:
3.1 Manual Cleaning with a Soft-Bristled Brush
If your roof has light debris or surface dirt, using a soft-bristled brush is the most gentle option. Start at the top of the roof and work your way down, brushing away dirt, leaves, and debris. Be careful not to damage the shingles or roof surface, especially if you have a delicate material like wood or asphalt shingles.
3.2 Using a Pressure Washer
A pressure washer can be effective for removing stubborn stains, moss, or algae buildup. However, you should use a low-pressure setting to avoid damaging the roof. Hold the nozzle at a safe distance (around 12 inches) and use a sweeping motion to clean the roof, never pointing the nozzle directly at the shingles. For best results, you may want to add a roof cleaner solution to the pressure washer.
3.3 Chemical Roof Cleaning Solutions
For tougher stains like moss or algae, you may need to use a chemical roof cleaner. There are various products available that are specifically designed for roof cleaning. Be sure to follow the manufacturer's instructions, and always test the cleaner on a small, inconspicuous area of your roof before applying it to the entire surface.
3.4 Removing Moss and Algae
If you have moss or algae growing on your roof, it’s essential to address it before applying any protective coating. Use a mixture of water and mild detergent or a specialized moss remover to scrub away these growths. For long-term prevention, you can install zinc or copper strips along the roof ridge to discourage future moss and algae growth.
4. How to Apply the Protective Coating or Sealant After Cleaning
Once your roof is thoroughly cleaned, you’re ready to apply the protective coating or sealant. Here's how to do it properly:
4.1 Choose the Right Product
Select a high-quality roof coating or sealant that is compatible with your roof type. There are different options available, including acrylic, silicone, and polyurethane-based coatings. Make sure the product you choose is specifically designed for your roofing material (e.g., asphalt, metal, or tile).
4.2 Apply Evenly
Using a roller or sprayer, apply the coating evenly across the roof surface. Start at the top and work your way down, applying a thin, uniform layer. Avoid applying too much product at once, as this can lead to streaks or uneven coverage.
4.3 Allow for Proper Drying
After applying the coating, allow it to dry completely before exposing the roof to weather conditions. The drying time will depend on the product you use and the weather conditions. It’s essential to follow the manufacturer's guidelines for curing time to ensure the coating forms a durable, long-lasting barrier.
5. Real-Life Case Study: Successful Roof Maintenance with Protective Coating
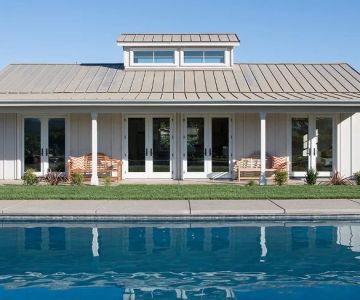
A homeowner in California had been dealing with frequent leaks and a deteriorating roof. After years of neglect, they decided to clean the roof and apply a protective coating to extend its lifespan. The cleaning process involved removing debris, algae, and moss using a pressure washer and chemical cleaner. Once the roof was clean and dry, they applied a high-quality acrylic sealant.
After the application, the roof was not only more energy-efficient but also significantly less prone to leaks. The homeowner reported that the roof remained in excellent condition for years, saving them money on repairs and reducing their cooling costs in the summer months. This case highlights the effectiveness of proper cleaning and the right protective coatings in maintaining the integrity and performance of a roof.


 Ohio & Indiana Roofing4.0 (22 reviews)
 Sayagos Home Improvement LLC4.0 (30 reviews)
 SKYFALL Roofing + Restoration4.0 (39 reviews)
 HI-5 Roofing4.0 (44 reviews)
 Peter Ryan and Son Roofing Inc.2.0 (10 reviews)
 Erie Home4.0 (52 reviews)
 How to Install a Ridge Vent on a Roof That Previously Had Box Vents
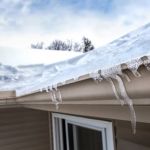 How to Deal With Water Damage From Roof Ice Dams
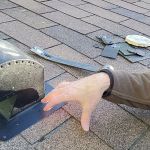 How to Install a Roof Vent for a Bathroom Fan to Prevent Moisture Buildup
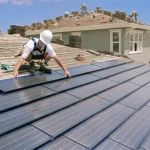 The Process of Installing a Solar Reflective Tile Roof in a Hot Climate
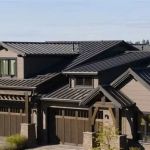 How Roofing Affects Home Resale Value: The Impact of Roof Quality on Selling Price
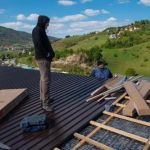 How Long Does Roof Installation Take? Understanding Your Timeline