
- 1-Introduction to Ridge Vent Installation
- 2-Why Switch from Box Vents to Ridge Vents?
- 3-Tools and Materials Needed for Ridge Vent Installation
- 4-Step-by-Step Guide: How to Install a Ridge Vent
- 5-Case Study: Upgrading a Roof Ventilation System
- 6-Common Mistakes to Avoid During Ridge Vent Installation
- 7-When to Call a Professional for Ridge Vent Installation
- 8-Conclusion: Enjoy Better Ventilation with Ridge Vents
1. Introduction to Ridge Vent Installation
If your roof currently has box vents, you might be missing out on the best form of ventilation available—ridge vents. Ridge vents provide continuous airflow across the entire length of your roof, helping to regulate attic temperatures, reduce moisture buildup, and extend the lifespan of your roof. Replacing your old box vents with a ridge vent is a simple yet effective way to enhance your home’s energy efficiency and maintain a comfortable indoor environment year-round. This article will walk you through the process of installing a ridge vent on a roof that previously had box vents, providing expert tips and a step-by-step guide for a successful installation.
Lance Roofing & Siding Inc. / lance roofing and siding
6903 Dayton Springfield Rd, Enon, OH 45323, USA
2. Why Switch from Box Vents to Ridge Vents?
Many homes originally have box vents, but ridge vents offer significant benefits that make them a superior choice for roof ventilation. Here’s why you should consider making the switch:
- Improved Airflow: Ridge vents provide continuous airflow across the peak of your roof, ensuring that hot air and moisture can escape more efficiently than box vents, which are often obstructed.
- Energy Efficiency: By allowing better airflow, ridge vents help regulate attic temperatures, reducing the load on your air conditioning system and improving energy efficiency.
- Extended Roof Lifespan: Proper ventilation prevents the buildup of moisture in the attic, which can cause mold, mildew, and even structural damage. Ridge vents help prevent these issues, extending the lifespan of your roof.
- Aesthetics: Ridge vents are less noticeable than box vents, improving the overall look of your roofline.
3. Tools and Materials Needed for Ridge Vent Installation
Before starting your ridge vent installation, make sure you have the following tools and materials on hand:
- Ridge Vent Kit: This includes the vent itself and any required flashing.
- Measuring Tape: To measure the length of the ridge and the positioning of the vent.
- Utility Knife: For cutting shingles and other roofing materials.
- Hammer or Nail Gun: To secure the ridge vent to the roof.
- Roofing Nails: For securing the ridge vent and shingles.
- Safety Gear: Such as gloves, goggles, and a harness if working on a steep or high roof.
- Shingles (if necessary): To replace any shingles removed during the installation process.
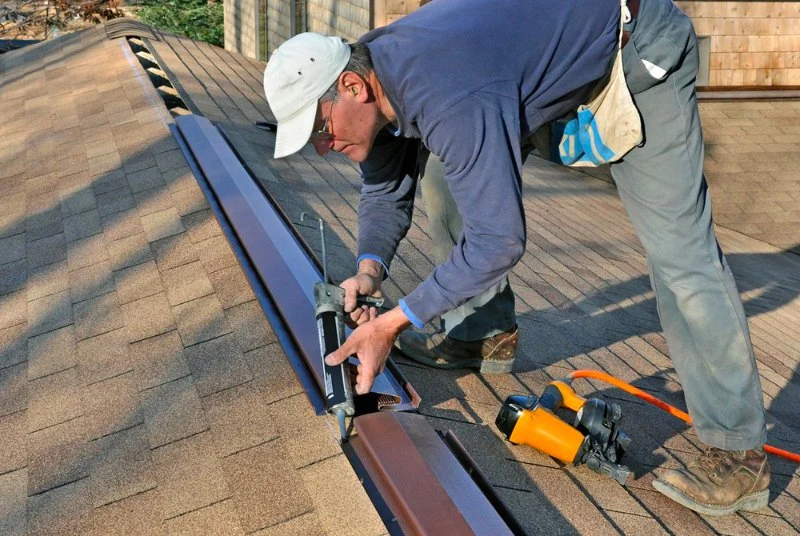
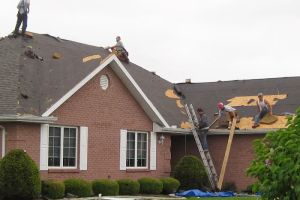
4. Step-by-Step Guide: How to Install a Ridge Vent
Follow these steps to install a ridge vent on a roof that previously had box vents:
- Remove the Old Box Vents: Carefully remove the box vents using a utility knife or pry bar. Be cautious not to damage the surrounding shingles or roofing materials.
- Measure and Mark the Ridge: Use a measuring tape to mark the centerline of the ridge where the vent will be installed. This will ensure the vent is centered and properly aligned.
- Cut a Slot Along the Ridge: Using a circular saw or handsaw, cut a slot along the ridge to allow airflow. The slot should be slightly smaller than the width of the ridge vent to ensure a tight fit.
- Install the Ridge Vent: Place the ridge vent along the ridge and secure it in place with roofing nails or a nail gun. Be sure to follow the manufacturer’s instructions for spacing and securing the vent properly.
- Replace Shingles: If necessary, replace any shingles removed to accommodate the ridge vent. Ensure the shingles are properly sealed to prevent leaks.
- Check for Proper Ventilation: After installation, inspect the ridge vent to ensure it is securely in place and that the slot is unobstructed, allowing for maximum airflow.
5. Case Study: Upgrading a Roof Ventilation System
Let’s take the example of the Smith family, who decided to upgrade their roof ventilation system by replacing their box vents with ridge vents. Their home had been experiencing issues with excess attic heat and moisture buildup, leading to higher energy bills and signs of mold growth. After consulting with a roofing professional, they opted to install ridge vents to improve ventilation and reduce energy costs.
Following the installation of the ridge vent, the Smiths noticed an immediate improvement in attic temperatures, and they no longer experienced the humidity and mold issues they had before. The installation also gave their roof a more modern and streamlined appearance. This case demonstrates the benefits of upgrading from box vents to ridge vents, resulting in better energy efficiency, improved air quality, and a longer-lasting roof.

Holden Roofing (Houston Corporate) / holden roofing
RosenbergFort Bend CountyTexas
2128 1st St, Rosenberg, TX 77471, USA
6. Common Mistakes to Avoid During Ridge Vent Installation
While installing a ridge vent can be a straightforward process, there are common mistakes to avoid that can affect the overall success of your installation:
- Improper Measurement: Accurate measurements are crucial for ensuring the ridge vent is properly aligned. Double-check your measurements before cutting to avoid mistakes.
- Not Securing the Vent Properly: Failing to secure the ridge vent tightly can lead to leaks and airflow issues. Follow the manufacturer’s guidelines for securing the vent to ensure it remains in place over time.
- Blocking the Ventilation Slot: Make sure the slot along the ridge remains clear to allow proper airflow. Obstructions can defeat the purpose of installing a ridge vent.
7. When to Call a Professional for Ridge Vent Installation
While installing a ridge vent is a manageable DIY project, there are situations where it’s best to call a professional. These include:
- If your roof has a steep pitch or you’re uncomfortable working at heights.
- If you encounter issues with the existing roof structure that require specialized tools or expertise.
- If you’re unsure about the proper ventilation requirements for your home.
Hiring a professional ensures that your ridge vent is installed correctly and safely, giving you peace of mind that your roof is well-ventilated and secure.
8. Conclusion: Enjoy Better Ventilation with Ridge Vents
Installing a ridge vent on a roof that previously had box vents is an excellent way to improve airflow, increase energy efficiency, and extend the lifespan of your roof. By following the proper installation steps and avoiding common mistakes, you can enjoy the benefits of better ventilation and a more comfortable home. For expert assistance, high-quality products, and professional roofing services, visit Pro Found Roofing, where we provide the best solutions for your roofing needs.


 T. Ryan Contracting, Inc.4.0 (55 reviews)
 Clean Team Roofing0.0 (0 reviews)
 Martin & Sons Roof Repair LLC4.0 (66 reviews)
 Yost Stucco Siding and Roofing.4.0 (7 reviews)
 MH Roofer & Commercial Roofing5.0 (1 reviews)
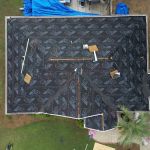 Canopy Roofing and Exteriors4.0 (76 reviews)
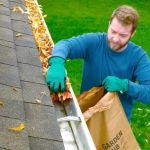 How to Clean Your Gutters to Protect Your Roof and Prevent Water Damage
 How to Identify and Repair Damage from a Recent Earthquake to Your Roof – Pro Found Roofing
 Should You Repair or Replace Your Roof? A Complete Decision Guide
 The Environmental Impact of Your Roofing Choices: How to Make Sustainable Decisions
 How to Identify and Repair Damage from a Small Fire on the Roof
 Best Green Roofing Solutions for Sustainable Homes