
How to Install a Roof Vent for a Gas Water Heater or Furnace
- Why Proper Ventilation is Crucial
- Tools You’ll Need for the Job
- Step-by-Step Installation Guide
- Common Mistakes to Avoid During Installation
- Maintaining and Inspecting Your Roof Vent
- Real-Life Installation Examples
1. Why Proper Ventilation is Crucial
Proper ventilation is essential for any gas appliance, particularly gas water heaters and furnaces. When these appliances burn fuel, they produce gases like carbon monoxide, which must be vented safely outside your home. Without proper venting, these harmful gases can accumulate, posing serious health and safety risks to your household.
Installing a roof vent ensures that the exhaust gases are expelled properly and helps prevent potential hazards such as carbon monoxide poisoning or fire. This installation also improves the efficiency of your gas appliances, allowing them to operate at peak performance while ensuring your home stays safe and comfortable.
Lance Roofing & Siding Inc. / lance roofing and siding
6903 Dayton Springfield Rd, Enon, OH 45323, USA
2. Tools You’ll Need for the Job
Before you begin installing a roof vent for your gas water heater or furnace, ensure you have the necessary tools. Here’s a list of the essential items:

SB Pro Roofing / sb pro roofing
Pinellas ParkPinellas CountyFlorida
6358 49th St N, Pinellas Park, FL 33781, USA
Basic Tools
- Drill with appropriate bits
- Roofing nails and screws
- Roof vent kit (including vent cap, collar, and flashing)
- Measuring tape
- Utility knife
- Caulk and caulking gun
- Safety gear (gloves, goggles, ladder)
These tools will allow you to properly install the roof vent and ensure that the system is sealed and secure. Always remember that safety is paramount when working on your roof, so take all necessary precautions to protect yourself.
3. Step-by-Step Installation Guide
Follow these steps to properly install a roof vent for your gas water heater or furnace:
Step 1: Prepare the Area
Start by ensuring the area around your gas appliance is clear of obstructions. Make sure the venting system is free of any damage. Use a ladder to access the roof, and inspect the area where you’ll be installing the vent.
Determine the location for the vent based on your appliance’s position. The vent should be placed at an angle to allow the gases to flow out efficiently, away from windows or other vents.
Step 2: Cut the Roof Opening
Using a measuring tape, mark the area on the roof where the vent will be installed. Cut an opening using a utility knife or a circular saw, making sure the hole is slightly larger than the diameter of your vent pipe to accommodate the flashing and vent cap.
Ensure that the hole is centered directly above the appliance to ensure proper venting.
Step 3: Install the Flashing
Place the flashing (included in your vent kit) around the hole, ensuring it fits snugly. The flashing helps seal the vent against water infiltration, preventing leaks into your attic or ceiling. Nail the flashing securely into place with roofing nails, making sure it overlaps with the surrounding roofing material for a watertight seal.
Step 4: Attach the Vent Pipe
Install the vent pipe by sliding it into the flashing and securing it with screws. Ensure the pipe is long enough to extend well above the roofline. The vent should be angled slightly upwards to ensure the exhaust gases flow smoothly out of the pipe.
Step 5: Seal the Installation
Once the vent pipe is in place, apply a generous amount of caulk around the edges of the flashing to seal the vent. This step is critical to prevent leaks and ensure a secure fit. You should also apply caulk to the top of the vent pipe and where it meets the flashing.
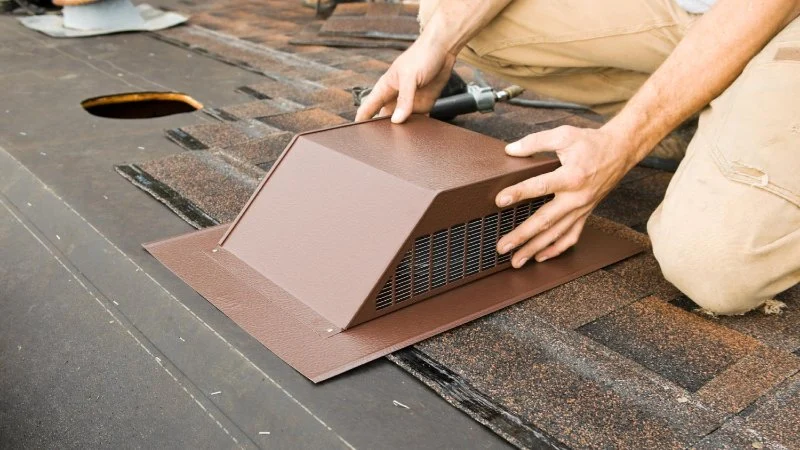
Step 6: Install the Vent Cap
Finally, place the vent cap on top of the pipe. The vent cap is designed to prevent debris, water, or animals from entering the vent. Secure it in place according to the manufacturer’s instructions.
4. Common Mistakes to Avoid During Installation
While installing a roof vent is a relatively straightforward process, some common mistakes can cause problems down the line. Here are some errors to avoid:
Incorrect Sizing
Choosing a vent that’s too small or too large for your gas appliance can reduce efficiency and compromise safety. Make sure to select the right size for your heater or furnace based on manufacturer specifications.
Improper Sealing
Failing to properly seal the flashing and vent pipe can lead to leaks, which may result in water damage or reduced venting efficiency. Always use high-quality caulk and check for any gaps after installation.
Wrong Placement
Ensure the vent is positioned far enough away from windows, doors, or other vents to avoid dangerous gas buildup. Proper placement is crucial for efficient venting and safety.
5. Maintaining and Inspecting Your Roof Vent
Once your roof vent is installed, regular maintenance is necessary to keep the system functioning properly. Here's how you can maintain your roof vent:
Regular Inspections
Inspect your roof vent at least once a year, or more often if you experience severe weather conditions. Look for signs of damage, such as rust, cracks, or loose parts, and address any issues immediately.
Cleaning the Vent
Ensure that the vent is free of debris, especially in areas with heavy foliage. Leaves and twigs can obstruct the flow of exhaust gases, leading to dangerous backdrafts.
Check for Leaks
After each inspection, ensure there are no leaks around the vent, flashing, or pipe. If any leaks are found, reseal with caulk or replace damaged parts as necessary.
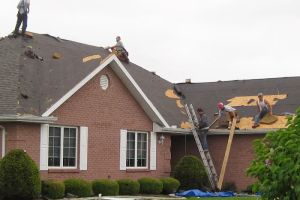
6. Real-Life Installation Examples
Let’s look at how others have successfully installed roof vents for their gas appliances:
Case Study 1: Sarah’s Furnace Venting
Sarah recently installed a new roof vent for her furnace. She followed the steps outlined in this guide, ensuring a proper seal and placement. A few months later, she noticed an increase in her furnace’s efficiency and no signs of water damage in the attic.
Case Study 2: John’s Water Heater Installation
John had to replace his old roof vent due to rust. After installing a new one, he reported that his gas water heater performed better, and he no longer had issues with water stains on the ceiling beneath the attic.
By following these installation tips and regularly maintaining your roof vent, you can ensure your gas water heater or furnace operates safely and efficiently. For more roofing supplies and services, visit Pro Found Roofing to find the best solutions for your home.


 Chontas Roofing and Construction2.0 (6 reviews)
 Above All Roofing4.0 (28 reviews)
 Homestretch Roofing5.0 (49 reviews)
 Perfexity Roofing5.0 (4 reviews)
 Saunders Roofing Co4.0 (52 reviews)
 Cross Timbers Roofing4.0 (128 reviews)
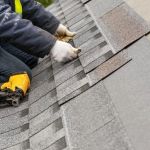 Common Roofing Terms Every Homeowner Should Know Before Talking to a Contractor
 Installing a Modified Bitumen Roof for a Low-Slope Garage: Step-by-Step Process
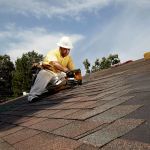 How to Find a Reliable Roofing Contractor Near You – Expert Tips for Hiring
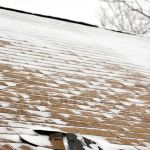 The Impact of Winter Weather on Different Roofing Materials: Crackling and Shrinking
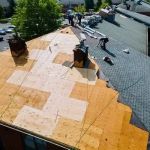 How to Tell If Your Roof Was Installed Properly
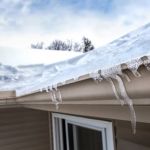 How to Deal With Water Damage From Roof Ice Dams