
- 1. Importance of Ice and Water Shield
- 2. Preparing the Roof for Installation
- 3. Installing Ice and Water Shield on Roofs with Valleys
- 4. Handling Penetrations While Installing Ice and Water Shield
- 5. Common Mistakes to Avoid During Installation
- 6. Final Checks and Securing the Shield
1. Importance of Ice and Water Shield
Ice and water shield is a vital protective layer that prevents water damage from ice dams and leaks. This roofing material is especially important in areas prone to heavy snowfall or fluctuating temperatures, like the northern parts of the United States. It provides an additional layer of waterproofing underneath shingles, which is crucial for protecting the roof in areas with many valleys and roof penetrations. These areas are prone to water buildup, making proper installation of an ice and water shield essential to prevent leaks and costly damage.
For roofs with multiple valleys or penetrations—such as vents, chimneys, or skylights—ice and water shield acts as a barrier that blocks water from infiltrating the roof structure. Without this protection, water can seep under shingles, causing rot, mold, and structural damage over time. Proper installation ensures your roof can withstand heavy rains and snow melt.

Rapid Response Roofing / rapid response roofing
East GreenvilleMontgomery CountyPennsylvania
408 State St, East Greenville, PA 18041, USA
2. Preparing the Roof for Installation
Before you begin installing the ice and water shield, it’s crucial to prepare the roof properly to ensure a smooth and effective installation process. The preparation steps include cleaning the roof surface, checking for any damages, and ensuring proper ventilation.
1. Clean the Roof Surface: Make sure the roof deck is clean, dry, and free of debris such as leaves, twigs, or old roofing materials. Any dirt or moisture left on the roof could affect the adhesion of the ice and water shield.
2. Check for Damage: Inspect the roof deck for any damages or areas of concern that need repair before installing the shield. Make sure that valleys, seams, and penetrations are structurally sound.
3. Ensure Proper Ventilation: Proper attic ventilation is essential for the longevity of your roof. Check that your roof’s ventilation system is adequate, as poor ventilation can contribute to moisture buildup and ice dam formation.

Absolute Roofing / absolute roofing
TimoniumBaltimore CountyMaryland
22 W Padonia Rd # B229, Timonium, MD 21093, USA
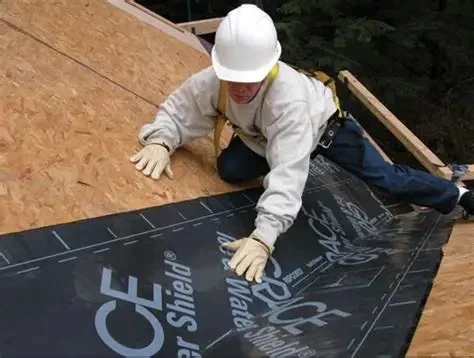
3. Installing Ice and Water Shield on Roofs with Valleys
Roofs with valleys present unique challenges when installing ice and water shield, as these areas are more prone to water accumulation. It’s essential to install the shield properly in the valleys to ensure maximum protection.
1. Start at the Eaves: Begin installing the ice and water shield at the lowest point of the roof (the eaves), where ice dams are most likely to form. This allows the shield to create a seamless barrier, protecting the roof from water infiltration.
2. Overlap the Shield: As you install the ice and water shield, make sure the material overlaps the previous course by at least 3 to 4 inches. This ensures that water flowing down the valley is directed onto the shield and does not seep underneath.
3. Focus on the Valleys: In valleys, it’s important to install additional layers of ice and water shield. Apply a full width of the material along the valley and overlap the material where two roof slopes meet. This helps prevent water from pooling and seeping through the valley seams.
4. Handling Penetrations While Installing Ice and Water Shield
Roof penetrations—such as pipes, vents, chimneys, and skylights—are areas where water is most likely to find its way under the shingles. Ensuring that these penetrations are properly sealed with ice and water shield is crucial for preventing leaks.
1. Seal Around Penetrations: Apply a generous layer of ice and water shield around all roof penetrations. The shield should extend several inches up the penetration, ensuring water does not find a way to slip through the gaps.
2. Overlap the Shield: As with the valleys, ensure that the ice and water shield overlaps the penetration and the shingles around it. This provides a waterproof barrier that prevents water from running underneath the shingles and causing leaks.
3. Install Flashing: After applying the ice and water shield, use flashing around penetrations for added protection. Flashing directs water away from vulnerable areas, ensuring that the roof remains watertight.
5. Common Mistakes to Avoid During Installation
While installing ice and water shield on a roof with many valleys and penetrations can be straightforward, there are a few common mistakes to avoid to ensure proper installation:
- Not Properly Overlapping Layers: Failing to overlap the shield properly can leave gaps where water can seep through. Always follow the recommended overlap guidelines to ensure full coverage.
- Incorrect Placement Around Penetrations: Skipping or skimping on the ice and water shield around roof penetrations can lead to leaks. Make sure to cover all penetrations with adequate overlap.
- Not Securing the Shield Properly: The shield needs to be well-secured to the roof surface for optimal adhesion. Avoid leaving any loose areas, especially in the valleys or around penetrations.
6. Final Checks and Securing the Shield
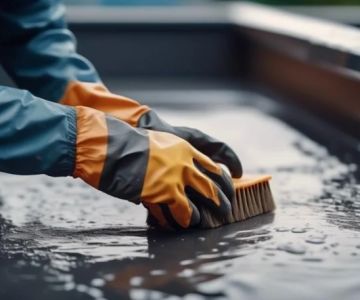
Once the ice and water shield is installed, take the time to check all seams, overlaps, and penetrations to ensure everything is properly sealed. Here are a few final steps to complete the installation:
- Inspect the Entire Roof: Walk the roof and inspect the shield for any visible issues, such as air bubbles or areas where the material hasn’t adhered properly.
- Ensure Full Coverage: Double-check that all valleys and penetrations are fully covered and that the shield extends sufficiently up the roof deck and over the eaves.
- Secure the Shield: Once everything is in place, ensure that the shield is securely fastened. You can then proceed with installing the rest of the roofing materials, such as shingles or metal panels, over the shield.


 MaxPro Roofing & Construction5.0 (11 reviews)
 Wayne's Roofing, Inc.4.0 (40 reviews)
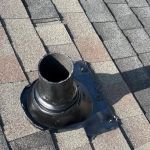 Georgia Roofing & Repair4.0 (157 reviews)
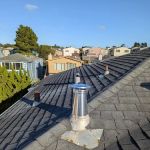 UL Roofing5.0 (9 reviews)
 Kevin Phillips Roofing5.0 (1 reviews)
 Bill Sprauer Austin Roofing Company4.0 (112 reviews)
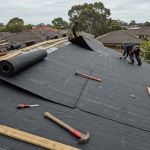 How to Install Roofing Underlayment on a Low-Slope or Flat Roof
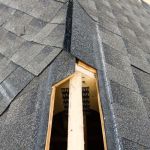 How to Install a Ridge Vent on a Roof with a Ridge Board Instead of a Peak
 Top Questions to Ask Before Hiring a Roofing Company
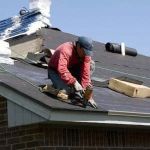 How Long Does Roof Installation Take? Timeline Explained | Pro Found Roofing
 The Best Time of Year to Replace or Repair Your Roof
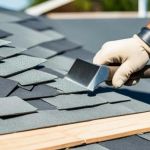 DIY Roof Repair Tips: What You Can Safely Do Yourself