
How to Install Roofing Underlayment on a Low-Slope or Flat Roof
- 1. The Importance of Roofing Underlayment on Low-Slope and Flat Roofs
- 2. Types of Roofing Underlayment for Low-Slope and Flat Roofs
- 3. Step-by-Step Guide to Installing Roofing Underlayment
- 4. Common Mistakes to Avoid During Installation
- 5. Maintenance Tips for Flat Roof Underlayment
1. The Importance of Roofing Underlayment on Low-Slope and Flat Roofs
Roofing underlayment plays a crucial role in the overall effectiveness and longevity of a roof, especially on low-slope or flat roofs. Unlike steep-slope roofs, flat or low-slope roofs have less natural drainage, which can result in water pooling on the surface. This makes the underlayment even more critical in preventing water infiltration and protecting the structural integrity of the roof.
Underlayment serves as a secondary barrier between the roof deck and the roofing material, providing waterproofing and an extra layer of protection from the elements. For low-slope and flat roofs, selecting the right underlayment material ensures that your roof remains leak-free, reducing the risk of water damage and costly repairs.

Rapid Response Roofing / rapid response roofing
East GreenvilleMontgomery CountyPennsylvania
408 State St, East Greenville, PA 18041, USA
2. Types of Roofing Underlayment for Low-Slope and Flat Roofs
There are several types of underlayment materials available for low-slope and flat roofs, each offering distinct benefits depending on your needs. Here are the most common types used for these roof types:
1. Felt Paper (Asphalt-Saturated Felt): Felt paper is a traditional choice for roofing underlayment. It is durable, relatively inexpensive, and works well in most conditions. However, it is more susceptible to water absorption over time, making it less ideal for areas with frequent heavy rain.
2. Synthetic Underlayment: Synthetic underlayment is a modern alternative to felt paper. It is lightweight, tear-resistant, and more water-resistant. Synthetic materials often come with enhanced durability and UV resistance, making them a better choice for roofs with low slopes.
3. Rubberized Asphalt Underlayment: For maximum protection, rubberized asphalt underlayment is an excellent choice. It offers superior waterproofing properties and is self-adhesive, making it an ideal option for flat roofs or areas prone to heavy rain. Its flexibility and excellent adhesion make it ideal for low-slope roofs.
4. Modified Bitumen Underlayment: This type of underlayment provides additional durability and protection. It is often used on flat roofs due to its ability to handle standing water and its enhanced waterproofing capabilities. Modified bitumen is also heat-welded or adhered to the roof deck, offering a seamless and secure barrier.

Holden Roofing (Houston Corporate) / holden roofing
RosenbergFort Bend CountyTexas
2128 1st St, Rosenberg, TX 77471, USA
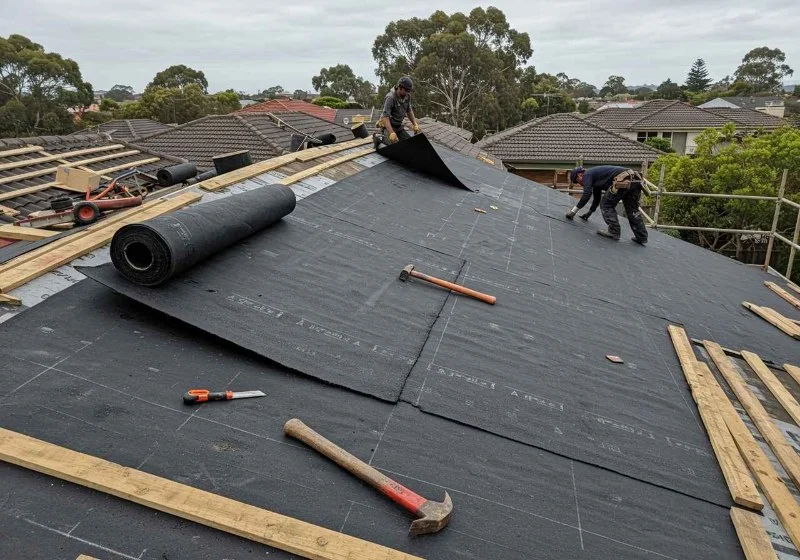
3. Step-by-Step Guide to Installing Roofing Underlayment
Installing roofing underlayment on a low-slope or flat roof involves several key steps to ensure that it is done properly. Here’s a detailed guide to installing underlayment for a secure, waterproof roof:
1. Prepare the Roof Deck: Before installing underlayment, ensure the roof deck is clean, dry, and free from debris. Any sharp objects or protrusions should be removed or smoothed out to prevent damage to the underlayment during installation.
2. Roll Out the Underlayment: Begin at the lower edge of the roof and unroll the underlayment across the roof deck, ensuring it is aligned properly. If using felt paper or synthetic underlayment, overlap each roll by at least 4 inches to ensure complete coverage.
3. Secure the Underlayment: As you unroll the material, secure it with roofing nails or staples. Be sure to fasten the underlayment every 6 to 8 inches along the edges to prevent it from shifting during the roofing process. If using self-adhesive underlayment, simply peel off the backing and press it into place.
4. Apply Additional Layers (if necessary): For added protection, you may choose to apply a second layer of underlayment, especially in areas that are more vulnerable to water damage, such as roof valleys or eaves. Ensure the layers overlap by 6 to 8 inches for a secure seal.
5. Install Flashing and Trim: Once the underlayment is fully installed, make sure to apply flashing around roof penetrations like vents, chimneys, and skylights. Flashing helps direct water away from these areas, preventing leaks. Additionally, trim any excess underlayment along the edges of the roof.
4. Common Mistakes to Avoid During Installation
Installing roofing underlayment can be tricky, and even small mistakes can lead to issues later on. Here are some common errors to avoid during the installation process:
1. Improper Overlapping: Overlapping the underlayment is crucial to prevent water from seeping through the seams. Ensure the overlaps are at least 4 inches, and always check for gaps that could cause leaks.
2. Skipping Flashing Installation: Flashing is essential for directing water away from vulnerable areas of your roof. Skipping this step can lead to water damage, especially around chimneys, skylights, and vents.
3. Poor Fastening: Not securing the underlayment properly can lead to shifting during the installation of the roof covering. Be sure to use the right fasteners and space them evenly to prevent loose underlayment.
5. Maintenance Tips for Flat Roof Underlayment
After installation, maintaining your roof’s underlayment is key to ensuring it continues to provide effective protection. Here are some tips for keeping your flat roof underlayment in good condition:
1. Regular Inspections: Inspect the roof periodically for signs of wear, such as cracks, tears, or lifting underlayment. Look for any areas where water may have been able to penetrate, and address them promptly.
2. Clean the Roof Surface: Remove debris, leaves, and other materials from the roof regularly to prevent water from pooling and to keep the roof deck dry. Standing water can break down the underlayment over time, leading to leaks.
3. Repair Damages Quickly: If any part of the underlayment gets damaged, repair it as soon as possible. Small leaks or cracks in the underlayment can lead to significant water damage if left untreated.
For the best underlayment products and professional installation services, visit Pro Found Roofing, where we offer quality materials and expert recommendations to ensure your roof is well-protected.


 Fonseca Family Roofers4.0 (43 reviews)
 Ridge Top Exteriors4.0 (412 reviews)
 Affordable Roofing, LLC0.0 (0 reviews)
 StaDry Roofing & Restoration5.0 (13 reviews)
 Rare breed construction5.0 (1 reviews)
 Roberts Restorations, Inc.5.0 (10 reviews)
 Storm Damage Roof Repairs: What to Expect and How to Act Fast
 Best Roofing Materials for Townhouses and Rowhomes in the City
 How to Keep Squirrels, Raccoons, and Birds Out of Your Roof and Attic
 The Impact of Climate Change on Roofing: Choosing Durable Materials for Extreme Weather
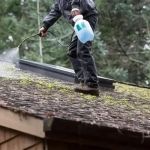 How to Safely Remove Moss and Algae from Your Roof - Step-by-Step Guide
 How to Choose the Best Roof Color for Energy Efficiency