
- 1-Introduction
- 2-Understanding Ridge Vents
- 3-Ridge Vent Installation with Ridge Board
- 4-Tools and Materials Needed
- 5-Tips for Effective Ventilation
1-Introduction
When it comes to maintaining a healthy and durable roof, proper ventilation is essential. One of the most effective ways to improve attic airflow and reduce heat buildup is by installing a ridge vent. Typically, ridge vents are installed along the peak of a roof. However, when your roof has a ridge board instead of a peak, the installation process requires a slightly different approach. In this guide, we’ll walk you through how to install a ridge vent on a roof with a ridge board, providing you with the tools and techniques necessary to boost your roof’s ventilation.

Rapid Response Roofing / rapid response roofing
East GreenvilleMontgomery CountyPennsylvania
408 State St, East Greenville, PA 18041, USA
2-Understanding Ridge Vents
A ridge vent is a venting system installed along the highest point of a roof. It allows hot, stale air from the attic to escape, while cooler, fresher air enters through soffit vents at the eaves of the roof. This passive ventilation system helps regulate temperature and humidity levels in your attic, preventing moisture buildup that can lead to mold growth, wood rot, and energy inefficiency.
For roofs with a peak, the ridge vent runs along the top of the peak. However, on roofs with a ridge board, the vent must be installed in a way that allows proper air circulation without disrupting the structural integrity of the ridge board. This installation is crucial for homes in areas with hot climates, as it significantly improves energy efficiency and extends the lifespan of your roof.

JK Contractors / jk roofing
West BendOzaukee CountyWisconsin
3058 County Rd Y, West Bend, WI 53095, USA
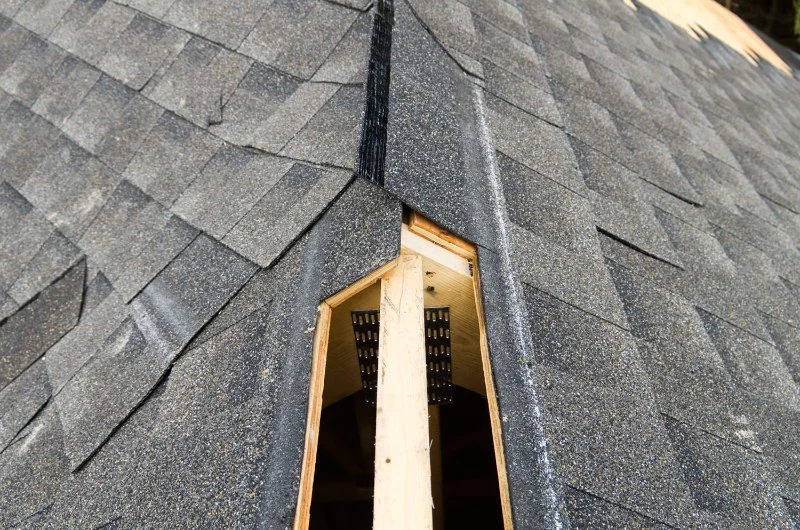
3-Ridge Vent Installation with Ridge Board
Installing a ridge vent on a roof with a ridge board involves several steps that ensure the vent is both functional and secure. Here’s how you can install the vent properly:
- Measure the Ridge Board: Start by measuring the length of the ridge board to determine how much ridge vent material you’ll need. The vent should span the entire length of the ridge, allowing for optimal airflow.
- Cutting the Ridge Board: Using a circular saw, cut a 1 to 1.5-inch slot along the top of the ridge board. This cut will allow the air to flow through the ridge vent. Be sure to make the cut as straight as possible, ensuring a clean line.
- Prepare the Ridge Vent: Roll out the ridge vent material, aligning it with the cut in the ridge board. Ensure the vent is positioned properly along the ridge line to maximize airflow.
- Attach the Ridge Vent: Using roofing nails or staples, secure the ridge vent to the ridge board. Space the nails or staples evenly to prevent the vent from shifting or coming loose over time. It’s important to ensure the vent is tight and secure without any gaps.
- Seal the Edges: Once the ridge vent is in place, use roofing sealant along the edges to prevent any rain or debris from entering through the vent. This step helps to ensure a weather-tight seal and long-lasting durability.
- Install Ridge Cap Shingles: Finally, cover the ridge vent with ridge cap shingles. These shingles should be placed over the vent, overlapping the edges to protect it from the elements. Nail the ridge cap shingles in place to ensure they stay secure during storms or high winds.
4-Tools and Materials Needed
To install a ridge vent on a roof with a ridge board, you’ll need the following tools and materials:
- Circular saw
- Measuring tape
- Ridge vent material
- Roofing nails or staples
- Roofing sealant
- Ridge cap shingles
- Hammer or pneumatic nailer
- Safety equipment (gloves, goggles, ladder, and harness)
Ensure that you have all these tools and materials ready before starting your project to avoid any interruptions during installation.
5-Tips for Effective Ventilation
Proper ridge vent installation is crucial, but there are a few additional tips to ensure maximum efficiency:
- Ensure Proper Sizing: The size of the ridge vent should match the airflow requirements of your attic. If your roof is large, you may need multiple ridge vents or larger vents to ensure adequate ventilation.
- Check for Obstructions: Before cutting into the ridge board, ensure there are no obstructions such as electrical wiring or roof trusses that could interfere with the vent installation.
- Install Soffit Vents: For optimal airflow, ensure that soffit vents are installed at the eaves of the roof. These vents work in conjunction with the ridge vent to draw in cool air while expelling hot air from the attic.
- Monitor Roof Health: Once the ridge vent is installed, periodically check the condition of the vent and the attic space to ensure that air circulation remains effective. This can help prevent future roof problems.
By following these tips, you can enjoy improved ventilation, energy savings, and enhanced roof longevity for your home.
For more guidance on roof ventilation and other roofing solutions, visit Pro Found Roofing for expert advice and services.


 VA Commercial Roofers4.0 (28 reviews)
 Nations Roof - Corporate Headquarters0.0 (0 reviews)
 ProRoofing - Atlanta5.0 (102 reviews)
 Central Roofing of Champaign4.0 (56 reviews)
 Infinity Roofing5.0 (29 reviews)
 Mr. Roof Grand Rapids4.0 (401 reviews)
 How to Safely Install a New Roof Over an Old One: Legal and Practical Facts
 Energy-Efficient 'Cool Roofs': How They Can Significantly Lower Your Cooling Bills
 How to Install a Roof Vent for a Bathroom that Has No Existing Ventilation
 How Hail Damage Affects Your Roof's Lifespan and Performance Over Time
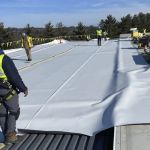 The Process of Installing a TPO Roof with Welded Seams for a Perfect Seal
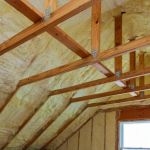 The Best Attic Insulation Types to Work with Your Roofing System for Efficiency