
The Benefits of Installing a Radiant Barrier Under Your Roof for Energy Savings
- 1. What is a Radiant Barrier?
- 2. How Do Radiant Barriers Work?
- 3. How Radiant Barriers Save Energy
- 4. The Installation Process
- 5. Choosing the Right Radiant Barrier for Your Home
1. What is a Radiant Barrier?
A radiant barrier is a reflective material, typically installed in attics or beneath the roof of a home, designed to reduce heat transfer into a building. It is usually made of aluminum foil or similar reflective materials that work by reflecting radiant heat away from the home, rather than absorbing it like traditional insulation. Radiant barriers are often used in hot climates to help keep homes cooler during the summer months and to reduce energy costs.
2. How Do Radiant Barriers Work?
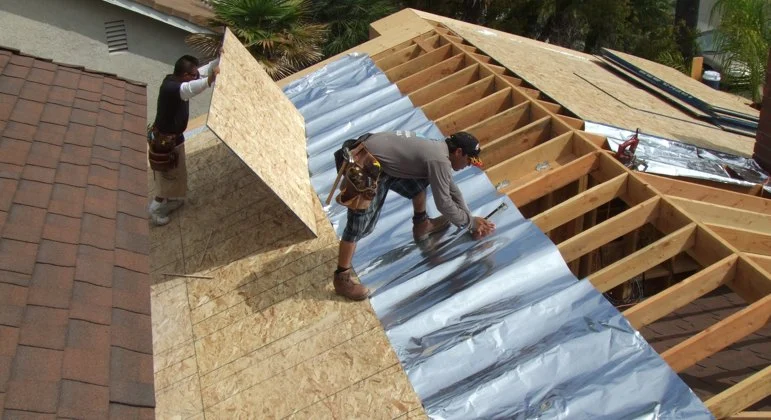
Radiant barriers work by reflecting the heat that comes from the sun’s rays, preventing it from being absorbed into your home. When sunlight hits the roof of a house, it generates heat, which can travel through the attic and into the living spaces below. Radiant barriers are installed on the underside of the roof or attic floor to reflect the heat back out, keeping the attic cooler and the living spaces below more comfortable. This process helps reduce the need for air conditioning and lowers the overall temperature inside the home.
3. How Radiant Barriers Save Energy
By reducing the amount of heat that enters the home, radiant barriers can significantly lower the need for air conditioning, especially during the hotter months. This leads to energy savings in two ways:
- Reduced Cooling Costs: With less heat entering the home, air conditioners don’t have to work as hard to cool the indoor environment. This translates into lower energy bills and longer lifespan for your cooling systems.
- Improved Home Comfort: Radiant barriers help maintain a consistent temperature inside the house, making it more comfortable during the summer months, which reduces the need for constant adjustments to your thermostat.
In addition, radiant barriers can work in conjunction with other insulation methods, enhancing overall energy efficiency and improving the comfort of the entire home. The combination of radiant barriers and proper insulation creates a more energy-efficient home, which can save you money on utilities in the long run.
4. The Installation Process
Installing a radiant barrier is a relatively simple process, but it’s important to ensure it’s done correctly to maximize its effectiveness. Here’s a breakdown of the typical installation process:
- Step 1: Choose the right type of radiant barrier. There are different options available, such as reflective foil, reflective insulation, or radiant barriers designed for specific roofing materials.
- Step 2: Decide where to install the barrier. Most commonly, radiant barriers are installed in the attic, either on the underside of the roof or above the insulation. If you have a vaulted ceiling, installation may be done between the rafters.
- Step 3: Installation. Radiant barriers are typically stapled or fastened in place. It’s important to leave a small air gap between the barrier and the surface to allow for proper airflow.
- Step 4: Ensure proper ventilation. Radiant barriers work best when installed in conjunction with good attic ventilation. Make sure that there is sufficient airflow in the attic to allow the barrier to function optimally.
While installing a radiant barrier can be a DIY project, it’s recommended to consult with a professional contractor to ensure the installation is done correctly, especially if your attic requires special considerations.
5. Choosing the Right Radiant Barrier for Your Home
When selecting a radiant barrier, consider factors such as:
- Climate: If you live in a hot climate, radiant barriers can be particularly effective at reducing cooling costs. They’re most beneficial in regions with long, hot summers.
- Roof Type: The type of roof and attic space you have will influence how and where the radiant barrier is installed. Some roofs may require specific products, such as radiant barrier paint or foil-based materials.
- Installation Location: Depending on where you choose to install the radiant barrier (attic floor, rafters, or roof), different products and installation techniques may be recommended.
It’s important to do thorough research or consult a professional to ensure you’re choosing the right type of radiant barrier for your specific needs. With the right choice and proper installation, you can enjoy significant energy savings and improve your home’s comfort year-round.


 N. Mallari General Contracting - New Castle, DE4.0 (21 reviews)
 Patrick Glynn Roofing LLC5.0 (33 reviews)
 J E Fournier Chimney and Roofing Contractors4.0 (37 reviews)
 Nations Roofing & Construction LLC4.0 (116 reviews)
 Detailed Roofing and Construction4.0 (35 reviews)
 Expert ContractorZ5.0 (4 reviews)
 How Roofing Affects Home Resale Value – Expert Insights
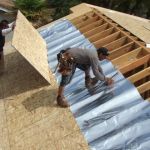 The Benefits of Installing a Radiant Barrier Under Your Roof for Energy Savings
 Best Tips to Avoid Common Roof Repair Mistakes | Pro Found Roofing
 What is a Roofing Membrane? A Guide to EPDM, TPO, and PVC for Flat Roofs
 Roofing Warranties: What’s Covered and What’s Not for Your Roof
 The Best Attic Insulation Types to Work with Your Roofing System for Efficiency