
1-Understanding Flat Roof Leaks and Liquid Rubber Sealant
Flat roofs are a popular choice for many commercial and residential buildings due to their cost-effective design. However, one common issue with flat roofs is leaks. Over time, weather conditions like heavy rain, snow, or even high winds can cause cracks, blisters, or damage to the roof membrane, leading to leaks. If left untreated, these leaks can lead to water damage, mold growth, and even structural issues. The good news is that repairing a leak in a flat roof is easier than it sounds—especially with the help of liquid rubber sealant. Liquid rubber is a versatile and durable solution for sealing leaks, and it's easy to apply, even for DIY enthusiasts. In this article, we’ll explore how to use liquid rubber sealant to fix a flat roof leak effectively.

Holden Roofing (Houston Corporate) / holden roofing
RosenbergFort Bend CountyTexas
2128 1st St, Rosenberg, TX 77471, USA
2-Why Choose Liquid Rubber Sealant for Flat Roof Repairs?
When it comes to roof repairs, particularly for flat roofs, choosing the right materials is essential. Here are some reasons why liquid rubber sealant is a preferred option for fixing flat roof leaks:
Victors Home Solutions / victors roofing
2722 E Michigan Ave suite 239, Lansing, MI 48912, USA
2.1-Ease of Application
Liquid rubber is easy to apply, making it an ideal choice for homeowners or professionals looking for a fast and effective solution. Unlike traditional roofing materials, liquid rubber can be painted or sprayed directly onto the roof's surface, allowing for a seamless application that covers any cracks or holes. This reduces the need for expensive and time-consuming roof replacements.
2.2-Durability and Flexibility
Liquid rubber sealants are known for their durability and flexibility. They form a waterproof membrane that can expand and contract with temperature fluctuations, ensuring that the seal remains intact even during extreme weather conditions. This flexibility makes it an excellent choice for flat roofs, which are more prone to stress from shifting and settling.
2.3-Long-Lasting Protection
When applied correctly, liquid rubber sealants provide long-lasting protection against water infiltration. They form a strong, elastic layer that resists damage from UV rays, moisture, and extreme temperatures. This makes it a reliable and cost-effective solution for flat roof repairs, as it can protect your roof for years with minimal maintenance.
2.4-Cost-Effective
Compared to replacing a flat roof, using liquid rubber sealant is a much more affordable option. It allows you to fix localized damage without the need for a full roof overhaul. This can save you a significant amount of money, especially if you’re dealing with small leaks or minor roof damage.
3-Step-by-Step Guide to Fixing a Leak in a Flat Roof with Liquid Rubber Sealant
Now that you understand why liquid rubber is a great option, let’s walk through the steps to fix a leak in a flat roof with liquid rubber sealant:
3.1-Inspect the Roof for Damage
The first step in fixing a leak is to inspect your roof thoroughly. Look for visible signs of damage, such as cracks, blisters, or areas where the roof membrane is peeling or lifting. If you have access to the roof, check for any pooling water or damp spots that could indicate a leak. Once you locate the damage, mark the areas that need repair.
3.2-Clean the Roof Surface
Before applying liquid rubber sealant, it’s crucial to clean the roof surface to ensure proper adhesion. Use a broom or pressure washer to remove any dirt, debris, or loose material from the roof. Make sure the surface is completely dry before proceeding to the next step. Any moisture left on the roof could affect the performance of the sealant.
3.3-Prepare the Liquid Rubber Sealant
Next, prepare the liquid rubber sealant according to the manufacturer’s instructions. Some sealants come ready to apply, while others may require mixing. Make sure you have all the necessary tools, such as a paint roller, brush, or sprayer, depending on the size of the area you’re repairing.
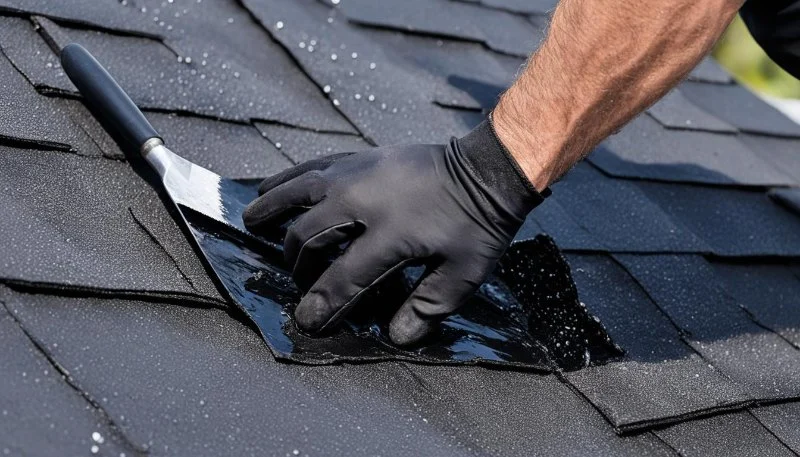
3.4-Apply the Liquid Rubber Sealant
Start by applying a thin layer of liquid rubber over the damaged areas. Use a brush to work the sealant into any cracks or crevices. For larger areas, a roller or sprayer may be more efficient. Apply a second layer of sealant if necessary, and make sure the entire surface is covered. Allow the sealant to dry completely before walking on the roof or exposing it to the elements. Drying times can vary, so check the product’s instructions for the recommended curing time.
3.5-Inspect the Repair
Once the liquid rubber sealant has dried, inspect the repaired areas to ensure there are no missed spots or incomplete coverage. If you notice any areas that need additional sealing, apply another coat of liquid rubber. It’s important to ensure a complete, seamless seal to prevent future leaks.
4-Common Mistakes to Avoid When Using Liquid Rubber Sealant
While liquid rubber is an effective solution for fixing roof leaks, there are some common mistakes to avoid during the application process:
4.1-Not Preparing the Roof Surface Properly
Failure to properly clean and prepare the roof surface is one of the most common mistakes. Dirt, debris, and moisture can prevent the sealant from adhering properly, leading to poor results. Always ensure the surface is clean and dry before applying the sealant.
4.2-Using Too Much Sealant
While it may seem like applying more sealant will provide extra protection, using too much liquid rubber can result in an uneven finish and may cause the sealant to peel over time. Apply thin, even coats, and avoid over-applying.
4.3-Not Allowing Enough Drying Time
Rushing the drying process can lead to incomplete bonding and may result in leaks down the line. Always allow sufficient time for the sealant to cure before exposing it to water or foot traffic.
5-Real-Life Example: Fixing a Leak in a Flat Roof with Liquid Rubber
Take the example of John, a homeowner who discovered a small leak in his flat roof after a heavy rainstorm. John decided to fix the leak himself using liquid rubber sealant. He followed the steps carefully—cleaning the roof, applying the sealant in thin layers, and allowing it to cure properly. After the repair, John noticed that the roof was no longer leaking, and he saved a significant amount of money compared to hiring a professional. John’s experience highlights how using liquid rubber can be a simple and cost-effective solution for flat roof leaks.
6-Where to Find the Best Liquid Rubber Sealant for Roof Repairs
If you're ready to tackle a roof leak yourself, visit Pro Found Roofing to find the best liquid rubber sealant for your flat roof repairs. We offer high-quality roofing products and sealants that are designed to provide long-lasting protection against leaks and weather damage. Whether you're a DIY enthusiast or a professional roofer, our selection of products will help you get the job done right.


 Hastings Roofing Inc4.0 (32 reviews)
 Best Roofing LA5.0 (20 reviews)
 PRO MASTER CONSTRUCTION NJ LLC5.0 (16 reviews)
 Darcy Roofing LLC4.0 (5 reviews)
 Rockwell Roofing5.0 (4 reviews)
 Glick's Exteriors4.0 (25 reviews)
 The Impact of Shade from Solar Panels on Moss Growth Underneath Them
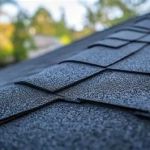 Understanding Roof Flashing: What It Is and Why It Matters for U.S. Homes
 What is a Roofing Nail? The Right Type, Size, and Number for a Secure Roof
 How to Choose Between TPO and PVC Roofing | Expert Roofing Guide
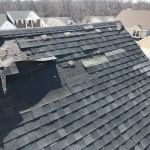 How to Get a Free Roof Inspection: What’s Included and What’s Not
 What is a Roofing Warranty? Understanding Manufacturer vs. Contractor Warranties