
- 1 - Understanding Ridge Caps
- 2 - Why a Weathertight Ridge Cap Is Important
- 3 - Materials Needed for Ridge Cap Installation
- 4 - Steps to Install a Ridge Cap on a Metal Roof
- 5 - Common Mistakes to Avoid
- 6 - Maintaining Your Ridge Cap for Long-Term Protection
1. Understanding Ridge Caps
A ridge cap is an essential component of any metal roof system, designed to cover the ridge or peak of the roof where two slopes meet. Its primary function is to provide protection from water infiltration, debris, and harsh weather conditions. Ridge caps not only contribute to the aesthetic of a roof but also ensure that the roofing system remains structurally sound by preventing water from entering the roof's seams.
When installed properly, a ridge cap ensures that the roof remains weathertight and safe from leaks, which can lead to costly damage over time. Whether you’re building a new roof or replacing an old one, it’s crucial to understand how to install a ridge cap to achieve these protective benefits.

Holden Roofing (Houston Corporate) / holden roofing
RosenbergFort Bend CountyTexas
2128 1st St, Rosenberg, TX 77471, USA
2. Why a Weathertight Ridge Cap Is Important
A weathertight ridge cap plays a vital role in safeguarding your metal roof from the elements. Without a proper ridge cap, rainwater, snow, and wind can enter through the ridge, potentially causing leaks, rust, and damage to the roof structure. In areas with heavy rainfall or snow, the ridge is particularly vulnerable to water penetration if not sealed correctly.
Additionally, a properly installed ridge cap helps prevent the buildup of moisture in the attic or roofing space, which can lead to mold growth or rotting in wooden structures. It also contributes to the overall energy efficiency of your home by reducing the chance of moisture-related insulation problems. Therefore, ensuring that the ridge cap is installed correctly is essential for the longevity of the roof and your home’s protection.
Lance Roofing & Siding Inc. / lance roofing and siding
6903 Dayton Springfield Rd, Enon, OH 45323, USA
3. Materials Needed for Ridge Cap Installation
Before starting the installation of a ridge cap, it’s important to gather all the necessary materials to ensure a successful and efficient process. Here are the materials you’ll need:
- Ridge Cap Panels: Pre-formed metal panels that match the style and color of your roofing material.
- Roofing Nails or Screws: Galvanized nails or screws designed to securely fasten the ridge cap to the roof.
- Sealant or Butyl Tape: To provide an extra layer of protection against water penetration and ensure the ridge cap is fully sealed.
- Metal Snips or Cutting Tools: To trim the ridge cap panels as needed for a perfect fit.
- Roofing Underlayment: A protective barrier between the ridge cap and the roof structure to prevent moisture infiltration.
- Ladder and Safety Gear: Ensure you have a stable ladder and safety equipment to work at height.
Having these materials on hand will allow you to install the ridge cap correctly and securely, minimizing the risk of water damage in the future.
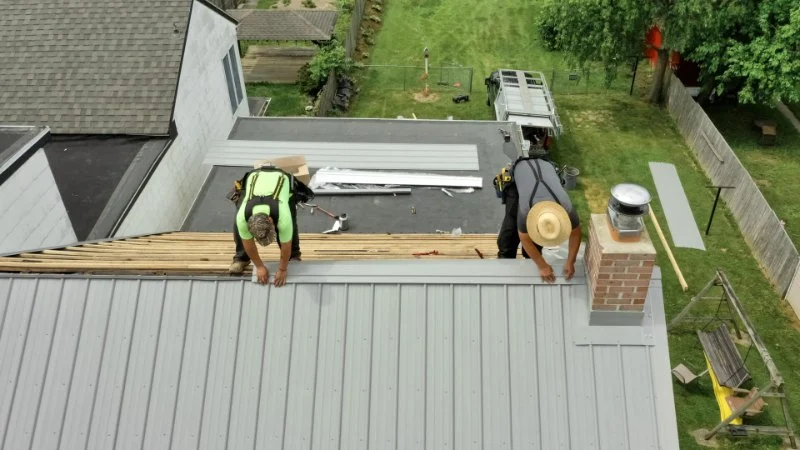
4. Steps to Install a Ridge Cap on a Metal Roof
Now that you have all the necessary materials, follow these steps to install a ridge cap on your metal roof:
1. Prepare the Roof and Ridge
Before installing the ridge cap, ensure that the roof is clean and dry. Remove any debris, leaves, or dirt from the ridge area. Check the ridge for any damaged sections or gaps that need to be sealed or repaired before proceeding with the installation.
2. Position the Underlayment
Install roofing underlayment along the ridge, ensuring that it is properly aligned with the edges of the roof. The underlayment helps to provide an additional layer of protection against water infiltration.
3. Install the Ridge Cap Panels
Place the ridge cap panels along the peak of the roof, making sure they are aligned properly. Begin at one end of the roof and work your way to the other end, overlapping the edges of each panel slightly to ensure full coverage.
Use roofing nails or screws to secure the panels to the roof, making sure to fasten them into the ridge beam or the topmost row of roofing material. Ensure that each fastener is driven in tightly but not too deep to avoid damaging the panels.
4. Seal the Ridge Cap
Apply a layer of sealant or butyl tape under the edges of the ridge cap to prevent water from seeping through any gaps. This step is critical to making sure your ridge cap is weathertight and secure. Once applied, press the ridge cap firmly into place and ensure the sealant bonds effectively.
5. Check for Proper Alignment and Secure Fasteners
Once all the ridge cap panels are installed, double-check that they are properly aligned and securely fastened. Look for any loose areas or gaps that could compromise the roof’s integrity. Tighten any fasteners as needed.
5. Common Mistakes to Avoid
To ensure that your ridge cap installation is done correctly and will provide long-lasting protection, here are some common mistakes to avoid:
1. Skipping the Sealant
Many homeowners overlook the importance of sealant when installing a ridge cap. Skipping this step can lead to water penetration and roof damage down the line. Always apply sealant or butyl tape under the ridge cap edges for a weathertight fit.
2. Inadequate Fastening
Using too few fasteners or not securing the ridge cap tightly can result in panels shifting or becoming loose over time. Make sure to follow the manufacturer’s instructions for the correct number of fasteners and placement to avoid this issue.
3. Poor Alignment
Improperly aligned ridge cap panels can affect the appearance of your roof and allow water to seep in through gaps. Take your time to ensure the panels are lined up properly along the ridge for a clean, effective installation.
6. Maintaining Your Ridge Cap for Long-Term Protection
Once your ridge cap is installed, regular maintenance is key to keeping it weathertight and functional. Here’s how you can maintain your ridge cap over time:
1. Inspect Regularly
Check the ridge cap annually for any signs of damage, such as loose panels, cracked sealant, or gaps. Early detection of issues can help prevent costly repairs down the road.
2. Clean Debris
Remove any leaves, branches, or debris that may accumulate on the ridge cap. Clogged ridge caps can trap moisture and lead to mold or mildew growth, affecting both the aesthetics and functionality of your roof.
If you're looking for high-quality materials or professional advice on roofing solutions, visit Pro Found Roofing for expert services and roofing products that will help ensure your roof remains secure and weathertight for years to come.


 Redemption Solar and Roofing4.0 (109 reviews)
 Lenox Roofing, Inc.5.0 (2 reviews)
 Krause Konstruction/Krause Kustom Metal Fabrication4.0 (5 reviews)
 Urban roofing4.0 (49 reviews)
 Tritop Roofing and Siding5.0 (33 reviews)
 Starnes Exteriors4.0 (38 reviews)
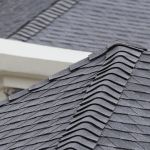 Best Roofing Materials for Homes in Wildfire-Prone Areas: Top Class A Options
 How to Handle a Roof Leak During a Storm
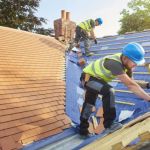 How to Finance a New Roof Without Breaking the Bank
 How Solar Panels Affect Your Roof – What You Need to Know
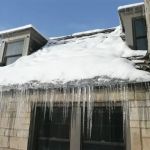 What is a Roofing Ice Dam? How Heat Loss from Your Home Creates This Problem
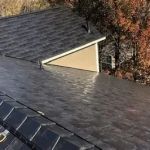 The Average Cost of a Metal Roof for a 2,000 Square Foot Home