
How to Install Roofing Underlayment Around Roof Penetrations like Vents
- 1. Understanding Roofing Underlayment and Its Importance
- 2. Preparing for Installation Around Roof Penetrations
- 3. Step-by-Step Guide to Installing Underlayment Around Vents
- 4. Common Mistakes to Avoid During Installation
- 5. Maintenance Tips for Roof Penetration Areas
1. Understanding Roofing Underlayment and Its Importance
Roofing underlayment is a critical layer of protection installed beneath the shingles or roofing material to provide an extra barrier against water infiltration. When working around roof penetrations, such as vents, chimneys, and skylights, it's essential to ensure that the underlayment is properly sealed to prevent leaks and damage to the structure of your roof.

Absolute Roofing / absolute roofing
TimoniumBaltimore CountyMaryland
22 W Padonia Rd # B229, Timonium, MD 21093, USA
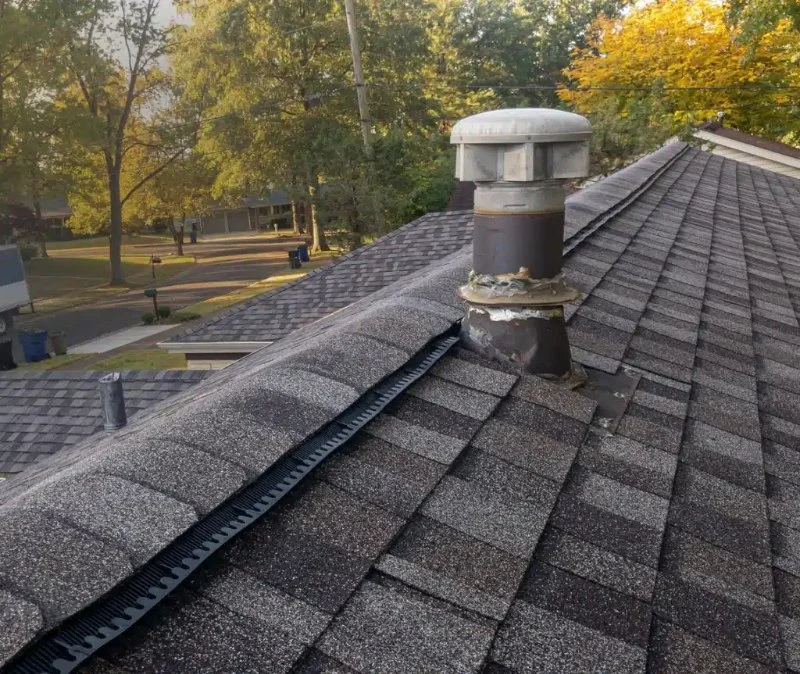
What Is Roof Penetration?
Roof penetrations occur wherever there is a fixture or opening through the roof, such as pipes, vents, and chimneys. These areas are vulnerable to water infiltration, especially during heavy rains. Proper installation and sealing of underlayment around these penetrations are essential for ensuring the roof remains watertight and durable.

SB Pro Roofing / sb pro roofing
Pinellas ParkPinellas CountyFlorida
6358 49th St N, Pinellas Park, FL 33781, USA
2. Preparing for Installation Around Roof Penetrations
Before you begin installing the underlayment around roof penetrations like vents, it’s important to gather the necessary tools and materials. Proper preparation will help you avoid delays and errors during installation.
Materials You’ll Need:
- Roofing underlayment (felt or synthetic)
- Utility knife
- Stapler or roofing nails
- Sealant (roofing caulk or rubberized flashing tape)
- Roofing adhesive
- Measuring tape
Safety Precautions
When working on the roof, always ensure safety by using proper fall protection and ladders. Roofing work can be hazardous, so it’s important to have the right equipment and precautions in place.
3. Step-by-Step Guide to Installing Underlayment Around Vents
Installing roofing underlayment around roof penetrations like vents requires a careful approach to ensure a tight seal and prevent leaks. Follow these steps for a successful installation:
Step 1: Start at the Bottom
Begin by laying the first layer of underlayment at the bottom of the roof, just above the eaves. This will act as your base layer for the entire roof.
Step 2: Cut and Fit Around Vents
When you reach a vent or other roof penetration, measure and cut the underlayment to fit snugly around the base of the penetration. Leave a bit of excess material to allow for proper sealing.
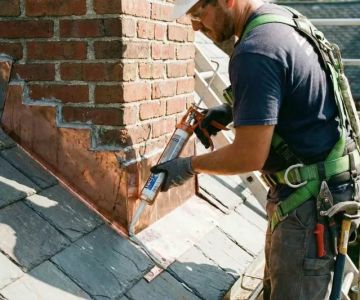
Step 3: Seal the Edges
Use roofing caulk or flashing tape to seal the edges of the underlayment around the vent. Apply the sealant generously to create a watertight barrier.
Step 4: Install the Next Layer of Underlayment
Once the edges are sealed, apply the next layer of underlayment over the vent and extend it over the first layer. Overlap the seams of the underlayment by at least 4 to 6 inches to ensure proper water runoff.
Step 5: Nail and Staple the Underlayment
Secure the underlayment with roofing nails or a stapler, ensuring that the nails penetrate through the material and into the roof decking. Be sure to leave about 1-inch space between each fastener to prevent water from seeping through.
4. Common Mistakes to Avoid During Installation
Even experienced roofers can make mistakes when installing underlayment around roof penetrations. Avoid these common errors to ensure a proper and lasting installation:
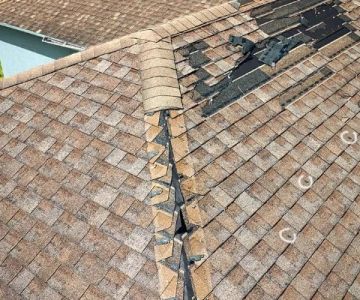
1. Not Sealing Penetrations Thoroughly
Ensure that the edges around vents and other penetrations are properly sealed. Water can quickly find its way into poorly sealed areas, leading to costly repairs later on.
2. Overlapping Underlayment Incorrectly
It’s crucial to overlap the underlayment properly. If the overlap is too small or uneven, water may seep through the gaps, compromising the roof's integrity.
3. Using the Wrong Type of Underlayment
Different roofing materials require different types of underlayment. Be sure to choose a product that is compatible with your roofing material and climate conditions.
5. Maintenance Tips for Roof Penetration Areas
Once the underlayment is installed, it's important to keep an eye on the areas around roof penetrations to ensure long-term protection:
Regular Inspections
Inspect the roof at least twice a year, especially after storms, to ensure that the underlayment around vents is intact and free from damage. Look for signs of leaks or water stains in the attic.
Prompt Repairs
If you notice any damage to the underlayment or the roof around the vents, it’s essential to repair it immediately. Delaying repairs could lead to bigger problems, including water damage and mold growth.
Clean the Vents
Regularly clean the vents to ensure they are not clogged with debris. Blocked vents can cause water buildup, leading to leaks or other issues with the underlayment.
For more information on roofing products and services, or to find the right tools for your roofing needs, visit Pro Found Roofing.


 Detweiler Roofing and Decking4.0 (3 reviews)
 Distinctive Roofing4.0 (147 reviews)
 Abel's Roofing LLC5.0 (5 reviews)
 Zooguy Renovations, LLC.4.0 (20 reviews)
 Home Science Solutions, LLC4.0 (12 reviews)
 Tm's quality metal roofing5.0 (1 reviews)
 Top Questions to Ask Before Hiring a Roofing Company
 The Benefits of a White TPO Roof for Reflecting Sunlight and Saving Energy
 Metal Roofs vs. Asphalt Shingles: Which Is Better for Your Home?
 How to Repair a Leaking Roof on a Porch or Sunroom with a Low Slope | Pro Found Roofing
 The True Cost of a Roof Replacement When You Also Need New Decking
 How to Choose the Right Roof Color for a House with a Lot of Windows