
- 1. Why Is Roofing Underlayment Important on Steep Pitch Roofs?
- 2. Materials You Need for Installing Underlayment
- 3. Step-by-Step Guide to Installing Roofing Underlayment on a Steep Pitch Roof
- 4. Common Mistakes to Avoid During Installation
- 5. Tips for Ensuring Safe Installation on Steep Roofs
1. Why Is Roofing Underlayment Important on Steep Pitch Roofs?
Roofing underlayment plays a critical role in protecting your home, especially on steep-pitched roofs. It acts as an additional layer of defense against moisture infiltration, ensuring that rain, snow, or ice doesn't seep through the shingles and cause damage to your roof structure or the interior of your home. On steep-pitched roofs, the underlayment helps prevent water from flowing underneath the shingles due to the fast-moving water caused by the roof's steep slope.

JK Contractors / jk roofing
West BendOzaukee CountyWisconsin
3058 County Rd Y, West Bend, WI 53095, USA
2. Materials You Need for Installing Underlayment
Installing roofing underlayment on a steep pitch roof requires the right materials to ensure long-term durability and effectiveness. Below are the essential materials you'll need:
- Roofing underlayment: Choose between felt, synthetic, or rubberized asphalt underlayment, based on the specific needs of your roof.
- Roofing nails: Used to secure the underlayment and shingles in place.
- Roofing adhesive (optional): Helps to add extra hold, especially on steep slopes.
- Safety gear: Including non-slip footwear, harnesses, and gloves to ensure safety while working at heights.
- Shingles or roofing tiles: To finish off the roof once the underlayment is installed.
3. Step-by-Step Guide to Installing Roofing Underlayment on a Steep Pitch Roof
Installing roofing underlayment on a steep-pitched roof can be challenging, but with proper preparation and care, you can do it safely and effectively. Here’s a step-by-step guide:

SB Pro Roofing / sb pro roofing
Pinellas ParkPinellas CountyFlorida
6358 49th St N, Pinellas Park, FL 33781, USA
3.1 Preparation: Ensure Safety First
Before starting, ensure that the roof is safe to work on. Use appropriate safety gear like harnesses, and make sure the roof is free from debris that could cause accidents. If you’re unfamiliar with working on steep roofs, consider hiring a professional.
3.2 Measure and Cut the Underlayment
Start by measuring the roof to determine the amount of underlayment required. Cut the underlayment into manageable strips, making sure they are long enough to cover the entire roof slope. It’s crucial to work in sections to avoid overlapping too much material at once.
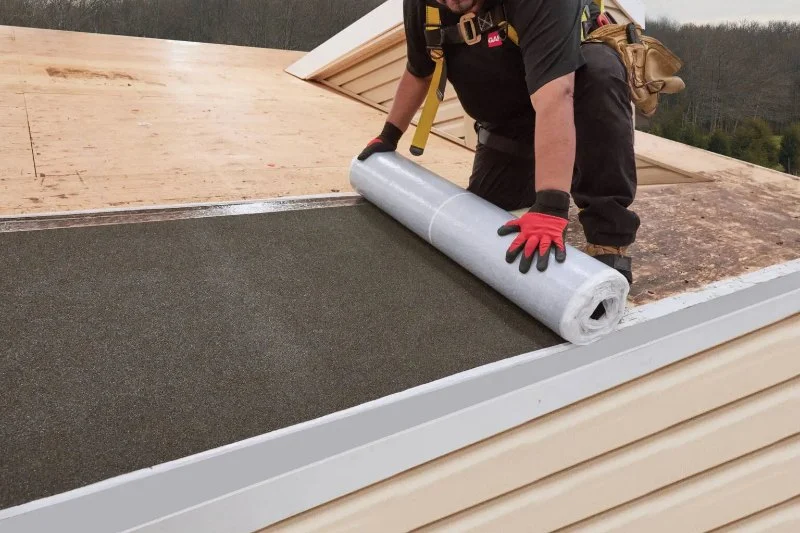
3.3 Lay the First Strip of Underlayment
Begin at the eave (the edge of the roof) and unroll the first strip of underlayment horizontally. Align it along the edge and make sure it overlaps the roof’s fascia by at least 1–2 inches. Use roofing nails to secure the underlayment at intervals of about 6–8 inches. Ensure the underlayment lies flat and smooth, avoiding wrinkles or bubbles.
3.4 Overlap the Next Layer
As you move upward, overlap each new layer of underlayment by 4–6 inches with the previous one. This overlapping ensures proper water runoff and prevents leaks between seams.
3.5 Secure the Top Edge of the Underlayment
Once you reach the top of the roof, secure the final edge of the underlayment with roofing nails or adhesive. Ensure the top layer is tightly secured to prevent any lifting due to high winds or storms.
3.6 Inspect the Underlayment Installation
After installing the underlayment, inspect the entire roof for any gaps or areas where the material isn’t secured properly. Recheck for wrinkles or lifting, which can allow water to enter. A well-installed underlayment is crucial for the roof’s long-term protection.
4. Common Mistakes to Avoid During Installation
When installing underlayment on a steep-pitched roof, there are several common mistakes to avoid:
- Improper overlap: Failing to overlap the strips properly can lead to water penetration.
- Loose or insufficient nailing: If the underlayment is not securely nailed down, it may shift during extreme weather.
- Neglecting the roof’s pitch: Different pitches may require different techniques or materials for underlayment. Be sure to adjust based on the steepness of the roof.
- Skipping safety precautions: Always prioritize safety when working at heights to avoid accidents.
5. Tips for Ensuring Safe Installation on Steep Roofs
Here are some additional tips to ensure a safe and successful installation of underlayment on steep-pitched roofs:
- Work with a partner: It’s always safer to work in pairs, especially on steep roofs, to assist with balancing and holding materials in place.
- Use a ladder with stabilizers: A ladder with stabilizers will provide extra support on steep slopes, reducing the risk of falls.
- Take regular breaks: Climbing up and down a steep roof can be physically demanding. Take regular breaks to avoid fatigue, which can lead to accidents.
- Check the weather: Avoid working on the roof during rain or high winds to ensure safety and proper installation of materials.
In conclusion, installing roofing underlayment on a steep-pitched roof requires careful planning, the right materials, and safety precautions. By following the steps and avoiding common mistakes, you can ensure that your roof remains protected for years to come. For professional assistance with roofing underlayment installation, contact Pro Found Roofing for expert services.


 Superior Southern4.0 (10 reviews)
 D&G Exteriors5.0 (34 reviews)
 Roof Squad5.0 (58 reviews)
 Roof Ready Home Improvements LLC5.0 (87 reviews)
 Wilson Roofing Inc.5.0 (5 reviews)
 Triple M Roofing5.0 (3 reviews)
 How to Install Ice and Water Shield in Valleys and at Eaves for Winter
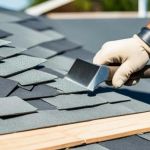 DIY Roof Repair Tips: What You Can Safely Do Yourself
 The Best Tools for a DIY Roof Repair Kit for Emergency Fixes
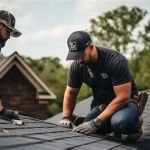 The Ultimate Checklist for Hiring a Roofing Contractor | Pro Found Roofing
 The Hidden Dangers of a Leaking Roof: Mold, Rot, and Structural Damage
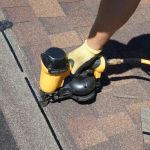 Should You Stay Home During Roof Replacement? Pros and Cons