
- Why Ice and Water Shield Is Important for Winter
- How to Install Ice and Water Shield in Roof Valleys
- Installing Ice and Water Shield at Eaves
- Common Mistakes to Avoid When Installing Ice and Water Shield
- When to Call Professionals for Roof Winterization
Why Ice and Water Shield Is Important for Winter
As the winter months approach, protecting your roof from the harsh elements becomes a priority. One of the best ways to prepare your roof for the snow, ice, and freezing temperatures is by installing an ice and water shield. This protective layer helps to prevent water infiltration, which can lead to serious damage like mold, rotting wood, or even structural issues in your home.
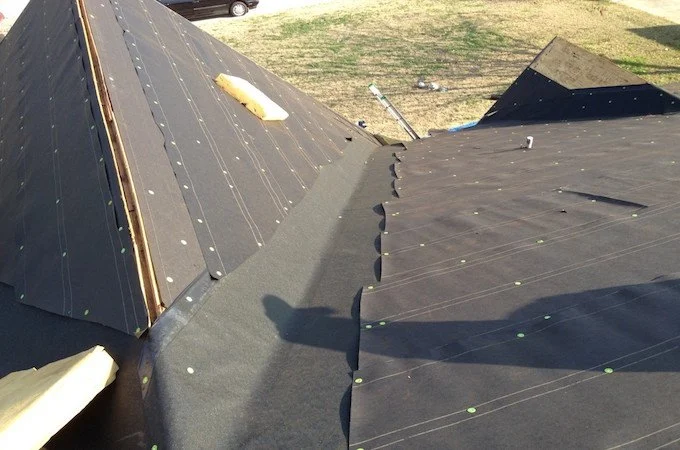
Ice and water shield is a self-adhesive membrane that provides an extra layer of protection in areas most susceptible to water buildup, such as roof valleys and eaves. During winter, ice dams can form along the roofline, causing water to back up and seep into your home. By installing ice and water shield in these areas, you can prevent water from penetrating your roofing system and causing long-term damage.

Holden Roofing (Houston Corporate) / holden roofing
RosenbergFort Bend CountyTexas
2128 1st St, Rosenberg, TX 77471, USA
How to Install Ice and Water Shield in Roof Valleys
Roof valleys are one of the most vulnerable areas of your roof when it comes to water damage. Snow and ice tend to accumulate in valleys, and if not properly sealed, water can seep through the roof. Installing ice and water shield in these areas is crucial to protect your home from leaks. Here’s how to do it:
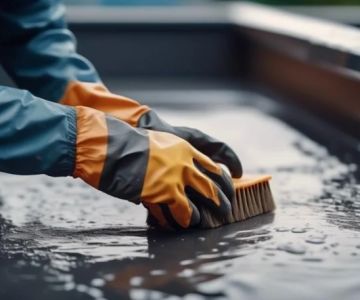
- Step 1: Clean and Prepare the Surface – Before installing the ice and water shield, make sure the roof valleys are clean and free of debris. Remove any old roofing materials, dirt, or leaves to ensure proper adhesion.
- Step 2: Measure and Cut the Shield – Roll out the ice and water shield along the valley and measure the length needed. Cut the shield to the appropriate size using a utility knife. It’s important to have enough material to cover the entire valley, from the eaves to the peak of the roof.
- Step 3: Apply the Shield – Begin at the lowest point of the roof valley and peel off the backing from the self-adhesive membrane. Press the shield firmly onto the roof, working your way up the valley. Make sure to smooth out any air bubbles to ensure good adhesion.
- Step 4: Overlap the Layers – If necessary, overlap the edges of the shield by at least 3-4 inches to create a watertight seal. This is particularly important in areas that are more exposed to water runoff.
- Step 5: Seal the Edges – Once the shield is installed, press down on the edges to ensure they’re sealed tightly against the roof. This will help prevent water from getting under the shield during heavy rain or snowmelt.
Installing Ice and Water Shield at Eaves
The eaves of your roof are another critical area for ice and water shield installation. The eaves are often the first place where ice dams form, and if water backs up here, it can seep under your shingles and cause damage to the interior of your home. Follow these steps to install ice and water shield at the eaves:
- Step 1: Clear the Area – As with the valleys, begin by cleaning the eaves area of your roof. Remove old roofing materials, leaves, and debris to ensure a clean surface for the shield to adhere to.
- Step 2: Measure and Cut the Shield – Measure the length of the eaves and cut the ice and water shield to fit. The shield should extend up the roof at least 24 inches from the edge of the eaves to ensure full coverage.
- Step 3: Apply the Shield – Starting at the eaves, peel off the backing and press the ice and water shield onto the roof. Work your way along the eaves, overlapping each strip by a few inches to ensure a tight seal.
- Step 4: Smooth the Surface – As you apply the shield, smooth out any air pockets or wrinkles. The more secure the shield is, the better protection it will provide against water infiltration.
Common Mistakes to Avoid When Installing Ice and Water Shield
While installing ice and water shield is a straightforward process, there are a few common mistakes to avoid to ensure that your roof is properly protected:
- Not Overlapping the Edges: Failing to overlap the edges of the shield properly can leave gaps where water can seep through. Always overlap by at least 3-4 inches to create a tight seal.
- Incorrect Placement: Be sure to install the shield starting at the lowest point of the roof and working your way up. Installing it in the wrong direction can cause water to flow underneath the shield instead of over it.
- Skipping the Eaves: Don’t neglect the eaves when installing ice and water shield. The eaves are particularly susceptible to ice dams and water damage, so make sure they are properly covered.
- Not Preparing the Surface: It’s essential to clean and prepare the roof surface before applying the ice and water shield. Any dirt, debris, or old roofing materials can interfere with the adhesive and prevent the shield from bonding properly.
When to Call Professionals for Roof Winterization
While DIY installation of ice and water shield is possible, there are times when it’s best to call in a professional roofing contractor. If you’re not comfortable working on your roof, or if the installation requires more advanced skills or materials, a professional can ensure the job is done correctly. A professional roofer will have the tools and expertise to install the shield properly and efficiently, providing you with peace of mind knowing your roof is fully prepared for winter.
If you need roofing products or professional services for winter preparation, visit Pro Found Roofing. We offer high-quality roofing materials and expert installation services to help you protect your roof and home from winter damage.


 American Roofing Contractors5.0 (1 reviews)
 New Century Construction Inc3.0 (2 reviews)
 Affordable Roofing / Gutters5.0 (25 reviews)
 Arellanos JNP5.0 (1 reviews)
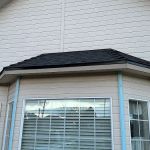 State Wide Contracting LLC5.0 (7 reviews)
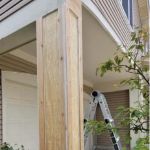 Paramount Home Restorations4.0 (31 reviews)
 Choosing the Right Roof Color: How It Affects Your Home's Energy Efficiency and Curb Appeal
 Installing a Skylight on an Existing Roof: Challenges, Costs, and Leak Prevention
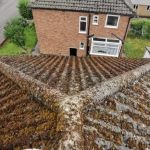 The Impact of Air Pollution on Your Roof's Color and Material Degradation
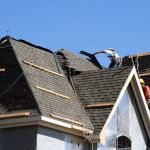 How to Finance a New Roof Without Breaking the Bank – Complete U.S. Guide
 How to Choose the Right Gutter System to Protect Your Roof and Foundation
 How to Choose the Best Roof Color for a House with Many Windows