
- Why You Need a DIY Roof Repair Kit
- Must-Have Tools for Your DIY Roof Repair Kit
- How to Use Your DIY Roof Repair Kit for Emergency Fixes
- Safety Tips When Performing DIY Roof Repairs
- Real-Life Stories: Successful DIY Roof Repairs
- How Pro Found Roofing Can Help with Roof Repairs
Why You Need a DIY Roof Repair Kit
Roof damage can occur at any time, often without warning, leaving you in need of quick repairs to prevent further issues like leaks or structural damage. Having a DIY roof repair kit on hand can be a lifesaver during an emergency. Whether it's a small leak or minor storm damage, knowing how to address these issues immediately can save you time, money, and hassle.
A well-stocked roof repair kit can help you tackle minor repairs yourself, especially in emergency situations when waiting for professional help might not be an option. In this article, we’ll explore the essential tools every DIY roof repair kit should include and how to use them effectively for emergency fixes.

JK Contractors / jk roofing
West BendOzaukee CountyWisconsin
3058 County Rd Y, West Bend, WI 53095, USA
Must-Have Tools for Your DIY Roof Repair Kit
When it comes to roof repairs, having the right tools is crucial. Below are the must-have tools that should be part of any DIY roof repair kit. These tools will enable you to perform emergency fixes and prevent further damage to your home.
Absolute Roofing / absolute roofing
TimoniumBaltimore CountyMaryland
22 W Padonia Rd # B229, Timonium, MD 21093, USA
1. Roof Sealant or Patch
Roof sealant or patch is one of the most essential items for any DIY roof repair kit. This product is used to seal small leaks, cracks, or holes on your roof. It can be applied to a variety of roofing materials, including shingles, metal, and flat roofs. When choosing a roof sealant, look for a product that is weather-resistant and can withstand extreme temperatures.
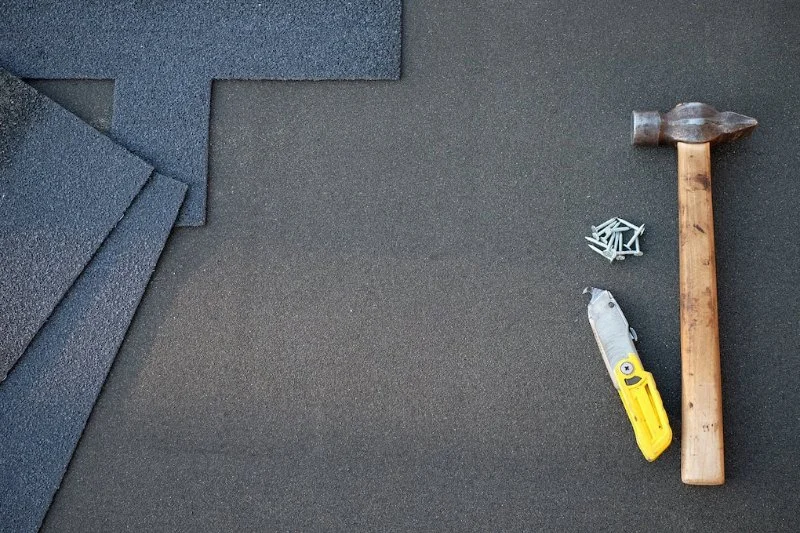
2. Roofing Nails and Hammer
Roofing nails are specifically designed to secure shingles, flashing, or roof patches in place. A hammer is necessary to drive these nails into the roofing materials effectively. Make sure you choose a hammer with a comfortable grip and a good amount of weight to ensure you can work efficiently.
3. Ladder
A sturdy ladder is essential for reaching your roof safely. It’s important to invest in a high-quality ladder that can handle your weight and provide a stable surface for working at height. Always ensure your ladder is properly secured before climbing to avoid any accidents.
4. Roofing Cement
Roofing cement is used to bond and seal various roof materials. It’s a versatile product that can be used to repair cracked shingles, flashings, or seams where leaks might occur. Roofing cement is particularly effective for emergency repairs where immediate sealing is necessary.
5. Utility Knife
A utility knife is essential for cutting through roofing materials, such as shingles, felt paper, or underlayment. It’s a handy tool for precise cuts, allowing you to trim and shape materials as needed during your repair process.
6. Flashing Tape
Flashing tape is a quick and effective solution for sealing joints, seams, and edges of your roof. This waterproof adhesive tape can be used to patch small holes or leaks until more permanent repairs can be made. It’s especially useful for emergencies and temporary fixes.
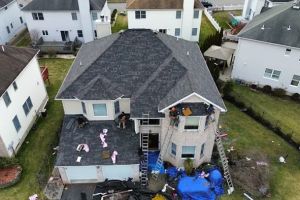
How to Use Your DIY Roof Repair Kit for Emergency Fixes
Once you have your DIY roof repair kit ready, it’s important to know how to use these tools effectively to address common roof issues. Here’s a step-by-step guide on how to use your kit for emergency repairs:
1. Identify the Leak or Damage
Before making any repairs, it’s essential to identify the source of the leak or damage. Inspect your roof carefully for visible cracks, missing shingles, or other signs of wear and tear. If it’s safe to do so, climb up the ladder and get a close look at the damaged area. If the leak is coming from a specific location, mark it for easy access during repairs.
2. Apply Roof Sealant or Patch
Once the damage is identified, use the roof sealant or patch to cover any holes, cracks, or gaps. Apply the sealant generously and press it firmly into place. Ensure that the entire damaged area is covered, and use your utility knife to trim any excess material.
3. Secure with Roofing Nails
For areas where shingles or materials are loose, use roofing nails to secure them in place. Make sure to drive the nails in at an angle to ensure they hold the materials tightly. Hammer the nails carefully to avoid damaging the roof further.
4. Seal Seams with Flashing Tape
For joints or seams that are difficult to seal with roof cement, use flashing tape as an alternative. Apply the tape over the seams and press it down firmly to ensure a strong bond. This will temporarily stop water from entering these vulnerable areas.
Safety Tips When Performing DIY Roof Repairs
While DIY roof repairs can save time and money, it’s important to prioritize safety. Here are some key safety tips to keep in mind:
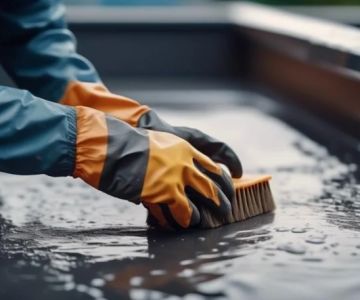
1. Always Wear Proper Safety Gear
Safety gear, such as non-slip shoes, gloves, and a helmet, is essential when working on a roof. These items will help prevent injuries from falls, sharp objects, and other hazards that may arise during repairs.
2. Inspect the Weather
Avoid working on your roof during wet or windy conditions. Slippery surfaces and unstable conditions can significantly increase the risk of accidents. Ensure that the weather is clear before you begin working.
3. Use a Stable Ladder
Make sure your ladder is properly positioned on level ground and that it is securely anchored. Never lean too far to one side while on a ladder, as this can cause you to lose your balance.
Real-Life Stories: Successful DIY Roof Repairs
Many homeowners have successfully tackled roof repairs on their own by using a DIY roof repair kit. For instance, Mark from California found a small leak after a storm. He used a combination of roofing cement and flashing tape to seal the area temporarily. “I was amazed at how easy it was to fix the issue with the right tools. It saved me a lot of money on professional repairs,” he shared.
Another example comes from Jane in Texas, who faced damage from high winds. With her DIY kit, she was able to patch up missing shingles and prevent further water damage. “Having the right tools made the whole process straightforward, and I didn’t have to wait for a contractor,” Jane said.
How Pro Found Roofing Can Help with Roof Repairs
While DIY roof repairs are a great way to handle minor issues, sometimes professional help is necessary for more extensive damage. At Pro Found Roofing, we provide expert roofing services and high-quality materials for all types of roof repairs. If you're facing a larger issue or need assistance with a more complex repair, our team is here to help.
Visit Pro Found Roofing to explore our range of products, services, and expert advice to ensure your roof stays in top condition.


 Archer Exteriors0.0 (0 reviews)
 Crestone Roofing4.0 (51 reviews)
 Eagle Rivet Roof Service Corporation4.0 (17 reviews)
 Tornado Roofing & Contracting, Inc.4.0 (78 reviews)
 Romanelli Roofing5.0 (9 reviews)
 Crist Jr Roofing and Construction4.0 (77 reviews)
 How to Choose the Right Roofing Material for Your Climate
 Standing Seam Metal Roof vs. Metal Shingles: Which is the Better Choice?
 DIY Roof Repair Tips: What U.S. Homeowners Can Safely Handle Themselves
 What is a Roofing Membrane? A Guide to EPDM, TPO, and PVC for Flat Roofs
 Everything You Need to Know About Insurance Claims for Roof Damage
 How to Safely Install a New Roof Over an Old One: Legal and Practical Facts