
1. Introduction: Understanding the Importance of Roofing Underlayment
Roofing underlayment plays a crucial role in protecting your home from water infiltration, especially in low-slope or flat roof designs. While the top layer of roofing materials provides the first line of defense against the elements, underlayment acts as an additional barrier that enhances the durability of your roof. In this article, we’ll guide you through the process of installing roofing underlayment on low-slope and flat roofs, ensuring your roofing system is secure and effective in protecting your home.

JK Contractors / jk roofing
West BendOzaukee CountyWisconsin
3058 County Rd Y, West Bend, WI 53095, USA
2. What is Roofing Underlayment and Why is it Essential?
Roofing underlayment is a water-resistant or waterproof material installed directly on top of the roof deck and beneath the outer roofing material. Its purpose is to provide an extra layer of protection against rain, snow, and ice, preventing leaks and moisture from reaching the interior of your home. On low-slope or flat roofs, where water drainage is less efficient, a properly installed underlayment becomes even more crucial in maintaining roof integrity.

SB Pro Roofing / sb pro roofing
Pinellas ParkPinellas CountyFlorida
6358 49th St N, Pinellas Park, FL 33781, USA
2.1 Types of Roofing Underlayment
There are several types of roofing underlayment to choose from, each offering different benefits:
- Asphalt-Saturated Felt: Commonly used for residential roofs, this type of underlayment is affordable and effective in providing water resistance. It is available in 15-pound and 30-pound rolls, with the latter offering more durability.
- Synthetic Underlayment: Made from polypropylene or polyester, synthetic underlayment is lighter, stronger, and more resistant to tearing compared to felt. It also provides superior water resistance, making it an excellent choice for low-slope roofs.
- Rubberized Asphalt Underlayment: This type of underlayment is coated with a layer of rubberized asphalt, offering enhanced waterproofing. It is ideal for areas prone to heavy rainfall and ice dams.
3. Steps for Installing Roofing Underlayment on Low-Slope or Flat Roofs
Installing roofing underlayment on low-slope or flat roofs requires careful preparation and precise installation to ensure proper water protection. Follow these steps for a successful installation:
3.1 Preparing the Roof Deck
Before installing underlayment, ensure the roof deck is clean, dry, and free from debris. This is crucial for proper adhesion and the overall effectiveness of the underlayment. Inspect the deck for any signs of damage or rot, as these areas should be repaired before proceeding with the installation.
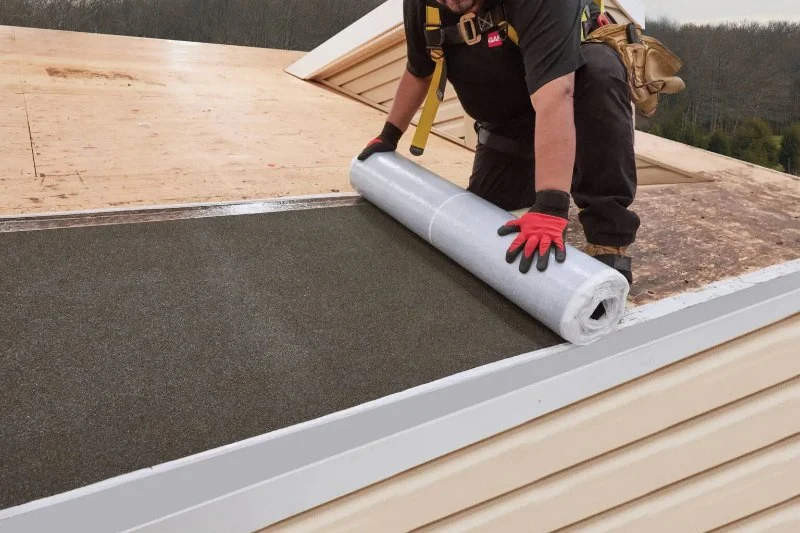
3.2 Installing the First Layer of Underlayment
Start by unrolling the first layer of underlayment along the edge of the roof deck, ensuring it is aligned properly. Use roofing nails or staples to secure the underlayment to the roof deck, placing the fasteners every 6 to 8 inches along the edges and every 12 inches in the field (center area). Be sure to overlap the seams by about 4 inches to prevent water from seeping through any gaps.
3.3 Applying Additional Layers of Underlayment
For low-slope or flat roofs, it is essential to apply multiple layers of underlayment to enhance water resistance. Continue installing the second layer by overlapping the first layer by about 6 to 8 inches, ensuring a tight seal. Repeat this process for each layer, making sure to maintain consistent coverage across the entire roof surface.
3.4 Sealing the Edges and Seams
Once the underlayment is installed, seal all edges, seams, and penetrations (such as vent pipes) with roofing cement or adhesive tape designed for roofing applications. This step is particularly important for low-slope roofs, where water can accumulate and find its way under the underlayment if seams are not properly sealed.
4. Common Challenges When Installing Underlayment on Low-Slope Roofs
Installing roofing underlayment on low-slope roofs can present some challenges, especially when it comes to ensuring proper water drainage. Here are a few common issues to watch out for:
4.1 Insufficient Overlap
One of the most common mistakes is not overlapping the underlayment layers sufficiently. If the layers are not overlapped enough, water can seep through the gaps and potentially damage the roof deck. Always make sure that the overlap is at least 4 inches for the first layer and 6 to 8 inches for subsequent layers.
4.2 Incorrect Fastener Placement
Improper placement of fasteners can lead to underlayment that is not securely attached to the roof deck. Ensure that you are placing fasteners every 6 to 8 inches along the edges and every 12 inches across the field to hold the underlayment in place securely.
4.3 Inadequate Sealing
Low-slope roofs are more prone to water pooling, so it’s essential to properly seal all seams, edges, and penetrations. Inadequate sealing can lead to water infiltration, which can damage the roof structure over time. Always apply roofing cement or adhesive tape where necessary.
5. Why You Should Trust Pro Found Roofing for Your Roofing Materials
Installing roofing underlayment correctly is essential for ensuring the long-term durability and functionality of your roof. At Pro Found Roofing, we provide high-quality underlayment materials and roofing supplies to help ensure your roof is both durable and energy-efficient. Our team of experts can assist you in choosing the right materials for your specific roof type and offer installation tips for the best results.
6. Conclusion: Ensuring Long-Term Protection with Proper Underlayment Installation
Installing roofing underlayment on low-slope or flat roofs is a crucial step in ensuring your roof’s durability and preventing water damage. By following proper installation techniques and using high-quality materials, you can enhance the lifespan of your roof and improve your home’s energy efficiency. Whether you’re doing the installation yourself or seeking professional help, always ensure the underlayment is installed correctly to avoid future problems.


 Superior Southern4.0 (10 reviews)
 D&G Exteriors5.0 (34 reviews)
 Roof Squad5.0 (58 reviews)
 Roof Ready Home Improvements LLC5.0 (87 reviews)
 Wilson Roofing Inc.5.0 (5 reviews)
 Triple M Roofing5.0 (3 reviews)
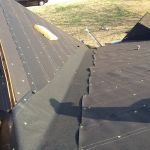 How to Install Ice and Water Shield in Valleys and at Eaves for Winter
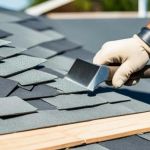 DIY Roof Repair Tips: What You Can Safely Do Yourself
 The Best Tools for a DIY Roof Repair Kit for Emergency Fixes
 The Ultimate Checklist for Hiring a Roofing Contractor | Pro Found Roofing
 The Hidden Dangers of a Leaking Roof: Mold, Rot, and Structural Damage
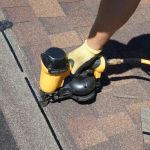 Should You Stay Home During Roof Replacement? Pros and Cons