
What is a Roofing Boot? How to Install a New Boot on an Old Pipe Vent
Roofing boots are a crucial component in maintaining the integrity of your roof, especially around pipe vents. They help seal out water and prevent leaks, which can lead to significant damage if left unchecked. In this article, we will explore what roofing boots are, why they are important, and provide a step-by-step guide on how to install a new boot on an old pipe vent.
- What is a Roofing Boot?
- Why are Roofing Boots Important?
- How to Install a New Boot on an Old Pipe Vent
- Common Issues with Old Roofing Boots
- Real-Life Case Study: Replacing a Roof Boot
- Tips for Maintaining Your Roof Boot
1. What is a Roofing Boot?
A roofing boot, also known as a pipe boot or flashing, is a waterproof seal that fits around the pipes that protrude from your roof. It’s designed to prevent water from seeping through the roof around the pipes and causing leaks. Roofing boots are typically made from rubber, silicone, or metal, and they’re an essential part of your roofing system.

Gunner Roofing / gunner roofing
CromwellLower Connecticut River Valley Planning RegionConnecticut
700 Corporate Row, Cromwell, CT 06416, USA
1.1 Materials Used for Roofing Boots
Roofing boots are available in a variety of materials, each suited to different needs. The most common materials include:
- Rubber: Flexible and durable, rubber boots are the most commonly used and are ideal for sealing pipes on sloped roofs.
- Silicone: Silicone boots are more flexible than rubber and are resistant to UV rays and extreme temperatures, making them a good choice for areas with harsh weather conditions.
- Metal: Metal roofing boots are more durable but are typically more expensive. They are ideal for roofs that require long-term, heavy-duty protection.
2. Why are Roofing Boots Important?
Roofing boots play a crucial role in protecting your home from water damage. If a roofing boot becomes cracked or damaged, it can allow water to enter your home, leading to leaks and potentially costly repairs. Here's why roofing boots are so important:
Lance Roofing & Siding Inc. / lance roofing and siding
6903 Dayton Springfield Rd, Enon, OH 45323, USA
2.1 Prevent Water Leaks
The primary function of a roofing boot is to prevent water from entering the space where the pipe meets the roof. Over time, weather, wear, and tear can damage a roofing boot, which increases the risk of leaks. A well-installed, functioning boot ensures that water stays out, keeping your home dry and safe.
2.2 Protect Against Mold and Mildew
If water leaks into your roof, it can create the perfect environment for mold and mildew to grow. By ensuring your roofing boot is in good condition, you can prevent these issues and protect your home from the harmful effects of mold, including health problems and structural damage.
2.3 Extend the Lifespan of Your Roof
Roofing boots help extend the lifespan of your roof by preventing water damage. Keeping them in good condition can ensure your roof remains intact and functions effectively for many years, saving you money on repairs or replacements.
3. How to Install a New Boot on an Old Pipe Vent
Installing a new boot on an old pipe vent may sound complicated, but it’s a manageable DIY project if you have the right tools and knowledge. Below are the steps you need to follow to replace an old, worn-out roofing boot:
3.1 Gather the Necessary Tools
- New roofing boot (rubber, silicone, or metal)
- Utility knife
- Roofing nails
- Caulk or roofing sealant
- Hammer
- Ladder
- Roofing cement
3.2 Remove the Old Roofing Boot
Start by removing the old roofing boot. You’ll need to carefully pry it off using a utility knife or pry bar. Be gentle to avoid damaging the surrounding shingles or flashing. Once removed, inspect the area around the pipe to ensure there is no significant damage or rot before proceeding with the new boot installation.
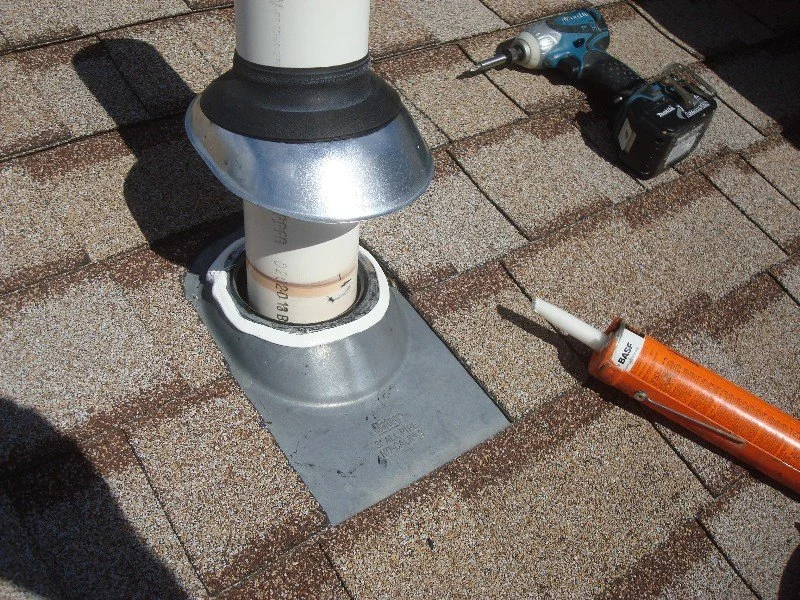
3.3 Install the New Roofing Boot
Place the new roofing boot over the pipe, ensuring it fits snugly around the base of the pipe. Apply a small amount of roofing cement to the underside of the boot where it meets the roof to create a waterproof seal. Carefully press the boot into place, ensuring the edges are flush with the surrounding shingles.
3.4 Secure the Boot and Seal the Edges
Use roofing nails to secure the boot in place, making sure not to puncture the boot itself. Once the boot is secured, apply roofing sealant or caulk around the edges to further prevent water from seeping in. Check the seal to make sure it’s tight and complete.
3.5 Check the Installation
Once the boot is installed and sealed, inspect your work to ensure everything is secure. It’s a good idea to check for leaks by spraying water around the pipe and observing for any signs of leakage inside your home.
4. Common Issues with Old Roofing Boots
As roofing boots age, they may develop issues that require attention. Here are some common problems you may encounter with old roofing boots:
4.1 Cracks and Tears
Over time, roofing boots can crack or tear due to exposure to weather elements. Once a boot is cracked, it can no longer effectively prevent water from entering, which increases the risk of leaks.
4.2 Loose or Detached Boots
Older roofing boots may become loose or detach from the roof over time. This can happen due to shifting in the roof or the breakdown of adhesives used to secure the boot.
4.3 Discoloration and Wear
Exposure to UV rays and extreme temperatures can cause the material of the boot to fade, crack, or break down. Discoloration is often a sign that the boot has lost its effectiveness in protecting the roof.
5. Real-Life Case Study: Replacing a Roof Boot
Last year, one of our clients, John, noticed a slight water stain on his ceiling. Upon inspection, he found that the roofing boot around his pipe vent had cracked and was allowing water to seep through. John decided to replace the old boot himself, following our step-by-step guide. After installing the new boot and sealing the edges, he no longer experienced water leaks. The quick replacement saved him money on professional repairs and extended the life of his roof.
6. Tips for Maintaining Your Roof Boot
Proper maintenance of your roofing boot is essential to ensure it continues to protect your home effectively. Here are some tips to maintain your roof boot:
6.1 Regular Inspections
Inspect your roofing boot at least once a year to check for cracks, tears, or signs of wear. Early detection can prevent bigger problems down the line.
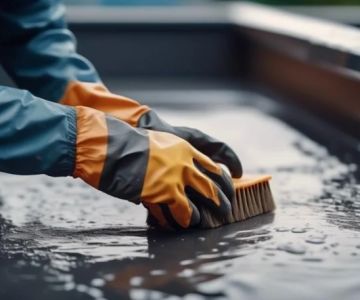
6.2 Clean the Area Around the Boot
Debris can build up around the base of the roofing boot, preventing proper sealing. Make sure to clear the area around the boot during your regular roof maintenance routine.
6.3 Reapply Sealant as Needed
If you notice gaps or weakened areas in the sealant around the boot, reapply it to maintain a watertight seal.
For expert advice on roofing boots or to find high-quality materials, visit Pro Found Roofing to explore products and services that can help you maintain your roof.


 Roofs Unlimited LLC4.0 (10 reviews)
 Rain-Tite Construction1.0 (2 reviews)
 Pizarro Roofing5.0 (2 reviews)
 D M Roofing4.0 (9 reviews)
 Weather Tight Roofing Solutions4.0 (40 reviews)
 Elite Roofing & Remodel4.0 (500 reviews)
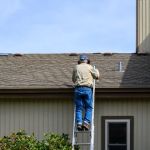 How to Clean Your Roof Without Damaging the Shingles' Fire Rating
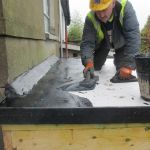 The Process of Installing Mastic Asphalt Roof for Traditional Flat Roofs
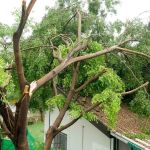 How to Prevent Roof Damage from Overhanging Tree Branches
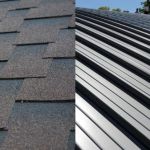 Asphalt Shingles vs. Metal Roofing: A Complete Comparison of Cost, Durability, and Style
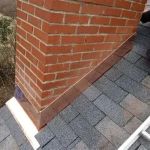 How to Fix a Leaking Roof Around a Chimney: Step-by-Step Flashing Repair | Pro Found Roofing
 The Best Time of Year to Replace or Repair Your Roof