
How to Fix a Leaking Roof Around a Chimney: Step-by-Step Flashing Repair
A leaking roof around your chimney can quickly turn from a minor annoyance into a major problem. Water seeping through flashing gaps or worn materials can damage ceilings, walls, and insulation — and even cause mold growth. Fortunately, with the right tools and guidance, you can learn how to fix a leaking roof around a chimney safely and effectively. In this guide, we’ll walk through step-by-step flashing repair methods to help you stop leaks for good. For professional tools, materials, or expert roofing services, check out Pro Found Roofing.
- 1. Why Chimney Leaks Happen
- 2. Inspect the Damage Before Repairing
- 3. Tools and Materials You’ll Need
- 4. Step-by-Step Flashing Repair Guide
- 5. Safety Tips and Long-Term Prevention
- 6. Why Choose Pro Found Roofing for Chimney Repairs
1. Why Chimney Leaks Happen
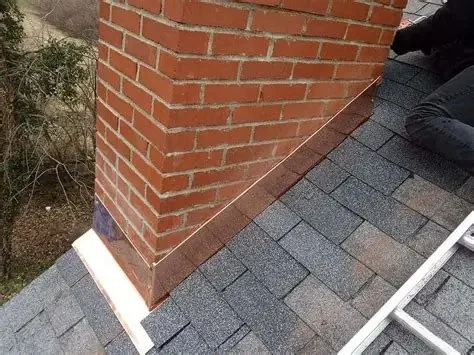
Most roof leaks around chimneys occur due to damaged or poorly installed flashing — the metal barrier that seals the joint between the chimney and the roof. Over time, weather exposure, corrosion, and roof settling can weaken the flashing and allow water to seep through. Even small cracks in the mortar or roof shingles near the chimney can cause leaks during heavy rain.
Lance Roofing & Siding Inc. / lance roofing and siding
6903 Dayton Springfield Rd, Enon, OH 45323, USA
Common Causes
Some of the most frequent causes of chimney leaks include:
- Rust or corrosion in the metal flashing
- Cracked or missing caulk around flashing edges
- Deteriorated mortar joints on brick chimneys
- Poor overlap between step flashing and shingles
- Improperly sealed counter flashing
Understanding what caused the leak helps you plan a more durable repair and avoid repeating the problem later.

Holden Roofing (Houston Corporate) / holden roofing
RosenbergFort Bend CountyTexas
2128 1st St, Rosenberg, TX 77471, USA
2. Inspect the Damage Before Repairing
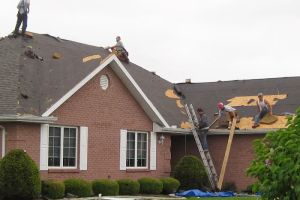
Before diving into repairs, take time to carefully inspect both the interior and exterior of your chimney area. Inside your attic, look for water stains, damp insulation, or wood rot. Outside, examine where the chimney meets the roof — especially under shingles and along metal seams.
Pro Tip
Always perform inspections during dry weather and daylight. Wet surfaces can hide small cracks and make the roof slippery, increasing the risk of accidents.
3. Tools and Materials You’ll Need
Having the right tools ensures efficiency and safety during flashing repair. You’ll need:
- Roofing cement or flashing sealant
- Galvanized step and counter flashing pieces
- Roofing nails and hammer
- Utility knife and pry bar
- Caulking gun
- Wire brush (for cleaning old mortar)
- Roofing gloves and safety harness
High-quality roofing materials can make all the difference in preventing future leaks. Pro Found Roofing offers durable flashing products designed to withstand harsh weather conditions.
4. Step-by-Step Flashing Repair Guide
Here’s a detailed process on how to fix a leaking roof around a chimney by repairing or replacing flashing effectively:
Step 1: Remove Old Flashing and Debris
Use a pry bar to gently remove old flashing and nails around the chimney base. Be careful not to damage nearby shingles. Clear out any remaining caulk or debris using a wire brush.
Step 2: Inspect the Underlying Surface
Check for water damage or rot on the roof decking or chimney mortar. If you find any, repair or replace these areas before installing new flashing. This ensures a solid foundation for the seal.
Step 3: Install New Step Flashing
Slide step flashing under each shingle row, ensuring it overlaps the chimney edge by at least two inches. Secure it with roofing nails at the upper edge, not the lower, to prevent leaks from nail holes.
Step 4: Add Counter Flashing
Install counter flashing over the step flashing and embed it into a groove cut into the chimney mortar joint. Seal the top edge with high-quality roofing sealant for added protection against water intrusion.
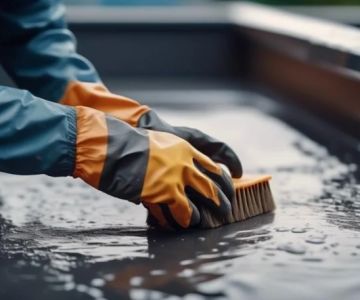
Step 5: Apply Roofing Cement and Seal Joints
Apply roofing cement where flashing pieces overlap and along any visible gaps. Smooth it out with a putty knife for a clean finish. Allow it to dry fully before exposing the area to rain.
Step 6: Test for Leaks
After completing the repair, spray water over the chimney and roof area with a garden hose for several minutes. Check inside the attic for any signs of leakage. If dry, your repair is complete.
5. Safety Tips and Long-Term Prevention
Working on a roof can be dangerous, so always prioritize safety. Use a sturdy ladder, wear non-slip shoes, and secure yourself with a harness. Never work in wet or windy conditions.
Prevent Future Leaks
Schedule annual roof inspections to catch issues early. Clear debris from gutters and around the chimney to maintain water flow. If your flashing is more than 10 years old, consider replacing it as part of regular maintenance.
6. Why Choose Pro Found Roofing for Chimney Repairs
For homeowners who prefer professional help, Pro Found Roofing offers reliable roof inspection and flashing repair services. Our experts use weather-resistant materials and precision installation to eliminate leaks for good. Whether it’s an emergency fix or preventive maintenance, you can trust our team to protect your home from costly water damage.
By following these steps — and knowing when to call a professional — you can ensure your chimney remains leak-free and your roof stays strong for years to come.


 Northeast Exteriors, LLC0.0 (0 reviews)
 Curtin Roofing, L.L.C.4.0 (5 reviews)
 Assurance Roofing, LLC4.0 (35 reviews)
 DIAZ ROOFING4.0 (34 reviews)
 Roof Restorations and Waterproofing Inc.5.0 (9 reviews)
 Buddy's Roofing & Repair4.0 (102 reviews)
 Roofing Warranties Explained: What’s Covered and What’s Not
 Best Time to Replace or Repair Your Roof – Expert Advice
 How to Spot Curling Shingles and What Causes This Common Problem
 What is a Roofing Felt? Why Synthetic Underlayment is Becoming the New Standard
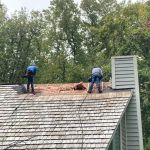 How to Finance a New Roof Without Breaking the Bank
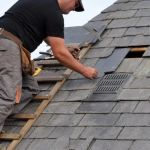 Top Mistakes Homeowners Make During Roof Repairs and How to Avoid Them