
How to Install a Roof Vent for a Bathroom that Has No Existing Ventilation
- 1- Why Install a Roof Vent for Your Bathroom?
- 2- Signs Your Bathroom Needs Better Ventilation
- 3- Materials Needed for Installing a Roof Vent
- 4- Step-by-Step Guide to Installing a Roof Vent
- 5- Common Issues and Tips for Installing Roof Vents
1. Why Install a Roof Vent for Your Bathroom?
Proper ventilation in a bathroom is essential for maintaining a healthy indoor environment. If your bathroom doesn’t have an existing vent, it can lead to a buildup of excess moisture, which may cause mold growth, unpleasant odors, and even structural damage over time. Installing a roof vent, such as a bathroom fan venting to the outside, is a great way to improve airflow, remove humidity, and enhance comfort.
A roof vent allows hot air, steam, and moisture to escape directly from the bathroom to the outside of your home. This reduces the risk of condensation, which can lead to mildew, damage to ceilings, walls, and even woodwork. It’s also an easy way to ensure that your bathroom stays fresh and odor-free.

Gunner Roofing / gunner roofing
CromwellLower Connecticut River Valley Planning RegionConnecticut
700 Corporate Row, Cromwell, CT 06416, USA
2. Signs Your Bathroom Needs Better Ventilation
Before installing a roof vent, it’s important to recognize the signs that your bathroom needs better ventilation. Here are some common indicators:
- Persistent Moisture: If you constantly find condensation on your bathroom mirror or walls after showers, this is a sign of poor ventilation.
- Mold and Mildew: Mold growth in corners, around windows, and along walls is a clear indication that your bathroom is retaining too much moisture.
- Musty Odors: A musty, damp smell in your bathroom is often caused by trapped moisture that can’t escape due to inadequate ventilation.
- Peeling Paint or Wallpaper: If the paint or wallpaper in your bathroom begins to peel or bubble, it’s often due to excess humidity buildup.
If you notice any of these issues, installing a roof vent could help resolve the problem and prevent further damage.

Rapid Response Roofing / rapid response roofing
East GreenvilleMontgomery CountyPennsylvania
408 State St, East Greenville, PA 18041, USA
3. Materials Needed for Installing a Roof Vent
To install a roof vent for your bathroom, you’ll need the following materials:
- Roof Vent Kit: These kits typically include the vent cap, ductwork, and all necessary fittings for installation.
- Flexible Ducting: Use flexible vent tubing to connect the fan to the vent cap on the roof.
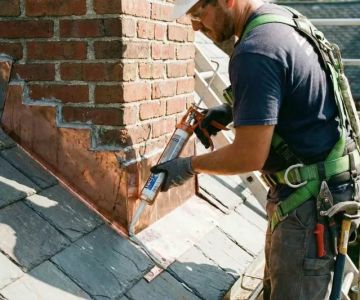
- Caulk or Roofing Sealant: To seal any gaps around the vent and prevent leaks.
- Drill and Bits: To make holes for the vent and ducting connections.
- Screws and Fasteners: For securing the vent to the roof and securing the ducting.
- Roofing Flashing: To ensure that the vent is properly sealed against the roof to prevent leaks.
- Safety Gear: Such as a ladder, gloves, safety goggles, and a work harness (if needed) for safety during the installation.
4. Step-by-Step Guide to Installing a Roof Vent
Installing a roof vent for your bathroom can be done with some basic tools and knowledge. Follow this step-by-step guide to get started:
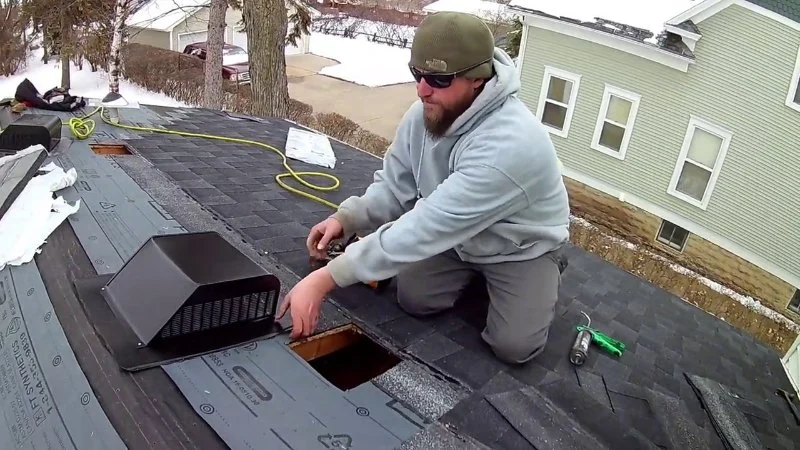
Step 1: Plan the Location for the Vent
Choose the location of the vent carefully. Ideally, the vent should be placed near the center of the roof, as far from any obstructions as possible. It should also be positioned so that it’s easy to connect the ductwork from the fan inside the bathroom to the vent on the roof. Mark the spot on the roof where the vent will be installed.
Step 2: Cut a Hole for the Vent
Using a drill and a saw, carefully cut a hole in the roof where the vent will be installed. Make sure the hole is slightly larger than the vent’s diameter to allow for proper sealing and fitting.
Step 3: Install the Roof Vent
Place the vent cap over the hole and secure it to the roof using screws. Apply roofing sealant around the edges of the vent to ensure a tight seal and prevent leaks. If necessary, install roofing flashing around the vent to provide additional protection against water infiltration.
Step 4: Connect the Ductwork
Run the flexible ducting from the bathroom fan to the vent on the roof. Make sure the ducting is properly sealed at both ends using clamps or tape to prevent air leaks. If necessary, use elbows or connectors to ensure a smooth path for the airflow.
Step 5: Seal and Test
Once the ductwork is securely connected, seal any gaps around the vent with caulk or sealant. Test the ventilation system by running the bathroom fan and ensuring that air flows freely through the duct and out of the roof vent.
5. Common Issues and Tips for Installing Roof Vents
Here are some common issues to watch out for during installation, along with tips to ensure a smooth process:
- Improper Vent Sizing: Make sure to choose the right-sized vent for your bathroom. A vent that’s too small won’t adequately remove moisture, while one that’s too large may be inefficient.
- Leakage: Ensure that all connections, particularly around the roof vent, are properly sealed with roofing sealant to prevent leaks.
- Obstructions in the Ductwork: Keep the duct path as straight as possible to avoid clogs or restrictions in airflow.
- Weather Considerations: Install the vent during dry weather to avoid complications from rain or snow. If working during colder months, ensure that the materials used are suitable for cold conditions.
For professional-grade materials and expert installation services, visit Pro Found Roofing for all your roofing and ventilation needs.


 Roman Construction5.0 (6 reviews)
 Rise Metal Roofing3.0 (13 reviews)
 First Home Improvement Inc4.0 (146 reviews)
 Cutting Edge Steel Roofing5.0 (4 reviews)
 Total Guard Construction Inc5.0 (11 reviews)
 SJ Roofing LLC5.0 (14 reviews)
 Storm Damage Roof Repairs: What to Expect and How to Act Fast
 The Average Cost of a Roof Inspection: Is a Free Inspection Really Free?
 Best Roofing Materials for Homes in Wildfire-Prone Areas: Top Class A Options
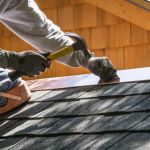 Choosing Between Residential and Commercial Roofing Solutions
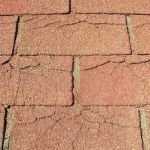 The Signs of UV Damage on an Asphalt Shingle Roof: Cracking and Curling
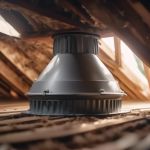 Best Ventilation Systems for Hot Attic: Reducing Heat Buildup in Summer