
- 1. Understanding Ice and Water Shield
- 2. Why Choose Ice and Water Shield for Complex Roofs
- 3. Tools and Materials Needed
- 4. Step-by-Step Installation Guide
- 5. Common Mistakes to Avoid When Installing
- 6. Final Tips for Effective Installation
1. Understanding Ice and Water Shield
Ice and water shield is a crucial roofing product that provides protection against water intrusion, especially in areas that are prone to ice dams and water back-up. This material forms a waterproof barrier on your roof, preventing water from seeping underneath shingles. When it comes to complex roof areas, especially those with many valleys, proper installation of ice and water shield is essential to avoid water damage that could lead to costly repairs.
In this guide, we will walk you through the process of installing ice and water shield in areas with multiple valleys, ensuring that your roof remains safe and watertight for years to come.

Holden Roofing (Houston Corporate) / holden roofing
RosenbergFort Bend CountyTexas
2128 1st St, Rosenberg, TX 77471, USA
2. Why Choose Ice and Water Shield for Complex Roofs
Complex roof designs with many valleys present unique challenges for water runoff. Valleys are particularly vulnerable to water buildup, and if not properly sealed, they can become a major source of leaks and structural damage. This is where ice and water shield plays a critical role.
Here’s why choosing ice and water shield is essential for complex roofs:
- Prevents Water Intrusion: Valleys are where water often collects, making them more prone to leaks. Ice and water shield provides an additional layer of protection in these areas.
- Ice Dam Protection: In colder climates, ice dams can form in valleys, forcing water back up under shingles. The shield prevents water from entering your home.
- Longevity: Ice and water shield adds durability to your roof, reducing the likelihood of leaks over time.
3. Tools and Materials Needed
Before you begin installing the ice and water shield, gather the following tools and materials to ensure a smooth process:
- Ice and Water Shield Rolls: Choose high-quality rolls designed for roofing. Ensure you have enough coverage for the entire valley area.
- Roofing Nails: These should be corrosion-resistant and durable for long-term installation.
- Utility Knife: For cutting the ice and water shield to the required lengths.
- Measuring Tape: To measure the areas accurately before applying the shield.
- Ladder and Safety Gear: Make sure you have a sturdy ladder and wear appropriate safety gear for roofing work.
4. Step-by-Step Installation Guide
Follow these steps to properly install ice and water shield in complex roof areas with many valleys:
- Prepare the Roof Surface: Ensure the roof deck is clean and dry before applying any materials. Remove any debris, nails, or old roofing material.
- Cut the Ice and Water Shield: Measure the length of the valley and cut the shield material accordingly. Leave some overlap to ensure full coverage.
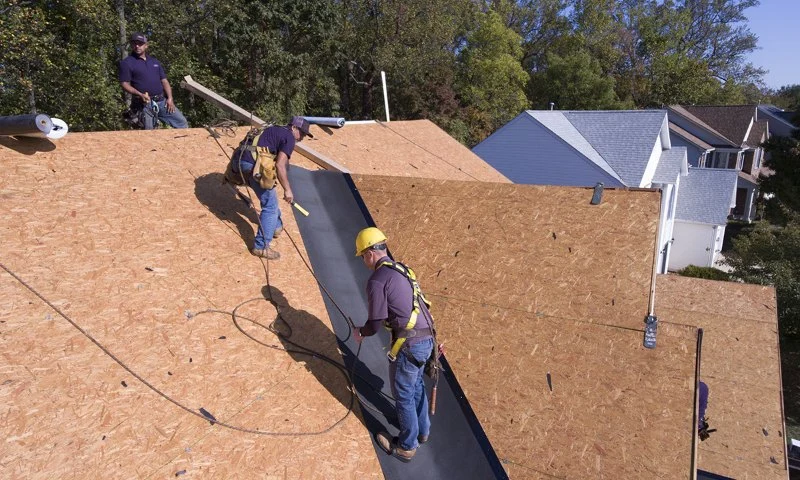
- Start at the Bottom of the Valley: Begin applying the shield at the lower edge of the valley, working your way up the roof. This ensures water flows properly over the shield.
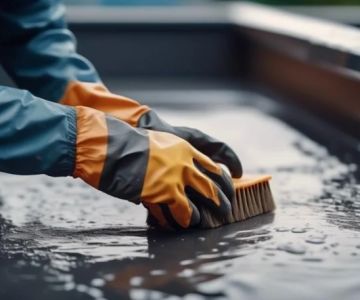
- Press the Shield Firmly: As you lay the shield, press it firmly to ensure it adheres to the roof deck and eliminate any air pockets.
- Overlap the Seams: When applying multiple strips of shield, make sure to overlap the seams by at least 3-4 inches to prevent water from seeping through.
- Finish with Shingles: Once the shield is in place, proceed with the regular roofing installation, ensuring that shingles or other roofing materials are installed on top to secure the shield in place.
5. Common Mistakes to Avoid When Installing
While installing ice and water shield is a relatively straightforward process, there are some common mistakes you should avoid:
- Inadequate Overlap: Failing to properly overlap the seams of the ice and water shield can lead to water penetration. Always make sure the seams are well-covered.
- Not Preparing the Surface: Installing the shield on a dirty or wet roof deck can cause poor adhesion, leading to leaks.
- Rushing the Process: Take your time to ensure the shield is laid properly. Speeding through the installation can result in improper coverage and future water damage.
6. Final Tips for Effective Installation
To ensure that your ice and water shield installation is effective and long-lasting, consider the following tips:
- Check the Weather: Make sure to install the shield in dry, mild weather. Wet conditions can interfere with the adhesive properties of the material.
- Use High-Quality Materials: Invest in high-quality ice and water shield to ensure it provides the best protection for your roof.
- Consult a Professional: If you’re unsure about your ability to install the shield, consider hiring a professional roofing contractor who can ensure proper installation.
If you need high-quality materials for your roofing project or expert advice, visit Pro Found Roofing for the best roofing products and services.


 VA Commercial Roofers4.0 (28 reviews)
 Nations Roof - Corporate Headquarters0.0 (0 reviews)
 ProRoofing - Atlanta5.0 (102 reviews)
 Central Roofing of Champaign4.0 (56 reviews)
 Infinity Roofing5.0 (29 reviews)
 Mr. Roof Grand Rapids4.0 (401 reviews)
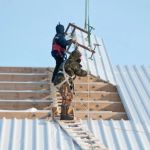 How to Safely Install a New Roof Over an Old One: Legal and Practical Facts
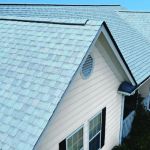 Energy-Efficient 'Cool Roofs': How They Can Significantly Lower Your Cooling Bills
 How to Install a Roof Vent for a Bathroom that Has No Existing Ventilation
 How Hail Damage Affects Your Roof's Lifespan and Performance Over Time
 The Process of Installing a TPO Roof with Welded Seams for a Perfect Seal
 The Best Attic Insulation Types to Work with Your Roofing System for Efficiency