
- 1 - Overview of Roofing Underlayment
- 2 - Why Snow Guards Are Important
- 3 - Preparing the Roof for Underlayment Installation
- 4 - Installing Underlayment Around Snow Guards
- 5 - Common Installation Mistakes to Avoid
- 6 - Maintenance Tips After Installation
1. Overview of Roofing Underlayment
Roofing underlayment is an essential component of any roofing system, acting as a moisture barrier to protect your home from water infiltration. This layer is installed between the roof deck and the shingles or other roofing material, providing an additional layer of defense against weather elements like rain, snow, and ice.
When installing roofing underlayment on a roof with existing snow guards, it’s important to understand the role of the underlayment in conjunction with the snow guards. Snow guards help prevent snow and ice from sliding off the roof, while underlayment protects against water damage caused by melting snow and ice. Together, they work to ensure a well-protected roof system.

Rapid Response Roofing / rapid response roofing
East GreenvilleMontgomery CountyPennsylvania
408 State St, East Greenville, PA 18041, USA
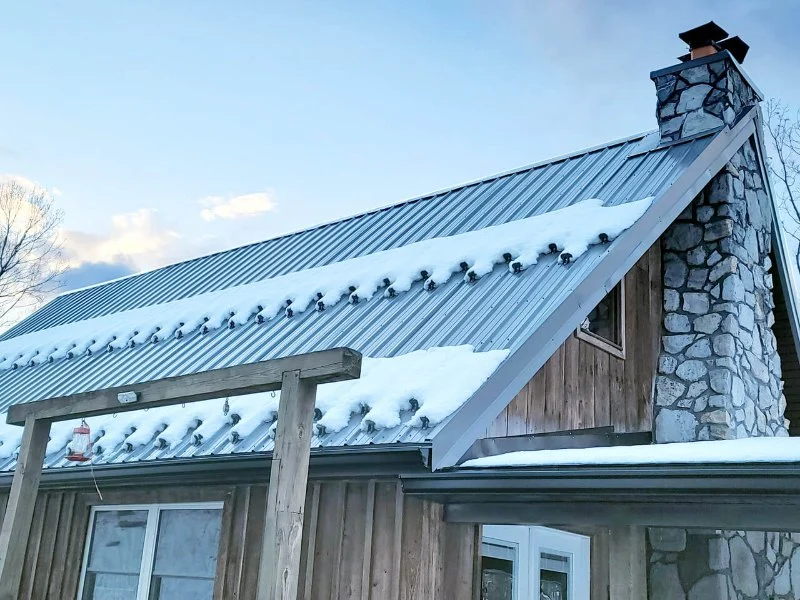
2. Why Snow Guards Are Important
Snow guards are crucial for preventing large snow and ice accumulations from sliding off the roof. Without them, homeowners face the risk of ice dams, roof damage, and potential injuries from falling ice. Snow guards help ensure the safety of the home and its occupants by holding snow in place and allowing it to melt gradually.
When installing roofing underlayment on a roof with existing snow guards, it’s important to pay attention to the positioning of the underlayment around the guards. Proper installation can ensure that the guards continue to function effectively while the underlayment provides necessary protection against moisture damage.

JK Contractors / jk roofing
West BendOzaukee CountyWisconsin
3058 County Rd Y, West Bend, WI 53095, USA
3. Preparing the Roof for Underlayment Installation
Before installing roofing underlayment, it’s crucial to prepare the roof properly. Here are the key steps to take:
3.1 Inspect the Roof Deck
Start by inspecting the roof deck for any signs of damage or wear. The surface should be clean, dry, and smooth to allow the underlayment to adhere properly. If there are any issues, such as rot or warping, these should be repaired before proceeding with the installation.
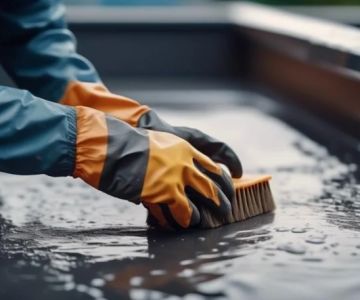
3.2 Remove Debris and Old Roofing Materials
Ensure that the roof is clear of any debris, such as leaves, dirt, or leftover roofing materials from a previous installation. This step is essential to prevent obstructions during the underlayment installation process and to ensure that the material can be laid down flat and securely.
3.3 Choose the Right Underlayment Material
There are several types of underlayment materials available, including asphalt-saturated felt, synthetic underlayment, and rubberized underlayment. Depending on your region’s weather conditions, you may need to choose a material that offers enhanced protection against ice and water. Synthetic underlayment, for example, is highly durable and offers excellent waterproofing capabilities.
4. Installing Underlayment Around Snow Guards
Installing underlayment around snow guards requires careful attention to ensure both systems work together effectively. Follow these steps for a successful installation:
4.1 Start at the Eaves
Begin by laying the underlayment at the eaves of the roof, where the snow guards are located. This is the area most prone to water infiltration due to melting snow and ice. Be sure to overlap the underlayment at the eaves to ensure a waterproof seal. This will help prevent water from seeping under the shingles and into the roof deck.
4.2 Install Underlayment Between Snow Guards
As you move upward on the roof, make sure to cut the underlayment around the snow guards, leaving enough space for the guards to function properly. It’s essential to work carefully around the guards to avoid disturbing their position. The underlayment should fit snugly around the snow guards to maintain a secure seal against moisture.
4.3 Overlap the Edges
For maximum protection, overlap the edges of the underlayment as you work across the roof. Each row of underlayment should overlap the row beneath it by several inches to ensure there are no gaps. This overlap is especially important when installing underlayment around snow guards, as it prevents water from seeping through the seams and into the roof.
5. Common Installation Mistakes to Avoid
While installing roofing underlayment on a roof with snow guards may seem straightforward, there are several common mistakes that can affect the integrity of the system:
5.1 Not Securing the Underlayment Properly
Failure to secure the underlayment can lead to shifting or bunching, which may compromise its ability to protect the roof. Be sure to fasten the underlayment securely to the roof deck using nails or staples, especially around the edges.
5.2 Insufficient Overlap
One of the most common mistakes is not overlapping the underlayment enough. The overlap ensures that water runs off the roof without seeping into the layers beneath. Without proper overlap, you risk allowing water infiltration, which can lead to leaks and damage.
5.3 Incorrect Positioning Around Snow Guards
It’s essential to install the underlayment carefully around snow guards to prevent gaps. Incorrect positioning can interfere with the snow guards' effectiveness and leave parts of the roof vulnerable to water damage. Always ensure the underlayment fits tightly and doesn’t interfere with the snow guard's operation.
6. Maintenance Tips After Installation
Once your roofing underlayment is installed, it's important to keep the roof well-maintained to ensure long-lasting protection:
6.1 Regular Inspections
Perform regular inspections of your roof to ensure that the underlayment remains intact and functional. Look for any signs of wear, damage, or water infiltration, especially around the snow guards. Early detection of issues can help prevent costly repairs later on.
6.2 Clean the Roof and Snow Guards
Remove debris and snow build-up from the roof and snow guards regularly. This will help prevent damage to the underlayment and ensure the snow guards continue to function properly. Cleaning also helps maintain the aesthetic appearance of the roof.
6.3 Repair Damaged Sections
If you notice any damaged areas of the underlayment or snow guards, repair them immediately to prevent further damage. Small repairs are easier and more affordable than dealing with larger issues down the line.
Proper installation and maintenance of roofing underlayment and snow guards can extend the life of your roof and prevent costly repairs. If you need assistance with installation or need high-quality roofing materials, visit Pro Found Roofing for expert advice and product recommendations.


 VA Commercial Roofers4.0 (28 reviews)
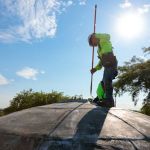 Nations Roof - Corporate Headquarters0.0 (0 reviews)
 ProRoofing - Atlanta5.0 (102 reviews)
 Central Roofing of Champaign4.0 (56 reviews)
 Infinity Roofing5.0 (29 reviews)
 Mr. Roof Grand Rapids4.0 (401 reviews)
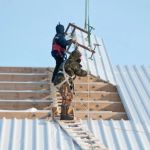 How to Safely Install a New Roof Over an Old One: Legal and Practical Facts
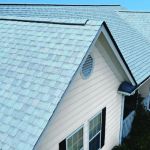 Energy-Efficient 'Cool Roofs': How They Can Significantly Lower Your Cooling Bills
 How to Install a Roof Vent for a Bathroom that Has No Existing Ventilation
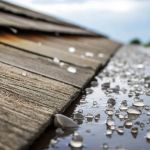 How Hail Damage Affects Your Roof's Lifespan and Performance Over Time
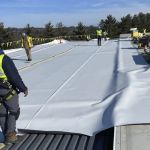 The Process of Installing a TPO Roof with Welded Seams for a Perfect Seal
 The Best Attic Insulation Types to Work with Your Roofing System for Efficiency