
How to Install Step Flashing on a Roof to Wall Intersection
- Understanding Step Flashing
- Why Step Flashing is Important
- Tools and Materials Needed
- Step-by-Step Guide to Installing Step Flashing
- Real-Life Case Study: Step Flashing in Action
- Why Choose Pro Found Roofing
Understanding Step Flashing
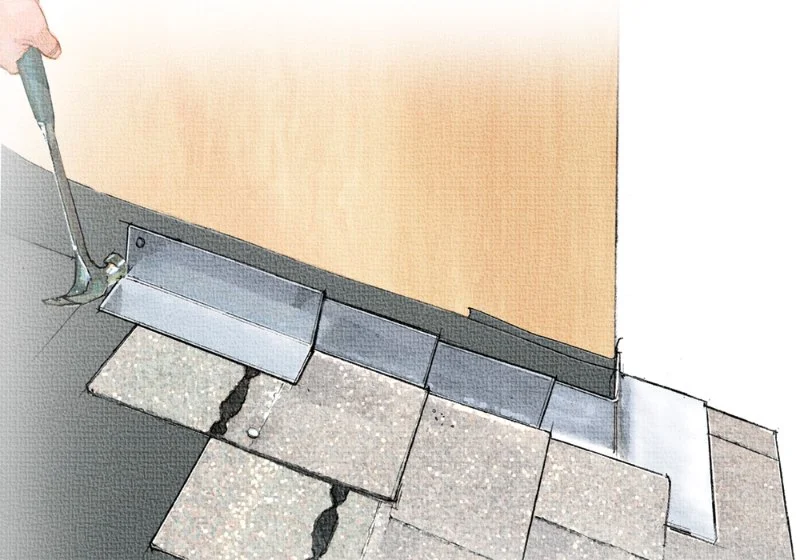
Step flashing is an essential component of roofing systems, particularly where a roof intersects with a wall. It is a technique used to direct water away from these junctions, which are prone to leaks. Step flashing consists of individual metal pieces, usually made from aluminum or galvanized steel, that are installed in a staggered pattern to provide a waterproof seal.
This type of flashing works by overlapping the individual pieces, creating a barrier that diverts water from the roof and wall intersection. Over time, step flashing prevents water from seeping behind the shingles and into the structure, thus reducing the risk of water damage and mold growth. Installing step flashing correctly is crucial for the long-term durability and effectiveness of your roof.
Lance Roofing & Siding Inc. / lance roofing and siding
6903 Dayton Springfield Rd, Enon, OH 45323, USA
Why Step Flashing is Important
The intersection of a roof and a wall is one of the most vulnerable areas of any roofing system. Without proper flashing, water can penetrate these joints, causing rot, rust, and structural damage over time. Step flashing plays a critical role in protecting your home from the elements.
Water damage can lead to costly repairs, including damage to drywall, insulation, and even the framing of the wall. Additionally, if moisture gets trapped behind the wall, it can create a breeding ground for mold and mildew, further compromising the integrity of your home. Proper installation of step flashing ensures that water is diverted away from these vulnerable points, extending the lifespan of your roof and preventing expensive repairs in the future.

Rapid Response Roofing / rapid response roofing
East GreenvilleMontgomery CountyPennsylvania
408 State St, East Greenville, PA 18041, USA
Tools and Materials Needed
Before you begin installing step flashing, make sure you have the proper tools and materials. The following items are essential:
- Step flashing (usually metal strips)
- Roofing nails
- Hammer or roofing nail gun
- Utility knife
- Measuring tape
- Roofing sealant
- Roofing shingles
- Drip edge (optional)
Once you have all the necessary materials, you are ready to begin the installation process. Each tool and material plays a crucial role in ensuring the installation is secure and effective, providing long-lasting protection for your home.
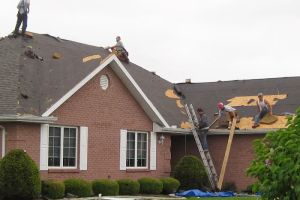
Step-by-Step Guide to Installing Step Flashing
Installing step flashing is a straightforward process, but it requires precision to ensure the best results. Follow these steps to install step flashing on your roof:
1. Prepare the Area
Begin by ensuring the roof and wall intersection is clean and free of debris. Remove any old flashing, nails, or shingles that may interfere with the installation. If you are working on a new roof, ensure the underlayment is properly in place before proceeding.
2. Measure and Cut the Flashing
Measure the length of the wall where the roof intersects. Cut the step flashing pieces according to the measurements, making sure each piece overlaps the one below it by about 2 to 3 inches.
3. Install the First Piece of Flashing
Place the first piece of flashing against the wall, ensuring it is flush with the roof deck. Secure it with roofing nails, making sure not to puncture the flashing itself.
4. Install Additional Flashing Pieces
Continue installing the flashing pieces in a staggered manner, with each piece overlapping the previous one. Make sure each piece is aligned properly and securely fastened to the roof.
5. Install Shingles Over the Flashing
Once the flashing is in place, install the roofing shingles on top of the flashing, starting from the bottom and working your way up. This ensures that water will flow over the shingles and step flashing, not underneath them.
6. Apply Roofing Sealant
Finally, apply roofing sealant to the edges of the flashing to create a watertight seal. This step is essential to prevent water from slipping behind the flashing and causing leaks.
Real-Life Case Study: Step Flashing in Action
A homeowner in California faced ongoing leaks at the intersection of their roof and wall, which resulted in water damage to the interior of their home. After consulting with a roofing expert, the homeowner decided to install step flashing along the roof-to-wall junction. The process involved removing the old flashing, preparing the area, and installing the new flashing, followed by the proper sealing and shingle installation.
After completing the installation, the homeowner noticed an immediate improvement. The leaks stopped, and the home remained dry even during heavy rainstorms. The investment in step flashing saved the homeowner from costly repairs and water damage, highlighting the importance of proper installation in protecting the home.
Why Choose Pro Found Roofing
When it comes to installing step flashing, choosing a reliable and experienced roofing company is essential. Pro Found Roofing offers expert services that ensure your flashing is installed correctly and effectively. Our team of professionals is trained to handle all aspects of roofing, from step flashing to full roof replacements.
Visit Pro Found Roofing for the best products and services, tailored to protect your home from the elements. With a reputation for quality and customer satisfaction, we’re here to help with all your roofing needs.


 E&Y Home Improvement llc4.0 (21 reviews)
 Jagger Roofing3.0 (11 reviews)
 Atlas Roofing NC, LLC.4.0 (48 reviews)
 Ember Roofing of Northern Virginia5.0 (25 reviews)
 Roof Rx0.0 (0 reviews)
 Storm Roofing and Repair4.0 (126 reviews)
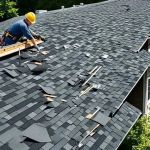 How Long Does Roof Installation Take? Complete Timeline for U.S. Homeowners
 The Benefits of a Living Roof for Urban Biodiversity and Stormwater Management
 The Impact of Winter Weather on Different Roofing Materials: Crackling and Shrinking
 What is a Roofing Warranty? Understanding Manufacturer vs. Contractor Warranties
 The Environmental Impact of Your Roofing Choices in the U.S.
 Roofing Warranties Explained: What’s Covered and What’s Not