
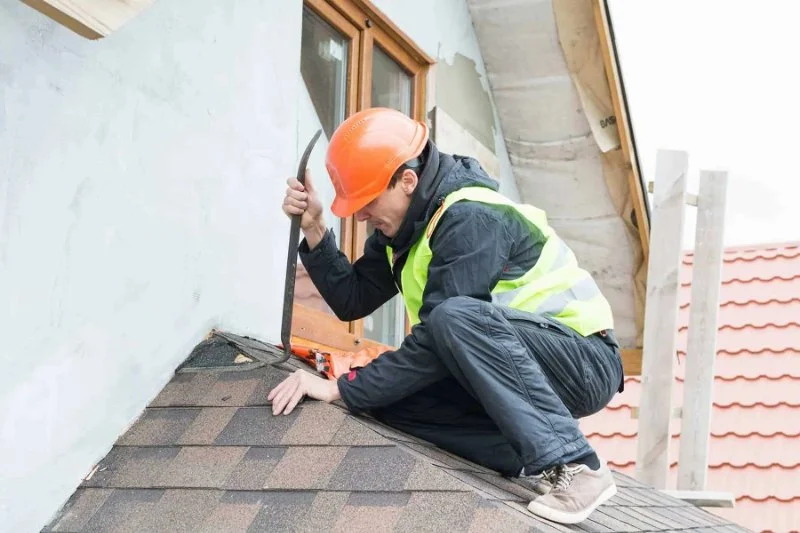
- 1. Understanding the Problem: Leaks in Bay Window Roofs
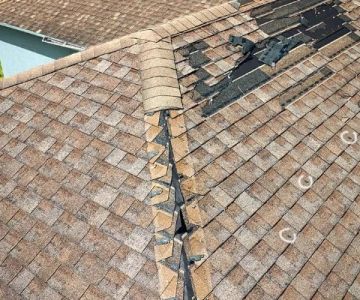
- 2. Why Bay Window Roofs with Complex Angles Are Difficult to Repair
- 3. Step-by-Step Guide to Repairing a Leaking Roof on a Bay Window
- 4. Materials You’ll Need for the Job
- 5. Real-Life Example: A Successful Roof Repair on a Bay Window
- 6. Final Thoughts: Ensuring Long-Lasting Roof Repairs
1. Understanding the Problem: Leaks in Bay Window Roofs
Bay windows are a beautiful addition to many homes, offering extra space and natural light. However, their unique structure and design can make roof repairs more complex than standard roofs. Leaks in the roof of a bay window often occur due to the intricate angles and joints where multiple roof planes meet. Water can easily find its way into these gaps, leading to leaks that may not always be obvious immediately but can cause significant damage over time. Addressing these issues quickly can save you from more expensive repairs in the future.

Holden Roofing (Houston Corporate) / holden roofing
RosenbergFort Bend CountyTexas
2128 1st St, Rosenberg, TX 77471, USA
2. Why Bay Window Roofs with Complex Angles Are Difficult to Repair
The roof of a bay window typically has multiple angled planes that intersect at different points, which makes it harder to waterproof effectively. These angles create several vulnerable points where water can seep in. Here are some reasons why bay window roofs are difficult to repair:
- Multiple Angles: The intersection of the different planes creates hard-to-reach areas where debris, dirt, and water can accumulate, causing leaks.
- Roofing Material Wear: Over time, the materials used on bay window roofs, such as shingles or metal flashing, can deteriorate, leading to cracks and gaps in these complex areas.
- Poor Flashing Installation: Flashing is crucial in preventing water from entering the joints of a roof. Poorly installed or aging flashing can be a major cause of leaks in bay window roofs.
Because of these factors, it’s essential to follow a meticulous repair process and use the right tools and materials to effectively seal and waterproof the roof.

Gunner Roofing / gunner roofing
CromwellLower Connecticut River Valley Planning RegionConnecticut
700 Corporate Row, Cromwell, CT 06416, USA
3. Step-by-Step Guide to Repairing a Leaking Roof on a Bay Window
To successfully repair a leaking roof on a bay window, follow this step-by-step guide:
- Step 1: Assess the Leak: Begin by inspecting the roof for visible signs of damage, such as cracked shingles or rusting flashing. If the leak is not immediately visible, check the areas where the roof planes meet to identify any gaps or cracks.
- Step 2: Remove Debris and Clean the Area: Clear away any leaves, branches, or other debris from the roof. Use a soft brush to clean the surfaces of the roof and ensure that there’s no dirt or mold buildup obstructing your repair work.
- Step 3: Repair or Replace Damaged Shingles: If shingles are damaged or missing, replace them with new ones. Ensure the shingles are properly aligned with the roof planes, ensuring water can flow off them without pooling.
- Step 4: Inspect and Replace Flashing: Check the flashing around the bay window for any rust or gaps. Remove the old flashing if it’s damaged and replace it with new flashing that fits the complex angles of the bay window roof. Ensure that the flashing is properly sealed with roofing caulk to prevent future leaks.
- Step 5: Apply Roofing Sealant: After replacing shingles and flashing, apply a high-quality roofing sealant around the seams and joints where water is most likely to enter. Ensure that all edges are thoroughly sealed, especially in areas where the roof planes meet.
- Step 6: Test the Repair: Once the sealant has dried, test the repair by running water over the roof and checking for any signs of leaks. If necessary, add more sealant to any remaining vulnerable spots.
4. Materials You’ll Need for the Job
Before starting your roof repair, make sure you have the following materials:
- New Shingles: Use shingles that match the existing ones in color and type.
- Roofing Flashing: High-quality flashing to cover the joints and seams of the bay window roof.
- Roofing Sealant: A waterproof sealant specifically designed for roofing applications.
- Caulk Gun: For applying the roofing sealant around joints and edges.
- Roofing Nails: Nails to secure the new shingles and flashing in place.
- Safety Gear: Safety goggles, gloves, and a sturdy ladder for safe roof access.
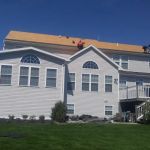
5. Real-Life Example: A Successful Roof Repair on a Bay Window
John, a homeowner in Texas, noticed a persistent leak in his bay window roof, especially after heavy rains. He initially struggled to find the source of the leak, as the water didn’t seem to come from any single obvious point. After a thorough inspection, John realized that the flashing around the angles of the roof had deteriorated over time, and several shingles were cracked. He followed the repair steps outlined earlier, replacing the damaged shingles and flashing and applying new roofing sealant. After completing the repair, John tested the roof by running water over it and found that the leak was completely gone. His bay window roof has remained dry ever since, and he avoided a more costly roof replacement.
6. Final Thoughts: Ensuring Long-Lasting Roof Repairs
Repairing a leaking roof on a bay window with complex angles requires careful attention to detail and the right materials. By following the proper steps and regularly maintaining your roof, you can extend its lifespan and prevent costly water damage. If you’re unsure about tackling the repair yourself, it’s always a good idea to consult a professional roofing service. For expert advice, tools, and services, visit Pro Found Roofing for all your roofing needs and solutions.


 ABC ROOFING INC2.0 (6 reviews)
 Four Seasons Roofing LLC5.0 (10 reviews)
 Sho Global Roofing5.0 (19 reviews)
 South County Roofing and Roof Leak Repair4.0 (1 reviews)
 Bang It Services Inc,4.0 (43 reviews)
 PeakMaster Roofing Services5.0 (3 reviews)
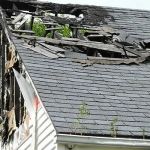 How to Identify and Repair Damage from a Small Fire on the Roof
 Flat Roofs vs. Sloped Roofs: Which One Should You Choose for Your Home?
 Hurricane-Proofing Your Roof: Reinforcement Techniques and Best Materials
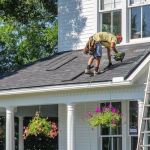 The True Cost of a Roof Replacement When You Also Need New Decking
 Top Questions to Ask Before Hiring a Roofing Company in the U.S.
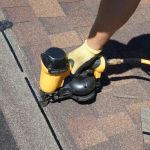 Should You Stay Home During Roof Replacement? Pros and Cons