

Roofing Final Walkthrough: Review Cleanup, Photos, and Documents
On this page
- Schedule the walkthrough before final payment
- Bring the contract and change orders
- Stay on the ground
- Review contractor photos
- Check the property cleanup
- Confirm gutters, vents, and penetrations
- Create a written completion list
- Collect product and warranty records
- Review invoices, permits, and inspections
- Learn maintenance and contact steps
- Final walkthrough checklist
A roofing final walkthrough connects the visible result with the contract, project photos, cleanup, and closing documents. It is not a homeowner roof inspection. The homeowner should remain on the ground while the contractor explains completed work and provides safe evidence for areas that cannot be seen.
Schedule the review when there is enough daylight and time to ask questions. Bring the signed scope and every approved change, then record any remaining item clearly. A structured walkthrough helps both parties distinguish completed work, documented limitations, and genuine follow-up tasks.

Absolute Roofing / absolute roofing
TimoniumBaltimore CountyMaryland
22 W Padonia Rd # B229, Timonium, MD 21093, USA
Schedule the walkthrough before final payment
Agree on the completion and payment process in the contract before work starts. When the project nears completion, set a walkthrough time with the contractor's authorized representative. Ask whether cleanup, waste removal, inspections, and document preparation will be finished by then.
Avoid a rushed review at dusk, during severe weather, or while crews are still dropping materials. If the property manager, co-owner, insurer, or another decision-maker needs to attend, coordinate that early. Questions about legal payment or completion obligations should be directed to a qualified adviser for the applicable jurisdiction.

Gunner Roofing / gunner roofing
CromwellLower Connecticut River Valley Planning RegionConnecticut
700 Corporate Row, Cromwell, CT 06416, USA
Bring the contract and change orders
Use the final written scope as the checklist. It should identify roof areas, removal, materials, underlayment, flashing, ventilation, penetrations, deck repairs, disposal, accessories, and exclusions. Add every signed or otherwise approved change order in chronological order.
Do not rely on memory of a sales conversation. If an expected feature is not in the documents, ask where it was confirmed. If a product changed, collect the approval, reason, price effect, and installed product information before closing the file.
Stay on the ground
Never climb onto the roof, a ladder, scaffold, waste container, or stacked materials for the walkthrough. New roofing can still be slippery, and fall protection requires training and proper systems. Ask the contractor to show roof-level details through dated photographs, video, inspection reports, or another safe method.
From the ground, look at overall lines, visible edges, downspouts, siding, soffits, landscaping, driveways, decks, and access areas. Binoculars may help with orientation but do not provide a professional inspection. Report what you see without diagnosing the cause.
Review contractor photos
Request organized images that show the starting condition, removal, deck condition, repairs, underlayment, flashing details, penetrations, ventilation work, completed surfaces, and cleanup where these items were part of the scope. Wide images establish location; closer images show the detail.
Ask the contractor to label images by roof section and stage. Confirm that they relate to your property and project date. Photos document work but do not replace required inspections, product instructions, or professional accountability. Keep original-resolution copies in the project folder.
Check the property cleanup
Confirm that removed shingles, packaging, pallets, tarps, temporary protection, and equipment are handled as agreed. Walk released ground areas in sturdy closed footwear with the contractor. Check driveways, paths, lawns, gardens, window wells, decks, and the previous waste-container location for nails and fragments.
Ask about magnetic sweeping and visual cleanup, recognizing that magnets do not collect every material. Keep children, pets, and vehicles away until the contractor releases the area. Note damage or remaining debris in the completion list and request a follow-up sweep when needed.
Confirm gutters, vents, and penetrations
Ask how gutters and downspouts were protected or cleaned and whether their condition is included in the scope. From the ground, look for obvious loose sections, blocked outlets, or debris. Do not reach into a gutter or climb to inspect it.
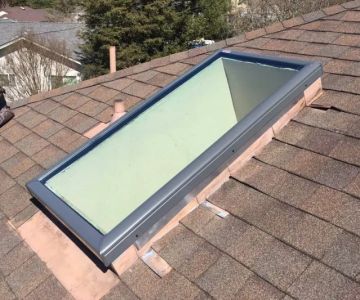
Review photos and documentation for plumbing vents, exhaust outlets, skylights, chimneys, satellite or antenna coordination, and other roof penetrations addressed by the project. Confirm that bathroom, kitchen, and dryer exhaust arrangements were identified correctly and that any separate trade responsibility is documented.
Create a written completion list
List each unfinished, damaged, incorrect, or unclear item with a location and photo when safe. Avoid vague entries such as “fix roof.” Use descriptions like “remove visible packaging beside north gate” or “provide approved change order for rear-slope deck replacement.”
Agree who owns each item, what action is expected, and the target date, subject to weather or inspection dependencies. State how completion will be verified and how it relates to the contract's final-payment terms. Send the list through the project's official communication channel and keep the response.
Collect product and warranty records
Request manufacturer, product line, color, lot or package information where available, quantities, installation date, and care guidance. Collect separate material and workmanship warranty documents and learn who handles each type of claim.
Ask whether registration is required, who completes it, what deadline applies, and what proof must be retained. Read exclusions, transfer terms, ventilation or maintenance conditions, and claim procedures. A headline warranty duration does not describe every covered cost.
Review invoices, permits, and inspections
Compare the final invoice with the original contract, approved changes, payments, credits, allowances, and applicable tax. Ask for correction of any mismatch. Keep traceable payment receipts and do not send funds to changed bank details without independent verification.
Collect permits, inspection results, engineer or consultant reports, and other closeout documents when applicable. Requirements vary by location and project. Confirm status with the relevant authority or qualified professional rather than treating the contractor's photos as an official approval.
Learn maintenance and contact steps
Ask what ground-level observations and professional maintenance the contractor or manufacturer recommends. Record how to report a leak, loose material, storm damage, or warranty concern, including emergency and normal contact routes. Verify current contact information before each future use.
Do not pressure-wash, coat, fasten accessories to, or walk on the roof without appropriate professional guidance. Keep trees, gutters, solar equipment, and other adjacent systems coordinated through qualified providers. Store all instructions with the photos and warranty records.
Final walkthrough checklist
- Schedule daylight time with an authorized project representative.
- Bring the contract, approved changes, and payment record.
- Remain on the ground and request safe roof-level evidence.
- Review organized before, progress, detail, and final photos.
- Walk released ground areas for debris and property damage.
- Confirm documented treatment of gutters and penetrations.
- Create a specific completion list with owners and dates.
- Collect product, workmanship, and registration information.
- Reconcile the final invoice and required project documents.
- Record maintenance, emergency, and warranty contact steps.
The final roofing walkthrough should leave the project easier to understand than it was on installation day. Match the result to the written scope, review evidence safely, document cleanup, and collect the records needed for future maintenance or a claim. A clear closing package gives the roof a usable history and gives every remaining task a defined path to completion.



 Qualis Roofing & Construction5.0 (15 reviews)
 Premier Building Associates4.0 (20 reviews)
 On Top Of Our Job5.0 (29 reviews)
 ACR1.COM Commercial Roofing1.0 (13 reviews)
 Roof Evolution, LLC0.0 (0 reviews)
 Sischo Construction Gutters & Roofing4.0 (53 reviews)
 DIY Roof Repair Tips: What You Can Safely Do Yourself
 Roof Replacement Cost with Gutters and Downspouts: Complete Guide
 The Process of Installing Mastic Asphalt Roof for Traditional Flat Roofs
 What is a Roofing Square? How to Account for Waste on a Complex Roof
 Green Roofs: How They Work, Their Benefits, and Installation Considerations
 What to Expect During a Professional Roof Inspection