
How to Install a Roof Vent for a Range Hood That Vents Through the Roof
- 1 - Understanding the Importance of Proper Ventilation
- 2 - Tools and Materials You’ll Need
- 3 - Preparing for the Roof Vent Installation
- 4 - Step-by-Step Guide to Installing the Roof Vent
- 5 - Sealing and Insulating the Vent
- 6 - Testing the Ventilation System
- 7 - Important Safety Tips During Installation
- 8 - Conclusion and Where to Buy Quality Roofing Materials
1 - Understanding the Importance of Proper Ventilation
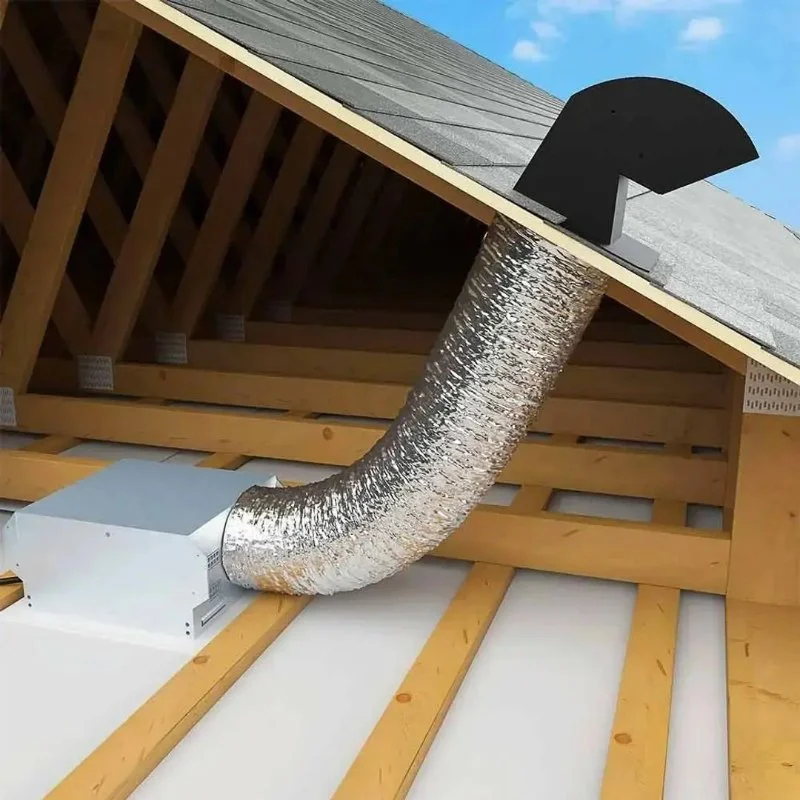
Proper ventilation is crucial for your kitchen, especially when using a range hood. A range hood that vents through the roof can help improve air quality by removing smoke, grease, and odors from your kitchen. Installing a roof vent for your range hood is an effective way to ensure your ventilation system works optimally. However, it’s important to understand the correct installation process to avoid potential issues like leaks or inefficient ventilation.

SB Pro Roofing / sb pro roofing
Pinellas ParkPinellas CountyFlorida
6358 49th St N, Pinellas Park, FL 33781, USA
2 - Tools and Materials You’ll Need
Before you begin installing a roof vent for your range hood, gather the necessary tools and materials. Having everything on hand will make the installation process more efficient and reduce the risk of mistakes. Here’s what you’ll need:
Lance Roofing & Siding Inc. / lance roofing and siding
6903 Dayton Springfield Rd, Enon, OH 45323, USA
2.1 Tools Required
- Measuring tape
- Drill with a hole saw attachment
- Jigsaw
- Utility knife
- Caulk gun
- Screwdriver
- Ladder or scaffolding (if needed for roof access)
2.2 Materials Required
- Roof vent kit
- Roof flashing
- Roof sealant (such as silicone or polyurethane)
- Vent pipe (typically 6 inches in diameter)
- Insulation for vent pipe (if needed)
3 - Preparing for the Roof Vent Installation
Preparation is key to a successful installation. Follow these steps to ensure the process goes smoothly:
3.1 Choose the Right Location
Select a location for the vent that is in line with the range hood and provides a clear path for the vent pipe. The location should also allow for proper sealing around the vent and a safe exit through the roof.
3.2 Check Local Building Codes
Before beginning, make sure to check any local building codes regarding the installation of a range hood vent through the roof. Some areas may have specific guidelines regarding vent size, materials, or installation methods.
3.3 Plan the Vent Path
Plan the path for the vent pipe, ensuring it is as short and straight as possible. Avoid sharp bends in the pipe, as they can reduce airflow efficiency. Use appropriate materials to connect the range hood to the roof vent.
4 - Step-by-Step Guide to Installing the Roof Vent
Now that you’re prepared, it’s time to begin the installation. Follow these detailed steps to install the roof vent correctly:
4.1 Mark the Vent Location on the Roof
From inside your kitchen, mark the location on the ceiling where the vent pipe will exit. Use a measuring tape to ensure the placement aligns with the range hood’s vent pipe.
4.2 Drill a Hole for the Vent Pipe
Using your drill and hole saw attachment, carefully drill a hole through the ceiling, attic, and roof. Make sure the hole is large enough to fit the vent pipe securely and provides enough space for sealing.
4.3 Install the Roof Vent
Place the roof vent into the hole you’ve drilled. Ensure it’s properly aligned and flush with the roof. Secure the vent in place using screws, making sure it’s tightly fixed to avoid leaks. Attach the roof flashing around the vent to ensure proper water drainage and to prevent leaks.
4.4 Connect the Vent Pipe
Run the vent pipe from the range hood to the roof vent. Secure the pipe using clamps or fasteners, ensuring a tight connection to prevent air leaks. Insulate the vent pipe if necessary to prevent condensation buildup.
5 - Sealing and Insulating the Vent
Sealing and insulating the vent properly is crucial to avoid leaks and ensure maximum efficiency of the ventilation system.
5.1 Seal the Roof Vent
Apply a generous amount of roof sealant around the base of the vent to create a waterproof barrier. This will prevent water from leaking into your home and causing damage to your roof or attic.
5.2 Insulate the Vent Pipe
If your vent pipe runs through unheated spaces, such as an attic, insulate the pipe to prevent condensation. Insulating the vent pipe also improves energy efficiency and helps maintain the airflow from the range hood.
6 - Testing the Ventilation System
After installation, it’s essential to test the system to ensure it is working properly. Here’s how:
6.1 Turn On the Range Hood
Switch on the range hood and check the airflow from the roof vent. You should feel a steady flow of air coming from the vent. If airflow is weak or nonexistent, check for blockages or improper connections.
6.2 Inspect for Leaks
Inspect the roof vent and vent pipe connections for any signs of leaks. Check both inside and outside the house to ensure the installation is airtight and water-tight.
7 - Important Safety Tips During Installation
Working on the roof can be dangerous, so always follow safety precautions to ensure a safe installation process:
7.1 Use Proper Ladder Safety
When accessing the roof, always use a sturdy ladder and ensure it is positioned securely. Consider using a safety harness if working at significant heights.
7.2 Wear Protective Gear
Wear protective gloves and eyewear when handling tools and materials to avoid injury. Wear non-slip footwear to prevent accidents when working on the roof.
7.3 Be Aware of Weather Conditions
It’s best to install a roof vent on a dry, clear day. Avoid working on the roof in high winds, rain, or snow, as these conditions can increase the risk of accidents.
8 - Conclusion and Where to Buy Quality Roofing Materials
Installing a roof vent for your range hood is a relatively simple process when done correctly. By following the steps outlined above, you can ensure that your kitchen’s ventilation system works efficiently and safely. For high-quality roofing materials and ventilation kits, visit Pro Found Roofing, where you can find the best products for your roofing and ventilation needs.


 Oswego Roofing4.0 (162 reviews)
 JMI Best Roofing5.0 (7 reviews)
 Mejia Roofing & Home Repair0.0 (0 reviews)
 Alpha Elite Roofing4.0 (178 reviews)
 Alpha Pro Construction5.0 (99 reviews)
 Perma Roof Contractors Inc4.0 (28 reviews)
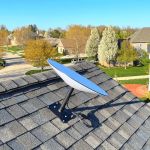 How to Fix a Leak in a Roof Around a Satellite Dish Mounting Bracket
 Does a New Roof Increase Your Home's Resale Value? A Look at the ROI | Pro Found Roofing
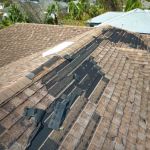 How to Repair Cracked, Curling, or Missing Shingles: A DIY Guide
 How to Inspect Your Roof for Damage After a Hailstorm – A Step-by-Step Guide
 How to Choose a Roofing Contractor with a Good Rating on the BBB | Pro Found Roofing
 What is a Roof Valley and Why is it So Prone to Leaks? Repair and Maintenance Tips