
- Understanding Shingle Damage
- Types of Shingle Damage
- Tools You’ll Need for Repair
- Step-by-Step Guide to Repairing Cracked, Curling, or Missing Shingles
- Common Mistakes to Avoid
- When to Call a Professional
1. Understanding Shingle Damage
Roof shingles are an essential part of your home’s exterior. They protect your home from weather conditions like rain, snow, and wind, while also contributing to the overall aesthetic of your house. However, over time, shingles can become damaged due to various factors like aging, extreme weather conditions, or poor installation.
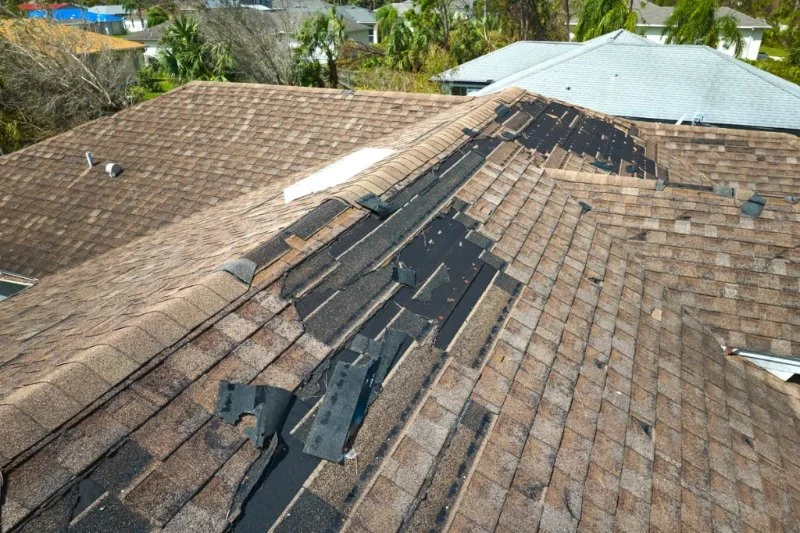
If you notice signs of damage, such as cracked, curling, or missing shingles, it’s important to take action promptly to avoid further damage to your roof and home. The sooner you repair your shingles, the less costly the repairs will be.

Rapid Response Roofing / rapid response roofing
East GreenvilleMontgomery CountyPennsylvania
408 State St, East Greenville, PA 18041, USA
Why It's Important to Repair Damaged Shingles
Neglecting to repair cracked, curling, or missing shingles can lead to leaks, water damage, and even structural issues. Over time, the compromised shingles will allow water to seep into your roof, causing rot, mold, and even weakening the roof’s support structure. Regular maintenance and timely repairs can extend the lifespan of your roof and protect your home from expensive damage.

Holden Roofing (Houston Corporate) / holden roofing
RosenbergFort Bend CountyTexas
2128 1st St, Rosenberg, TX 77471, USA
2. Types of Shingle Damage
Shingle damage can vary in severity and type. Understanding the different types of damage will help you determine the right course of action for repairs.
Cracked Shingles
Cracked shingles are often caused by weather conditions like hail, extreme heat, or heavy winds. Cracks can also form due to the natural aging process of the material. When shingles crack, they can no longer effectively protect your roof, and they may eventually break off completely.
Curling Shingles
Curling occurs when the edges of the shingles begin to lift away from the roof, often due to moisture exposure or poor ventilation in your attic. Curling shingles expose your roof to the elements, making it easier for water to penetrate and cause damage.
Missing Shingles
Missing shingles can occur after a heavy storm or due to prolonged wear and tear. Missing shingles leave your roof exposed and vulnerable to leaks, which can lead to water damage inside your home.
3. Tools You’ll Need for Repair
Before beginning any repair work, it’s essential to gather the right tools. Proper tools will make the process safer and more efficient. Here’s a list of the tools you’ll need for repairing cracked, curling, or missing shingles:
1. Ladder
You’ll need a sturdy ladder to safely access your roof. Make sure the ladder is positioned on level ground and extends at least three feet above the edge of the roof for maximum stability.
2. Hammer and Roofing Nails
A hammer and roofing nails are essential for securing new shingles in place. Make sure to use roofing nails that are designed for shingle installation to prevent leaks.
3. Utility Knife
A utility knife is useful for cutting shingles to the right size, especially when replacing a single shingle or trimming edges around vents or chimneys.
4. Roofing Cement
Roofing cement is used to seal down curling shingles or to help secure any loose edges. It can also be used to seal around nail heads to prevent leaks.
5. Replacement Shingles
For missing or severely damaged shingles, you will need to have replacement shingles. Make sure to use shingles that match the style and color of your existing roof for a seamless repair.
4. Step-by-Step Guide to Repairing Cracked, Curling, or Missing Shingles
Now that you have the right tools, it’s time to tackle the repairs. Here’s a step-by-step guide for fixing cracked, curling, or missing shingles:
1. Safety First
Always prioritize safety when working on your roof. Wear non-slip shoes, use a stable ladder, and consider wearing a safety harness if your roof has a steep slope. If you're not comfortable working on your roof, it’s best to hire a professional.
2. Inspect the Damage
Before starting repairs, carefully inspect the damage to determine whether you need to replace or simply repair the shingle. For small cracks or curling, you may only need to secure the shingle. For larger cracks or missing shingles, a full replacement is likely necessary.
3. Repair Cracked or Curling Shingles
To repair cracked shingles, apply roofing cement under the crack and press the edges of the crack together. Use roofing nails to secure the shingle in place. For curling shingles, lift the edges and apply roofing cement under the shingle, then press it back down and secure it with nails.
4. Replace Missing Shingles
To replace a missing shingle, remove any remaining nails or debris from the area. Slide the new shingle into place and secure it with roofing nails. Be sure to nail it securely and seal the edges with roofing cement to prevent water infiltration.
5. Inspect the Entire Roof
After repairing the damaged shingles, take a moment to inspect the rest of the roof. Look for any other potential issues, such as loose shingles, clogged gutters, or debris. Performing regular maintenance will help extend the life of your roof and prevent future issues.
5. Common Mistakes to Avoid
When repairing shingles, there are a few common mistakes that can compromise the integrity of your roof. Here are some things to watch out for:
1. Using the Wrong Nails
It’s important to use the right type of nails when securing shingles. Roofing nails should have a wide, flat head to hold the shingles in place properly. Using nails that are too short or thin can result in the shingles coming loose over time.
2. Over-tightening Nails
Over-tightening nails can damage the shingles and create holes, which can lead to leaks. Nails should be driven in just enough to hold the shingle in place without puncturing or tearing the material.
3. Neglecting to Seal the Shingles
After securing the shingles, always seal the edges with roofing cement. Failing to do so can leave gaps for water to enter, leading to leaks and further damage.
6. When to Call a Professional
While minor repairs can often be handled by homeowners, some situations require the expertise of a professional roofer. Here’s when you should call in the pros:
1. Extensive Damage
If your roof has extensive damage, such as multiple missing shingles, leaks, or a significant amount of curling, it’s best to hire a professional. A roofer can assess the full extent of the damage and recommend the most cost-effective solution.
2. Safety Concerns
If you’re not comfortable working on your roof, it’s always safer to call a professional. Roofing work can be dangerous, especially on steep or high roofs.
3. Warranty Concerns
If your roof is still under warranty, you may need a licensed roofer to perform repairs to avoid voiding the warranty. Always check with the manufacturer’s guidelines before making any repairs yourself.
For professional roof repairs and high-quality shingles, visit Pro Found Roofing for the best roofing products and services.


 AZ Roofing4.0 (145 reviews)
 Top Notch Brandon Roofing5.0 (25 reviews)
 SR Builders4.0 (62 reviews)
 Midwest Building Solutions4.0 (36 reviews)
 Sunflo Roofing - Orlando4.0 (115 reviews)
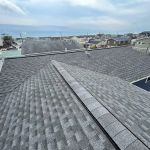 Hammond Roofing5.0 (6 reviews)
 How to Choose a Roofing Contractor Who is an Authorized Installer for the Brand
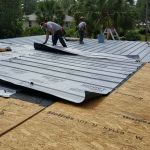 How to Install Roofing Underlayment on a Roof with a Very Low Pitch
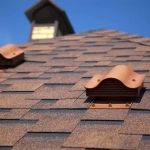 Understanding Roofing Ventilation Systems and Why They Matter for U.S. Homes
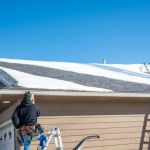 Best Time to Replace or Repair Your Roof – Expert Advice
 The Best Time of Year to Replace or Repair Your Roof | Pro Found Roofing
 Does Your Roof Need Additional Ventilation? Signs of Poor Airflow in Your Attic