
- -How to Install Drip Edge on Rakes and Eaves for Complete Water Management-Understanding Roof Edge Protection
- -Planning the Installation-Proper Preparation and Placement Strategy
- -Step by Step Techniques-Ensuring Secure Fit and Water Flow Control
- -Common Mistakes-Avoiding Leaks and Structural Damage
- -Real Roofing Experiences-Why Correct Installation Makes a Difference
How to Install Drip Edge on Rakes and Eaves for Complete Water Management: Understanding Roof Edge Protection
Learning how to install drip edge on rakes and eaves for complete water management is an essential part of building a durable roofing system. Drip edges may seem like small metal components, but they play a major role in directing rainwater away from the roof deck, fascia, and foundation. Without proper installation, water can seep under shingles, causing rot, mold, and long-term structural damage.

SB Pro Roofing / sb pro roofing
Pinellas ParkPinellas CountyFlorida
6358 49th St N, Pinellas Park, FL 33781, USA
1. Why Drip Edges Matter in Roofing Systems
Roof edges are highly exposed to rain, wind, and temperature changes. These areas are where water first makes contact and where damage often begins.

Gunner Roofing / gunner roofing
CromwellLower Connecticut River Valley Planning RegionConnecticut
700 Corporate Row, Cromwell, CT 06416, USA
1.1 Protecting the Roof Deck
Drip edges guide water away from the edges of the roof, preventing moisture from getting underneath the shingles and into the wood structure.
1.2 Improving Water Flow Direction
Proper placement ensures water falls directly into the gutter system rather than running behind it.
2. Understanding the Difference Between Rakes and Eaves
To fully understand how to install drip edge on rakes and eaves for complete water management, it is important to know how these areas function.
2.1 Eaves at the Lower Roof Edge
Eaves are located along the bottom edges of the roof where water typically flows into gutters.
2.2 Rakes Along the Sloped Sides
Rakes run along the sloped sides of a roof and protect the edges from wind-driven rain.
Planning the Installation: Proper Preparation and Placement Strategy
Preparation is a critical step in understanding how to install drip edge on rakes and eaves for complete water management. Good planning ensures that each section works together to prevent water intrusion.
1. Choosing the Right Materials
High-quality drip edge materials provide long-term protection against moisture and weather exposure.
1.1 Matching the Roof Type
Different roof styles and slopes may require slightly different drip edge shapes and sizes.
1.2 Ensuring Durability
Metal components designed to resist corrosion perform better over time and maintain structural integrity.
2. Understanding Placement Order
Correct placement order is key to effective water management.
2.1 Eaves Installed First
At the eaves, drip edges are usually installed before the underlayment to guide water toward the gutter.
2.2 Rakes Installed After Underlayment
On the rake edges, drip edges are typically placed over the underlayment to shield against wind-driven rain.
Step-by-Step Techniques: Ensuring Secure Fit and Water Flow Control
When learning how to install drip edge on rakes and eaves for complete water management, careful attention to detail ensures long-lasting performance.
1. Securing the Drip Edge at the Eaves
The eaves play a major role in directing water away from the home.
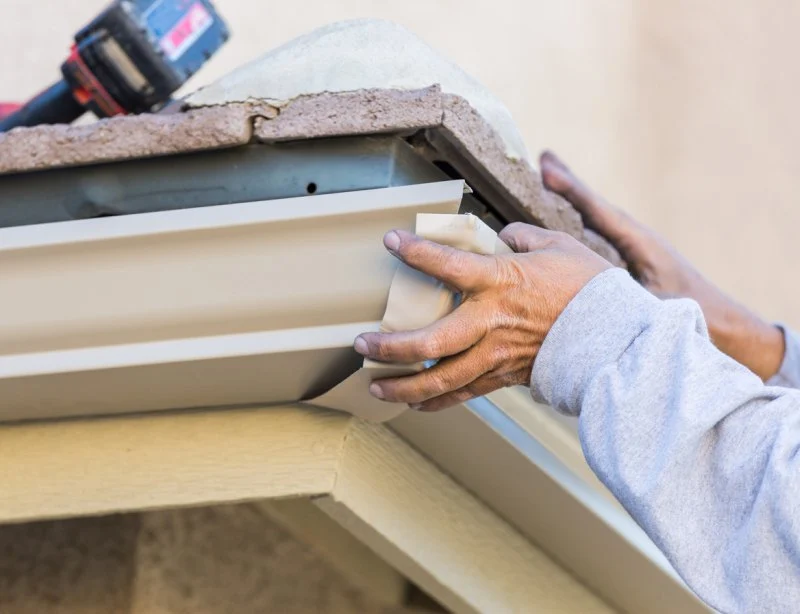
1.1 Aligning with the Roof Edge
The drip edge should sit flush along the roof deck and extend slightly over the fascia to direct water into the gutter.
1.2 Fastening at Proper Intervals
Consistent fastening helps keep the drip edge stable during storms and strong winds.
2. Installing Along the Rake Edges
The rake edges require careful placement to protect the sides of the roof.
2.1 Overlapping Sections
Overlapping each piece helps prevent water from slipping through gaps.
2.2 Ensuring Smooth Water Flow
A properly aligned drip edge helps water move cleanly down and away from the structure.
Common Mistakes: Avoiding Leaks and Structural Damage
Even experienced installers can make mistakes when working on roof edges. Understanding common issues helps improve the installation process.
1. Incorrect Placement Order
One of the most frequent errors is installing rake and eave drip edges in the wrong sequence.
1.1 Water Trapping Risk
If installed incorrectly, water can become trapped beneath roofing layers instead of being directed away.
1.2 Reduced Effectiveness
Improper placement may allow moisture to reach the wood beneath the shingles.
2. Gaps and Poor Alignment
Even small gaps can create entry points for water.
2.1 Misaligned Sections
Uneven installation can disrupt the flow of water and increase the risk of damage.
2.2 Loose Fastening
If the drip edge is not secured properly, wind and weather can shift it over time.
Real Roofing Experiences: Why Correct Installation Makes a Difference
Real-life roofing stories highlight the importance of knowing how to install drip edge on rakes and eaves for complete water management. One homeowner shared their experience after noticing peeling paint along the fascia just a year after installing a new roof.
1. Discovering the Cause
Upon inspection, it turned out the drip edge had been installed incorrectly along the eaves, allowing water to run behind the gutters.
1.1 Early Signs of Damage
The first clues were minor discoloration and damp spots. Over time, these signs led to wood deterioration.
1.2 Repair and Reinstallation
After correcting the installation, the water flow improved and further damage was prevented.
2. The Value of Professional Insight
Many property owners seek guidance from experienced professionals and trusted sources when planning roofing improvements.
2.1 Learning from Roofing Experts
Platforms like Pro Found Roofing help homeowners and contractors better understand installation techniques, materials, and practical solutions that support long-term roof protection.
2.2 Long-Term Protection Through Proper Planning
Correct drip edge installation supports complete water management, protecting the roof structure and improving durability for years to come.


 UglyRoof5.0 (7 reviews)
 Mr. B's Roofing Ranger5.0 (1 reviews)
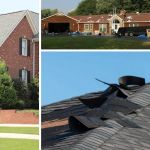 Lawndale Roofing Specialists0.0 (0 reviews)
 Express Roofing4.0 (17 reviews)
 Best American Roofing LLC5.0 (7 reviews)
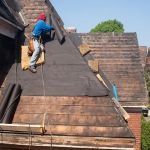 BNF Roofing5.0 (20 reviews)
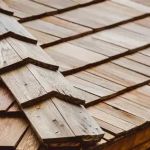 The Average Cost of a Cedar Shake Roof: Installation and Maintenance Over Time
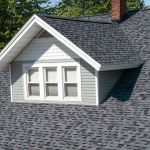 What Roof Color Is Best for Energy Efficiency? Climate-Based Guide
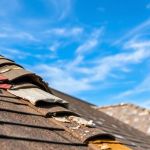 How to Identify and Repair Damaged Roof Soffits and Fascia
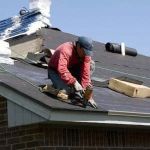 How Long Does Roof Installation Take? Timeline Explained | Pro Found Roofing
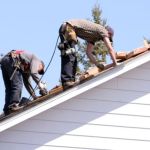 What is a Roofing Warranty? What to Do if Your Roofing Contractor Goes Out of Business
 How to Install Ice and Water Shield in Complex Roof Areas with Many Valleys