
- 1-Introduction to Ice and Water Shield
- 2-Materials and Tools Needed
- 3-Steps to Install Ice and Water Shield
- 4-Tips for a Successful Installation
- 5-Common Mistakes to Avoid
1. Introduction to Ice and Water Shield
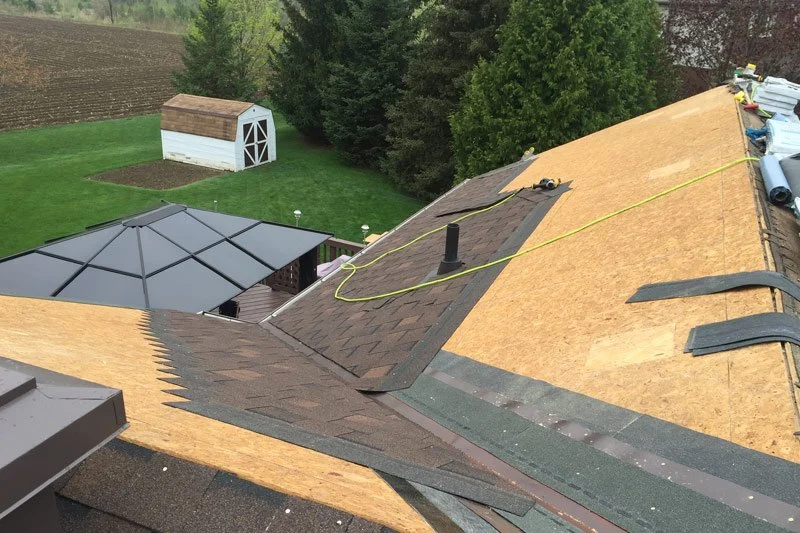
Installing an ice and water shield on your roof deck is one of the best ways to prevent leaks caused by ice dams and water penetration. This layer of protection is especially crucial in areas that experience heavy snowfall and freezing temperatures. An ice and water shield creates a barrier between your roofing material and the deck, ensuring that even if ice or water does accumulate, it won't leak into your home.
While the installation process may seem complicated, with the right materials and technique, you can add this essential layer of protection yourself. In this guide, we’ll walk you through the steps required to install the ice and water shield correctly and ensure your roof is as secure as possible.

Gunner Roofing / gunner roofing
CromwellLower Connecticut River Valley Planning RegionConnecticut
700 Corporate Row, Cromwell, CT 06416, USA
2. Materials and Tools Needed
Before you begin the installation, it's essential to have the proper materials and tools on hand. Here's a list of what you'll need:
- Ice and Water Shield: This is a self-adhesive membrane designed to prevent water from seeping into your roof.
- Roofing Nails or Staples: These will be used to secure the roofing materials once the shield is in place.
- Utility Knife: For cutting the ice and water shield to fit the dimensions of your roof.
- Measuring Tape: Ensure that you measure the areas properly before cutting or installing materials.
- Hammer or Pneumatic Stapler: To apply the roofing nails or staples efficiently.
- Caulk or Roofing Sealant: To seal any areas where the shield might overlap or to seal around penetrations.
- Roofing Underlayment (Optional): If you're adding an extra layer of protection, this can go over the ice and water shield before the final shingles are installed.
With these materials and tools, you'll be prepared to get started with the installation process.

Holden Roofing (Houston Corporate) / holden roofing
RosenbergFort Bend CountyTexas
2128 1st St, Rosenberg, TX 77471, USA
3. Steps to Install Ice and Water Shield
Follow these steps to install the ice and water shield on your roof deck:
3.1. Prepare the Roof Deck
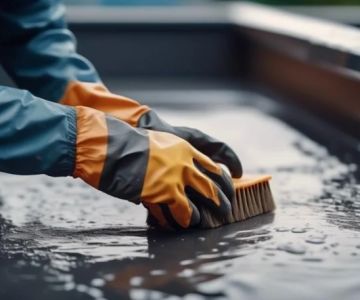
Start by cleaning the roof deck to remove any dirt, debris, or old roofing materials. The surface must be dry and smooth to ensure the ice and water shield adheres properly. If your roof deck is damaged, repair any areas before moving forward with the installation.
3.2. Measure and Cut the Ice and Water Shield
Using a measuring tape, measure the area of the roof deck you plan to cover with the ice and water shield. Make sure to account for areas around the eaves, valleys, and other roof features. Cut the ice and water shield to the correct length using your utility knife.
3.3. Install the Ice and Water Shield
Starting at the bottom edge of the roof (the eave), peel off the backing paper from the ice and water shield and apply it to the roof deck. Press it down firmly to ensure the adhesive sticks. Work your way up the roof, overlapping each new strip by about 4 to 6 inches to ensure proper coverage. Continue applying the shield until you've covered the entire roof deck or the areas most susceptible to water damage.
3.4. Apply Roofing Nails or Staples
Once the ice and water shield is in place, use roofing nails or staples to secure it. Pay special attention to the edges and overlaps to ensure they stay in place, particularly where the roof deck is most vulnerable to water damage.
3.5. Seal the Edges
Finally, use roofing caulk or sealant to seal any edges or areas where the shield overlaps with other materials. This step will prevent water from getting under the shield and causing leaks over time.
4. Tips for a Successful Installation
To ensure your installation goes smoothly, consider these tips:
- Work on a dry, sunny day: This ensures the ice and water shield adheres better to the roof deck and won’t be compromised by moisture.
- Pay attention to overlaps: Overlapping the strips of ice and water shield by at least 4 to 6 inches is essential for preventing leaks.
- Double-check the measurements: Measure carefully before cutting the shield to avoid wasting material and to ensure a perfect fit.
- Use high-quality materials: Invest in a high-quality ice and water shield to ensure the best protection for your roof.
5. Common Mistakes to Avoid
Even experienced roofers can make mistakes during installation. To ensure a successful installation, avoid these common mistakes:
- Not preparing the roof deck properly: Failing to clean the surface or address damaged areas can result in poor adhesion and potential leaks.
- Insufficient overlap: Failing to overlap the strips of shield adequately may leave gaps where water can seep through.
- Skipping the sealing step: Not sealing the edges and overlaps properly can lead to water getting under the shield, causing leaks and damage.
By following the correct procedure and taking precautions, you can ensure that your roof is well-protected with ice and water shield.
For expert roofing solutions, tips, and quality materials, visit Pro Found Roofing for all your roofing needs.


 Hohen Construction4.0 (134 reviews)
 Sankoz Corporation4.0 (16 reviews)
 Martinez Brothers Roofing4.0 (69 reviews)
 Martino Commercial Roofing5.0 (15 reviews)
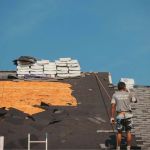 Roofsimple Richmond5.0 (2 reviews)
 AB Roofing Repair & Replacement5.0 (8 reviews)
 What is a Roofing Cricket? How to Frame a Cricket for a Skylight
 The Best Roofing Materials for a Lake House with High Humidity
 How to Choose the Best Roofing Contractor: 10 Essential Questions You Must Ask
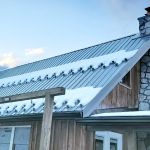 How to Install Roofing Underlayment on a Roof with Existing Snow Guards
 The Benefits of a Stainless Steel Roof for Its Resistance to Corrosion
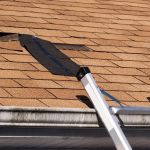 What to Do When Your Roof Fails a Home Inspection