
Why Ridge Ventilation Is Crucial for Your Roof
Ridge vents are a vital component of any roofing system designed to maintain proper ventilation in your attic. Without adequate ventilation, heat and moisture can build up, causing damage to your roof, insulation, and home structure. Ridge vents, placed along the peak of your roof, allow hot air and moisture to escape, ensuring a balanced airflow and keeping your attic cool and dry.
Proper attic ventilation helps prevent the growth of mold, reduces energy costs by maintaining a stable temperature inside your home, and extends the lifespan of your roof. Installing ridge vents can provide these benefits while improving overall air quality in your home.
- 1. Tools and Materials Needed for Installing Ridge Vents
- 2. Step-by-Step Guide to Installing Ridge Vents
- 3. Common Ridge Vent Installation Mistakes to Avoid
- 4. How to Maintain Ridge Vents for Long-Term Efficiency
- 5. When to Call a Professional Roofing Service
1. Tools and Materials Needed for Installing Ridge Vents
Before you start installing your ridge vent, gather the necessary tools and materials. Here’s what you’ll need:
- Ridge vent materials: Choose high-quality ridge vent systems designed for your roof type (shingle, metal, etc.). Make sure the vent is long enough to cover the ridge length of your roof.
- Utility knife: To cut shingles and roofing materials to accommodate the vent.
- Roofing nails: These are essential to secure the ridge vent in place.
- Hammer or nail gun: For attaching the vent to the roof.
- Measuring tape: To ensure precise measurements of your ridge and vent materials.
- Caulk or roofing sealant: To seal the edges and prevent water leaks.
- Ladder and safety equipment: Ensure you have a stable ladder and safety gear to work at height.
2. Step-by-Step Guide to Installing Ridge Vents
Follow these detailed steps to properly install ridge vents and enhance your attic ventilation:
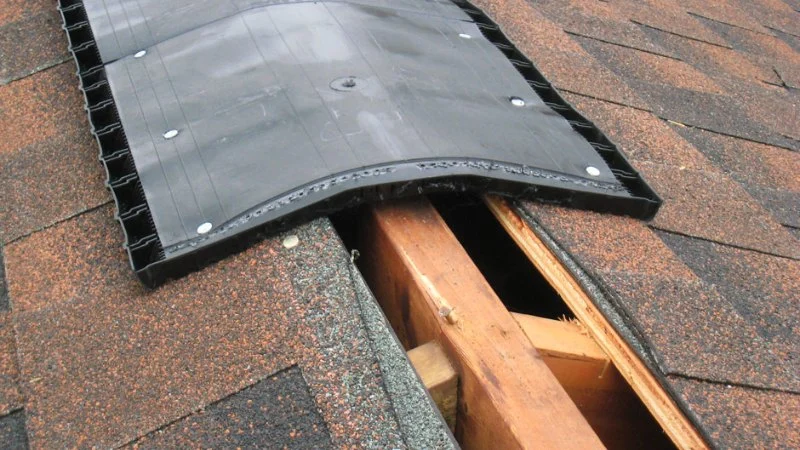
- Prepare your roof: Begin by clearing the ridge of any existing materials such as shingles, nails, or debris. Use a utility knife to remove the shingles along the ridge, making sure to expose the roof decking.
- Measure and cut: Measure the length of your ridge and cut the ridge vent accordingly. If your vent comes in sections, make sure the pieces fit snugly together.
- Install the ridge vent: Position the ridge vent along the ridge line of your roof, ensuring it is centered and evenly placed. Secure the vent to the roof decking using roofing nails, making sure to fasten it every 6 to 8 inches.
- Seal the edges: Apply roofing sealant or caulk along the edges of the vent to prevent water from seeping through. This is crucial to avoid any leaks in your attic.
- Replace shingles: Once the vent is secured, carefully replace the shingles around the ridge, ensuring they overlap the vent and are properly sealed to prevent water infiltration.
- Inspect the installation: After installation, check the ridge vent to ensure it’s securely attached and that there are no gaps. Test the vent for airflow by observing how air moves through the attic during hot weather.
3. Common Ridge Vent Installation Mistakes to Avoid
While installing ridge vents can be a manageable DIY project, there are several common mistakes that you should avoid:
- Improper measurement: Failing to measure the ridge length accurately can lead to poorly fitted vents. Always double-check your measurements to avoid gaps.
- Over-tightening the nails: Over-tightening roofing nails can damage the vent or the roofing materials. Ensure nails are securely fastened but not overdriven.
- Skipping sealant: Neglecting to apply sealant around the edges of the ridge vent can lead to water leakage, causing damage to your attic and roof.
- Not checking attic ventilation: Installing a ridge vent without assessing the overall attic ventilation system can reduce its effectiveness. Ensure there are proper intake vents at the eaves to allow airflow to the ridge vent.
4. How to Maintain Ridge Vents for Long-Term Efficiency
To ensure that your ridge vents continue to provide effective attic ventilation, regular maintenance is necessary. Here are some tips for keeping your ridge vents in optimal condition:
- Clean regularly: Periodically inspect and clean the vent to remove debris, leaves, and dirt that can block airflow.
- Check for damage: After storms or extreme weather conditions, inspect the ridge vent for signs of damage or wear. Replace or repair any damaged sections promptly.
- Ensure proper ventilation: Make sure your attic has balanced ventilation, with enough intake vents to complement the ridge vent for maximum efficiency.
5. When to Call a Professional Roofing Service
While ridge vent installation can be a DIY project for some homeowners, it’s important to recognize when professional help is needed. If your roof is steep, you’re uncomfortable working at height, or you’re unsure about your ability to install the vent correctly, consider hiring a professional roofer.
Professional roofers, like those at Pro Found Roofing, can ensure that the ridge vent is installed properly and provide long-term maintenance to ensure your roof and attic remain well-ventilated.


 SolRa Tech5.0 (123 reviews)
 Robert's Roofing Inc5.0 (9 reviews)
 Keystone Advanced Remodeling, LLC5.0 (82 reviews)
 Expert Roofing & Basement Waterproofing5.0 (4 reviews)
 Roofing5.0 (20 reviews)
 Allied Brothers Home Corp Central NJ5.0 (3 reviews)
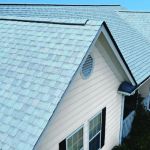 Energy-Efficient 'Cool Roofs': How They Can Significantly Lower Your Cooling Bills
 The Pros and Cons of a Butterfly Roof Design for Rainwater Collection
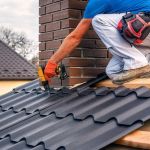 How to Choose the Right Roofing Material for Your Climate | Pro Found Roofing
 Top 5 Roofing Materials Compared: Pros and Cons for Your Home
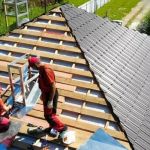 How Often Should You Replace Your Roof? The Key Factors That Determine Its Lifespan
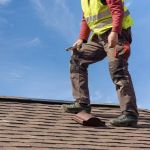 The Best Time to Inspect Your Roof for Damage: Spring and Fall Checklists