
- 1-Understanding Roof-to-Wall Flashing
- 2-The Role of Flashing in Preventing Roof Leaks
- 3-Types of Roof-to-Wall Flashing
- 4-Proper Installation of Flashing
- 5-Maintaining Roof-to-Wall Flashing
- 6-Real-Life Case: The Impact of Flashing on Roof Leaks
1. Understanding Roof-to-Wall Flashing
Roof-to-wall flashing is a vital component in roofing systems that helps prevent water penetration at the intersection of the roof and wall. These intersections are highly susceptible to leaks because they are areas where two different surfaces meet, creating an ideal entry point for water if not properly sealed. Flashing, which typically consists of metal or other waterproof materials, is installed at these junctions to direct water away from the vulnerable seams and ensure the roof's longevity.

Holden Roofing (Houston Corporate) / holden roofing
RosenbergFort Bend CountyTexas
2128 1st St, Rosenberg, TX 77471, USA
2. The Role of Flashing in Preventing Roof Leaks
The primary function of roof-to-wall flashing is to act as a barrier that redirects water away from critical intersections. Without proper flashing, water can seep into the structure, leading to potential water damage, mold growth, and a weakened roof structure. These issues can escalate quickly, especially during heavy rainfall or snowmelt.
Flashing creates a protective layer that ensures water flows over the roof and down the wall, rather than penetrating the seams where the two surfaces meet. By directing water away from the wall-roof interface, flashing prevents pooling and infiltration that could compromise the integrity of your home.

Rapid Response Roofing / rapid response roofing
East GreenvilleMontgomery CountyPennsylvania
408 State St, East Greenville, PA 18041, USA
3. Types of Roof-to-Wall Flashing
There are several types of roof-to-wall flashing, each designed to suit different roofing styles and environments. Here are the most common types:
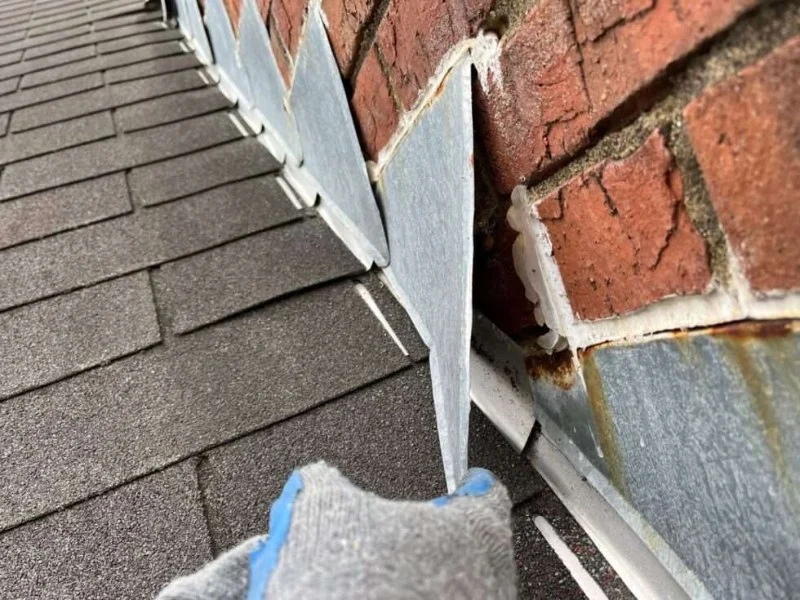
1. Step Flashing: This is the most commonly used type of flashing for pitched roofs. Step flashing involves a series of small metal pieces installed in a stair-step pattern along the intersection between the roof and wall. This design allows for water to flow over each piece, creating an effective barrier.
2. Continuous Flashing: Continuous flashing is a single long piece of metal that runs along the entire intersection. This type of flashing is often used for flat roofs or areas with a less complex roof structure.
3. Counter Flashing: Counter flashing is installed over existing flashing to provide additional protection. This type is commonly used in areas with high water exposure, such as areas with frequent rain or snow.
4. Proper Installation of Flashing
Correct installation is essential to the effectiveness of roof-to-wall flashing. If flashing is not properly installed, it may not function as intended, leaving your home vulnerable to leaks. Here are the key steps in ensuring proper installation:
1. Ensure Proper Alignment: Flashing should be aligned properly along the roof-wall intersection to direct water away from the vulnerable seams.
2. Overlap Flashing Pieces: When installing step flashing, each piece must overlap the one beneath it to ensure that water flows over the flashing and doesn't seep underneath.
3. Seal the Joints: The joints between flashing pieces should be sealed using roofing cement or caulking to prevent water from sneaking through gaps.
4. Secure Flashing: Ensure flashing is securely fastened to both the roof and wall to prevent it from being displaced by wind or other forces.
5. Maintaining Roof-to-Wall Flashing
Regular maintenance is key to ensuring the continued effectiveness of roof-to-wall flashing. Over time, flashing can become damaged or corroded, which may compromise its ability to prevent leaks. Here are some maintenance tips:
1. Inspect Flashing Annually: Check the condition of your roof-to-wall flashing at least once a year, particularly after a storm. Look for signs of rust, corrosion, or physical damage.
2. Clean the Flashing: Remove any debris, leaves, or dirt that may have accumulated on the flashing. Blocked flashing can cause water to pool and eventually leak.
3. Check for Sealant Failure: Over time, the sealant around flashing can break down. Inspect the joints for cracks and reseal them if necessary to prevent water infiltration.
6. Real-Life Case: The Impact of Flashing on Roof Leaks
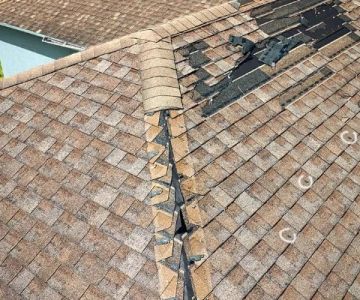
A homeowner in Oregon experienced frequent leaks in their home after heavy rainfall. The leaks occurred at the intersection where the roof met the wall, causing significant damage to the interior of the house. Upon inspection, it was discovered that the roof-to-wall flashing had become loose and deteriorated over time.
After repairing and reinstalling new flashing, the homeowner noticed a significant improvement in the roof's performance. Water no longer seeped through the intersection, and the leaks stopped. This case illustrates the importance of timely flashing installation and regular maintenance to prevent costly water damage.
If you're looking for expert advice or services related to roof-to-wall flashing, visit Pro Found Roofing for the best roofing solutions tailored to your needs.


 Montclair Roofing of Englewood5.0 (4 reviews)
 Orlandoroofclaims.com5.0 (14 reviews)
 Roofing Co0.0 (0 reviews)
 Hect Home Improvement LLC - Saginaw4.0 (12 reviews)
 Skylight Exteriors5.0 (3 reviews)
 Starway Roof Systems5.0 (412 reviews)
 htmlCopy codeThe True Cost of a Built-Up Roof (BUR) with Gravel for a Commercial Building
 The Best Roofing Materials for a Mediterranean or Spanish-Style Home
 How to Prepare Your Roof for Hurricane or Tornado Season
 Slate Roofing: The Ultimate Guide to Cost, Installation, and Maintenance
 How Attic Ventilation Impacts the Health of Your Roof
 The Signs of a Roof Leak in Your Attic: Stains, Mold, and Wet Insulation