
- What is Step Flashing?
- Why Step Flashing is Important for Roofs
- How to Install Step Flashing Where a Roof Meets a Sidewall
- Common Mistakes When Installing Step Flashing
- Tips for Successful Step Flashing Installation
What is Step Flashing?
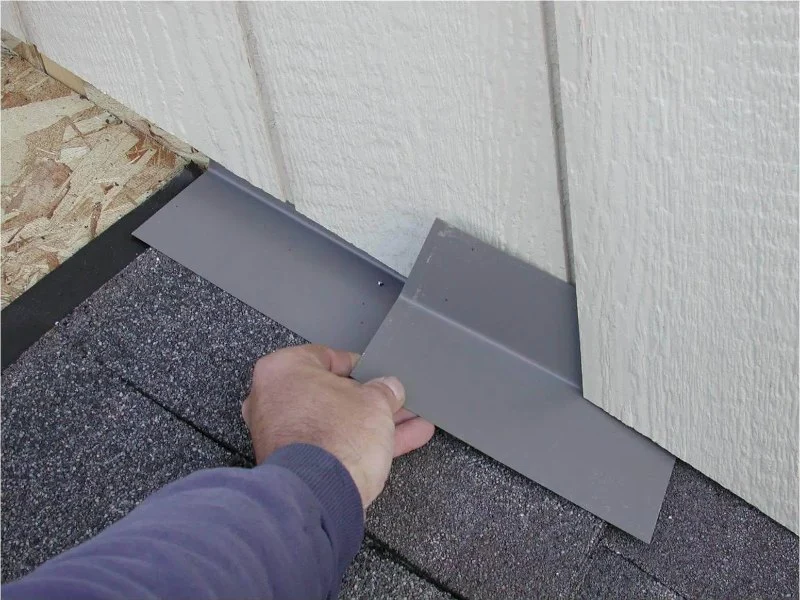
Step flashing is a critical component in roofing systems that helps prevent water from leaking where the roof meets a vertical surface, such as a sidewall. It consists of metal strips that are layered, or "stepped," along the junction to ensure water flows off the roof and away from the house. This simple yet effective method is essential for waterproofing areas that are particularly prone to water infiltration.

Gunner Roofing / gunner roofing
CromwellLower Connecticut River Valley Planning RegionConnecticut
700 Corporate Row, Cromwell, CT 06416, USA
Why Step Flashing is Important for Roofs
Properly installed step flashing is essential to the longevity of your roof and home. Without it, water can penetrate the roof and sidewall junction, leading to leaks, mold growth, and wood rot. These issues can cause serious damage to the structure of your home and lead to costly repairs. By installing step flashing correctly, you provide an effective barrier that prevents water from seeping into vulnerable areas.

Holden Roofing (Houston Corporate) / holden roofing
RosenbergFort Bend CountyTexas
2128 1st St, Rosenberg, TX 77471, USA
How to Install Step Flashing Where a Roof Meets a Sidewall
Installing step flashing correctly is a straightforward but precise task. Here’s a detailed step-by-step guide to ensure your installation is successful:
1.1 Prepare the Roof and Sidewall
Before beginning, make sure the roof and sidewall are clean and dry. Any debris or old roofing materials should be removed to ensure a proper seal. If you're replacing old flashing, remove it carefully to avoid damaging the surrounding materials.
1.2 Cut the Flashing to Size
Measure the length of the roof where it meets the sidewall to determine the size of the flashing strips. Cut the flashing material to match the length of the section you are working on. For a more professional finish, use a metal cutting tool for clean edges.
1.3 Install the First Layer of Flashing
Start at the bottom of the roof and install the first strip of flashing. Position it so that the bottom edge of the flashing overlaps the edge of the roof by about 1 to 2 inches. The flashing should be flush with the sidewall to direct water away from the junction.
1.4 Add Roofing Felt
Next, install a layer of roofing felt or underlayment over the flashing to prevent water from getting under the shingles. The roofing felt should cover the flashing strip and extend beyond the edge of the flashing to ensure a waterproof seal.
1.5 Continue Installing the Flashing in Layers
For each additional strip of flashing, make sure it overlaps the previous layer by about 3 to 4 inches. The step flashing layers should alternate between the roof shingles and the sidewall. This “stepping” effect directs water off the roof and down the wall, preventing infiltration.
1.6 Install the Shingles Over the Flashing
Once the flashing layers are in place, begin installing your shingles over the flashing. Make sure the shingles overlap the flashing strips to provide extra protection from water. As you work up the roof, each layer of shingles should overlap the layer below it to ensure the water flows smoothly off the roof.
1.7 Secure the Final Layer of Flashing
At the top of the sidewall, install the final piece of flashing. This piece should fit tightly against the wall and be covered by the final row of shingles. Make sure it is securely nailed into place, ensuring the entire system is watertight.
Common Mistakes When Installing Step Flashing
While installing step flashing is relatively simple, there are a few common mistakes to avoid:
2.1 Incorrect Overlapping
Improper overlapping of the flashing strips can lead to water infiltration. Make sure each layer overlaps the previous one by at least 3 inches to create a continuous waterproof barrier.
2.2 Forgetting to Use Roofing Felt
Skipping the installation of roofing felt or underlayment over the flashing can lead to water damage. This layer is essential for preventing water from seeping under the shingles.
2.3 Cutting Flashing Too Short
Ensure that your flashing strips are long enough to cover the entire area where the roof meets the sidewall. Cutting them too short can leave gaps where water can enter.
Tips for Successful Step Flashing Installation
Here are some additional tips to ensure a successful installation:
3.1 Use High-Quality Flashing Materials
Investing in high-quality step flashing materials will ensure better protection and longer-lasting results. Look for materials that are durable and resistant to rust, especially in areas with harsh weather conditions.
3.2 Double Check the Alignment
Proper alignment is key to ensuring that water flows correctly off the roof. Use a level to ensure each flashing layer is installed evenly and straight.
3.3 Consider Hiring a Professional
If you're unsure about installing step flashing yourself, consider hiring a professional roofer. They have the expertise to ensure that the job is done correctly and that your roof remains waterproof for years to come.
For the best roofing materials and expert advice on installing step flashing, visit Pro Found Roofing to find the right products and services for your home.


 Ale Home Improvement llc4.0 (31 reviews)
 Rex Roofing LLC5.0 (16 reviews)
 Safeties Construction Inc.0.0 (0 reviews)
 Epdm Roofing NJ5.0 (28 reviews)
 Clarke Roofing & Siding5.0 (2 reviews)
 Buchanan Contracting Services LLC5.0 (18 reviews)
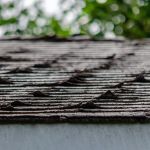 How to Spot Curling Shingles and What Causes This Common Problem
 What is a Roofing Square? How to Calculate the Area of a Hip Roof
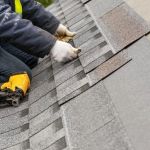 Common Roofing Terms Every Homeowner Should Know Before Talking to a Contractor
 htmlCopy codeThe True Cost of a Built-Up Roof (BUR) with Gravel for a Commercial Building
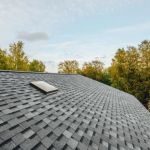 The Pros and Cons of Installing a Roof Overlay vs Full Replacement
 Energy-Efficient 'Cool Roofs': How They Can Significantly Lower Your Cooling Bills