
- 1. Understanding Roofing Boots and Their Purpose
- 2. Why Roofing Boots Need Replacement
- 3. Signs of a Cracked or Deteriorated Vent Pipe Boot
- 4. How to Replace a Cracked or Deteriorated Vent Pipe Boot
- 5. Common Challenges When Replacing a Roofing Boot
- 6. How Pro Found Roofing Can Help
1. Understanding Roofing Boots and Their Purpose
A roofing boot is a protective component installed around vent pipes on the roof. These boots are typically made from durable materials like rubber, metal, or plastic and are designed to prevent water from leaking around the vent pipes. The roofing boot helps seal the area where the vent pipe meets the roof, creating a waterproof barrier that protects the interior of the home from water damage.
Roofing boots are essential for maintaining the integrity of your roof, as they prevent leaks that could lead to extensive water damage. They are commonly found around plumbing vent pipes, HVAC systems, and exhaust fans. Ensuring that these boots are properly installed and maintained is key to extending the life of your roof and preventing costly repairs.

SB Pro Roofing / sb pro roofing
Pinellas ParkPinellas CountyFlorida
6358 49th St N, Pinellas Park, FL 33781, USA
2. Why Roofing Boots Need Replacement
Roofing boots can deteriorate over time due to exposure to harsh weather conditions, UV rays, and the natural wear and tear of the materials. A cracked or worn-out roofing boot no longer provides the necessary protection, which can lead to leaks and water damage inside your home. It's essential to replace roofing boots when they show signs of damage to avoid further complications.
Victors Home Solutions / victors roofing
2722 E Michigan Ave suite 239, Lansing, MI 48912, USA
2.1 Weather and UV Damage
Over time, roofing boots are exposed to the elements, including rain, snow, extreme heat, and intense sunlight. UV rays can cause the rubber or plastic materials of the boot to dry out and crack. This leads to gaps that allow water to seep through, causing potential damage to the roof deck and interior of the building.
2.2 Physical Wear and Tear
Roofing boots also experience physical stress from temperature fluctuations, wind, and debris. This can cause the boot to become loose, cracked, or completely deteriorated. Regular inspections are important to ensure that the boots are still providing a tight seal around the vent pipes.
3. Signs of a Cracked or Deteriorated Vent Pipe Boot
There are several telltale signs that your roofing boot may need replacing. Being proactive in spotting these signs can help you avoid water damage and costly repairs:
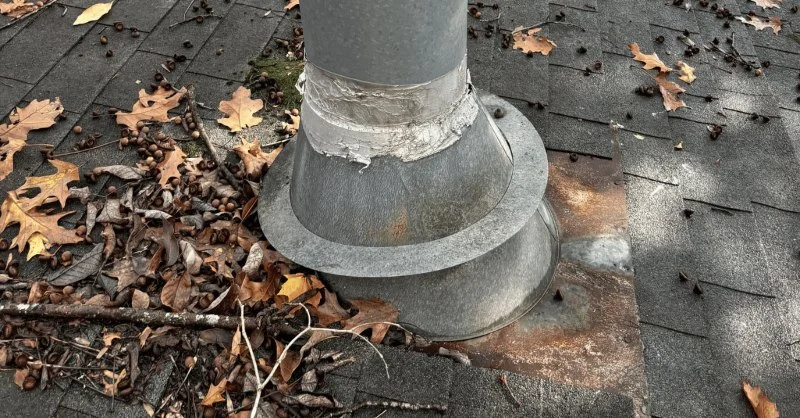
3.1 Visible Cracks or Tears
If you notice cracks or tears around the vent pipe boot, it's a sign that the material has deteriorated. This can happen over time due to exposure to weather conditions, and it compromises the waterproof barrier that the boot provides.
3.2 Water Leaks Inside the Home
If you notice water stains on the ceiling or walls near the vent pipe, this could indicate that water is leaking through the roofing boot. Even small leaks can cause significant damage if not addressed quickly.
3.3 Loose or Dislodged Boot
If the roofing boot appears loose or has shifted out of place, it can no longer provide a proper seal. Wind, physical damage, or poor installation can cause the boot to become dislodged, allowing water to infiltrate the roof.
4. How to Replace a Cracked or Deteriorated Vent Pipe Boot
Replacing a roofing boot is a relatively straightforward process that you can handle with the right tools and materials. Here's a step-by-step guide:
4.1 Gather the Necessary Materials
Before starting, you'll need a new roofing boot, roofing nails, a utility knife, a hammer, roofing sealant, and a ladder. Make sure you purchase a boot that matches the size of your vent pipe and is suitable for the weather conditions in your area.
4.2 Remove the Damaged Boot
Start by carefully removing the old, cracked, or deteriorated boot. Use the utility knife to cut any caulking or sealant around the boot, and then pull the boot off the vent pipe. You may need to remove nails or screws if the boot is attached with fasteners.
4.3 Clean the Area Around the Vent Pipe
Once the old boot is removed, clean the area around the vent pipe. Make sure there is no debris or old sealant left on the roof to ensure a clean, tight fit for the new boot.
4.4 Install the New Roofing Boot
Place the new roofing boot over the vent pipe and secure it with nails or screws. Ensure that the boot is positioned correctly and provides a snug fit around the pipe. Apply roofing sealant around the edges of the boot to create a watertight seal. Be sure to follow manufacturer instructions for the specific boot you're installing.
4.5 Check for Proper Sealing
After installing the new boot, check for any gaps or loose areas. If necessary, add more sealant to ensure that the boot is securely attached and that no water can enter the roof.
5. Common Challenges When Replacing a Roofing Boot
While replacing a roofing boot is a manageable task, there are some challenges that you might encounter:
5.1 Working at Heights
Working on a roof can be dangerous. Always ensure that you're using a sturdy ladder and safety equipment like a harness. If you're uncomfortable with heights, it may be best to hire a professional roofer to replace the boot.
5.2 Ensuring Proper Sealing
Ensuring that the boot is properly sealed is critical. If you miss any gaps during installation, you risk allowing water to seep in, causing leaks. Take your time to check the seal and apply extra roofing sealant if necessary.
6. How Pro Found Roofing Can Help
If you're not comfortable replacing the roofing boot yourself, or if you're looking for expert advice on selecting the right materials, Pro Found Roofing is here to help. Our team of professionals can assist with roofing installations and repairs, ensuring that your roof remains safe and leak-free. Visit Pro Found Roofing for top-quality roofing products and services tailored to your needs.


 Elevated Roofing Concepts5.0 (5 reviews)
 Heartland Roofing, Siding and Windows, LLC4.0 (17 reviews)
 Twincreek Roofing4.0 (76 reviews)
 Restoration Roofing LLC5.0 (12 reviews)
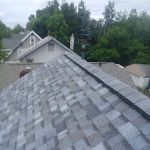 Ohio Storm Proof LLC Roofing & Construction5.0 (2 reviews)
 Square One Roofing0.0 (0 reviews)
 Top 5 Roofing Materials Compared: Pros and Cons for Your Home
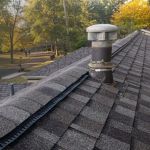 How to Install Roofing Underlayment Around Roof Penetrations like Vents
 How to Keep Squirrels, Raccoons, and Birds Out of Your Roof and Attic
 Top-Rated Roofing Brands You Can Trust in 2024 – Best Roofing Solutions
 How to Prepare Your Roof for Hurricane or Tornado Season
 How to Install a Ridge Cap for a Metal Roof to Ensure It's Weathertight